• Skip to primary navigation
  • Skip to main content
  • Skip to primary sidebar
  • Skip to footer

The Nifty Foodie

  • Home
  • About
  • Recipes
    • Appetizers
    • Beverages
    • Breads/Muffins
    • Breakfast
    • Canning
    • Desserts
    • Dog Treats
    • Entertaining/Parties
    • Fruit
    • Holiday Recipes
    • Louisiana Cuisine
    • Main Dishes
    • Mexican
    • Nifty Foodie Original
    • Nifty Tricks
    • Project Food Blog
    • Pumpkin
    • Salads
    • Sauces/Dips
    • Side Dishes
    • Skinny
    • Slow Cooker
    • Spices
    • Stews/Soups
    • The Disasters
  • My Weight Loss Journey
    • Races
    • Running
    • Weight Loss Milestones
  • Crafts
  • Contact Me

Amy

Cuccidati (Italian Fig Cookies)

February 1, 2021 by Amy 2 Comments

There are some things that just trigger memories in all of us. These cookies (called cuccidati) remind me of the days of going to St. Joseph altars with my family, and since it was recently my dad’s birthday, I thought it would be fun to surprise him with some happy mail. We aren’t seeing family very much with the pandemic, so mail has been so much help for us to send loved ones little bits of happiness.

Cuccidati may seem intimidating, but it’s really approachable. You make the dried fruit/nut mix and dough in advance, and assemble/bake/ice another day. The results? A delicious cookie that is a showstopper!

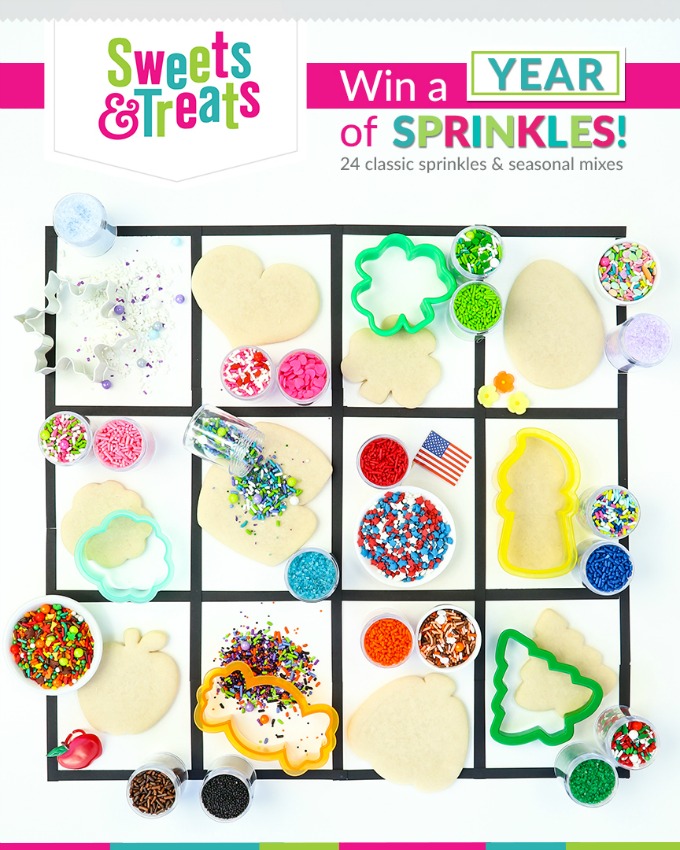
Since these were made to share with a loved one, I thought they would be perfect to share with y’all for this year’s Good Cookie Food Bloggers’ Valentine’s Event. This is the fifth year for our event, and we want to continue to make a difference in the fight against pediatric cancer.

Cancer is the #1 cause of death of children by disease in the U.S. There are 40,000 U.S. children actively battling cancer right now. The National Cancer Institute’s budget for childhood cancer is less than 4%. It’s such a small number and that’s why I got involved. And with the ongoing pandemic, children are still being diagnosed with cancer.

It’s imperative that we raise awareness and continue to raise funds to fund the ongoing pediatric cancer research! Help us make a difference by donating to Cookies for Kids’ Cancer! Our goal is to raise at least $3000. Because these three companies: OXO, Mediavine and Dixie Crystals have each pledged to match our donations raised through this campaign up to $3000! That means when we raise $1, it turns into $4!

Thank you to so many of you who have already donated, please help us reach our goal so we can get the full matching donations and help us make an even huge difference! Donate here today. Donations are being accepted through March 1st – thank you SO much for your support!

Cuccidati (Italian Fig Cookies)
Source: Epicurious

Ingredients:
For the filling:

  • 1 cup packed so dried Mission figs (8 oz), hard tips discarded
  • 3/4 cup raisins (3 3/4 oz)
  • 3/4 cup mild honey
  • 1/4 cup brandy
  • 1 1/2 tsp. finely grated fresh orange zest
  • 1 tsp. finely grated fresh lemon zest
  • 1 tbsp. ground cinnamon
  • pinch ground cloves
  • 1/4 tsp. freshly grated nutmeg
  • 3/4 cup whole almonds (4 oz), toasted and coarsely chopped
  • 3/4 cup walnuts (3 oz), toasted and coarsely chopped

For the dough:

  • 4 cups all-purpose flour
  • 1 cup plus 2 tbsp. sugar
  • 1 tbsp. baking powder
  • 1 tsp. salt
  • 2 sticks (1 cup) cold unsalted butter, cut into 1/2-inch cubes
  • 2 large eggs, lightly beaten
  • 1/2 cup whole milk
  • 1 1/2 tsp. vanilla extract
  • 1 tsp. finely grated fresh orange zest

For the icing:

  • 1 cup confectioners sugar
  • 1/2 tsp. vanilla extract
  • 1 1/2 to 2 tbsp. fresh orange juice
  • Garnish: multicolored nonpareils

Directions:

  1. To make the filling, pulse the filling ingredients in a food processor until the filling is finely blended together. Cover the mixture and allow it to chill in the fridge for at least 8 hours (no longer than 5-7 days).
  2. To make the dough, pulse the flour, sugar, baking powder, and salt in a food processor. Add the butter chunks and pulse the mixture in a food processor, until most of the mixture resembles a coarse meal with some small butter lumps. Place the mixture in a medium sized bowl, and add in the eggs, milk, vanilla extract and zest. Stir the mixture with a fork until a dough forms. Divide the dough in half and shape each half into a ball. Between sheets of plastic wrap, flatten each ball into a 4×6 inch rectangle. Wrap each dough half with plastic wrap then foil, and chill the dough in the fridge for at least 8 hours (no longer than 3 days).
  3. When the dough and filling are well chilled and you are ready to form the cookies, preheat the oven to 350 degrees F.
  4. Remove one rectangle of dough from the fridge, and on a well-floured surface, roll out the rectangle into a 15×14 inch rectangle. Trim the dough to an even 13×10 inch rectangle, and chill the leftover trimmings – then cut that rectangle into 4 10-inch strips.
  5. Using a mini scoop or spoon, add/spread the filling (about 1/3 cup) in a 1-inch wide log lengthwise down the center of each strip. Then, fold the sides of each strip over the filling to enclose it, and pinch the edges together to seal the cookies. Turn the rolls seam-side down, and lightly flatten the top of the logs. Cut the logs with a floured knife into 1 1/2 inch wide slices & place them 1/2 inches apart on a silicone mat or parchment lined baking sheet. Repeat the process in the same way with the rest of the chilled dough and filling.
  6. Bake the cookies one sheet at a time on the middle rack of the oven until golden around the edges, 16-20 minutes. While the cookies are baking, make the icing. In a small bowl, whisk together the confectioners sugar, vanilla extract and orange juice. If it isn’t pourable, add in more orange juice 1 tsp. at a time. Set aside.
  7. Once the cookies are done baking, transfer the baked cookies to cooling racks and allow them to cool until warm, about 10 minutes.
  8. Once the cookies have reached a warm temperature, brush icing onto each cookie and sprinkle with nonpareils (if using). Allow the cookies to cool completely before serving. Enjoy!

Be sure to visit the other bloggers participating in the Valentine’s Day event and check out their recipes!

Heart Shaped Chocolate Cake from Julie of The Little Kitchen
Easy Chocolate Mousse from Allison of Celebrating Sweets
Chocolate Marshmallow Cookies from Sheila of Life, Love, and Good Food
Lemon Biscotti from Jenn of Ever AFTER IN THE WOODS
Easy Cream Cheese Candies from Kelly of Live Laugh Rowe
Cornflake Cookies from All The Good Cookies from Wendy of A Day in the Life on the Farm
Strawberry Mochi Cookies from Heather of Delicious Not Gorgeous
Red Velvet Valentine Brownies Recipe from Jennifer of The Rebel Chick
Red Velvet Cupcakes Recipe from Faith of An Edible Mosaic
Chinese Five-Spice Snickerdoodle Cookies from Bridget of Bake at 350
Chocolate Molten Lava Cake from Ashley of Spoonful of Flavor
Double Chocolate M&M Cookies from Melissa of Persnickety Plates
Raspberry Lemon Macaroons from Sue of It’s Okay to Eat the Cupcake
Raspberry Curd from Holly of A Baker’s House
Red Velvet Brownies from Kelly of Kelly Lynn’s Sweets and Treats
Toffee Chocolate Chip Ice Cream Cookie Sandwiches from Audrey of That Recipe
Creamy Raspberry Sherbet Pandemic Punch from Laura of Untwisted Vintage
Chocolate Dipped Strawberry Cake Balls from Lindsey of Lindsey Loo’s Bakery
Chocolate Covered Oreo Pops for Valentine’s Day from Heather of Totally Tailgates
Amaretto Cherry Swirl Cake from Samantha of Haute Pepper Bites
Gluten Free Double Chocolate Bundt Cake from Elaine of Small Farm Big Life
Easy Strawberry Mousse from Caroline of Caroline’s Cooking
Cornflake Cookies from All The Good Cookies #HelpingCookies from Wendy of A Day in the Life on the Farm
Vanilla Bean Cherry Chocolate Kiss Cookies from Colleen of Faith, Hope, Love, & Luck Survive Despite a Whiskered Accomplice
Neapolitan Cookies Recipe from Lisa of Blogghetti
Small Batch Almond Thumbprint Cookies from Lauren of Healthy Delicious
Kahlua Truffles from Camilla of Culinary Adventures with Camilla
Red Velvet Brownie Cups from Nikki of Soulfully Made
Triple Chocolate Trifles from Coleen of The Redhead Baker
Cast Iron Skillet Cookie For Two from Aimee of Aimee Broussard
Festive Puppy Chow from Erin of The Speckled Palate
Chewy White Chocolate Raspberry Cookies from Jessica of A Kitchen Addiction
Hot Chocolate Bombs for Valentine’s Day from Anna-Marie of Beauty and the Beets
Chocolate Sandwich Cookies from Lisa of Taste Cook Sip
Peanut Butter Snickerdoodles from Betsy of The JavaCupcake Blog
Cherry Blossom Cookies from Carolann of Apron Warrior
Chocolate Mint Frappuccino Cookies from Peabody of Sweet ReciPEAs
Mini Chocolate Covered Strawberry Cheesecakes from Kate of Kate’s Recipe Box
Almond Flour Peanut Butter Cookies from Shashi of Savory Spin
Funfetti Cookie Bars from Becca of The Salted Cookie
Grapefruit Poppyseed Cake from Michelle of Cold Weather Comfort
White Rabbit Candy Cookies from Linda of Ketchup with Linda
Baby Yoda Valentine’s Day Cookies to Support Cookies for Kid’s Cancer from Jenn of justJENN recipes
Salted Peanut Butter Pretzel Cowboy Cookies from Bree of Baked Bree
Red Velvet Hot Chocolate Bombs from Erin of The Spiffy Cookie
Homemade Hot Chocolate Mix from Gwynn of Swirls of flavor
Cherry Chocolate Chip No Bake Cheesecake from Stefanie of Stef’s Eats and Sweets
Valentine’s Day Homemade Ding Dongs from TammyJo of The Chocolate Cult
Guava Macarons with Coconut Buttercream from Lindsay of Anchored Baking
Valentines Pink Dessert Charcuterie Board for Kids from Nicole of For the Love of Food
Hot Chocolate Cookies from Amanda of A Cookie Named Desire
Cóctel de Camarones from Rebekah of Kitchen Gidget
Cuccidati (Italian Fig Cookies) from Amy of The Nifty Foodie

Filed Under: Uncategorized

Mini Tall & Creamy Cheesecakes

December 10, 2020 by Amy 1 Comment

One of the few things that I’m known for in my friends/family/coworker circle is that I can make a really great cheesecake. This particular cheesecake is smooth, creamy & almost has a light/airy texture to it that you don’t find with typical cheesecakes.

There’s no secret to my cheesecake – whenever people ask me about it, I happily share the recipe. However, I’ve noticed there’s some sort of intimidation when it comes to cheesecake – like that intimidation a lot of us have with bread. When it comes to cheesecake, the secret is in the mixing. Don’t skimp on mix times, and scrape down the mixing bowl a lot – like after every ingredient addition. You want the batter to have as few clumps as possible. Other than that, I find cheesecakes to be fairly simple to make – you just have to think ahead to make these, since they require a decent amount of chill time before serving.

This year – there’s no cheesecake for the coworker pot luck (we are all working from home), and there’s no cheesecake for family gatherings (we are all distancing in our immediate family circles). However, I still want to give them their holiday cheesecakes this year, so I purchased some 4″ springform pans.

I used the same recipe I always use, but instead of the typical bake time, I baked these for just about half the time. They still had that perfect texture, and a 4″ springform is a generous dessert for 2. Top these with the sauce of your choice – I made a homemade strawberry sauce.

Check out what other bloggers are sharing for #ChristmasSweetsWeek below this recipe!

Mini Tall and Creamy Cheesecakes
Source: Baking From My Home to Yours

Ingredients:

For the crust:

  • 1 3/4 cups graham cracker crumbs
  • 3 tablespoons sugar
  • Pinch of salt
  • 1/2 stick (4 tablespoons) unsalted butter, melted

For the cheesecake:

  • 2 pounds (four 8-ounce boxes) cream cheese, at room temperature
  • 1 1/3 cups sugar
  • 1/2 teaspoon salt
  • 2 teaspoons pure vanilla extract
  • 4 large eggs, at room temperature
  • 1 1/3 cups sour cream or heavy cream, or a combination of the two (I used heavy cream)

Directions:

To make the crust:

  1. Butter 4-inch springform pans (this recipe makes enough for 6), and wrap the bottom of the pans in a double layer of aluminum foil; put the pans on a baking sheet.
  2. Stir the crumbs, sugar and salt together in a medium bowl. Pour over the melted butter and stir until all of the dry ingredients are uniformly moist.  Turn the ingredients into the buttered springform pan and use your fingers to pat an even layer of crumbs along the bottom of the pan and about halfway up the sides (I like to use a round glass to make it flat.). Don’t worry if the sides are not perfectly even or if the crumbs reach above or below the midway mark on the sides—this doesn’t have to be a precision job. Put the pans in the freezer while you preheat the oven.
  3. Center a rack in the oven, preheat the oven to 350°F and place the springforms on a baking sheet. Bake for 10 minutes. Set the crusts aside to cool on a rack while you make the cheesecake batter.
  4. Reduce the oven temperature to 325°F.

To make the cheesecake:

  1. Put a kettle of water on to boil (or microwave water in a bowl).
  2. Working in a stand mixer, preferably fitted with a paddle attachment, or with a hand mixer in a large bowl, beat the cream cheese at medium speed until it is soft and lives up to the creamy part of its name, about 4 minutes. With the mixer running, add the sugar and salt and continue to beat another 4 minutes or so, until the cream cheese is light. Scrape down the sides of the bowl. Beat in the vanilla. Add the eggs one by one, beating for a full minute after each addition—you want a well-aerated batter. Scrape down the sides of the bowl. Reduce the mixer speed to low and stir in the sour cream and/or heavy cream.
  3. Put the foil-wrapped springform pans in a roaster pan.
  4. Give the batter a few stirs with a rubber spatula, just to make sure that nothing has been left unmixed at the bottom of the bowl, and scrape the batter into the springform pans. The batter will reach the brim of the pans. Put the roasting pan in the oven and pour enough boiling water into the roaster to come halfway up the sides of the springform pan.
  5. Bake the cheesecake for 45-50 minutes, at which point the tops will be browned (and perhaps cracked) and may have risen just a little above the rim of the pan. Turn off the oven’s heat and prop the oven door open with a wooden spoon. Allow the cheesecake to luxuriate in its water bath for another hour.
  6. After 1 hour, carefully pull the setup out of the oven, lift the springform pan out of the roaster—be careful, there may be some hot water in the aluminum foil—remove the foil. Let the cheesecake come to room temperature on a cooling rack.
  7. When the cakes are cool, cover the tops tightly and chill the cake for at least 4 hours, although overnight would be better.

Welcome to #ChristmasSweetsWeek 2020! Co-hosted by Terri from Love and Confections and Christie from A Kitchen Hoor’s Adventures! What better way to celebrate the holidays than with food and fun? 21 bloggers from around the country have come together to share some of their favorite sweet Christmas recipes!! Deck the halls and get ready for very merry sweet treats, like fudge, cookies, Christmas morning breakfasts, layer cakes, cocoa, and more! Follow along on social media with our #ChristmasSweetsWeek hashtag. Happy Holidays!

Enjoy these #ChristmasSweetsWeek recipes from our bloggers:

Candy and Fudge Recipes
Peanut Butter Truffles by A Kitchen Hoor’s Adventures
Grinch Snack Mix by Sweet Beginnings
Chocolate Pecan Pralines by House of Nash Eats
Oreo Cookie Truffles by Kathryn’s Kitchen Blog

Pastry and Dessert Recipes
Gingerbread Poke Cake by Love & Confections
Mini Tall & Creamy Cheesecakes by The Nifty Foodie
Small Batch Chocolate Cake with Fluffy Peppermint Frosting by Kate’s Recipe Box

Filed Under: Cakes/Cupcakes, Desserts, Holiday Tagged With: cheesecake, dessert, holiday dessert, individual dessert

Salted Chocolate Chip Cookies

December 8, 2020 by Amy 2 Comments

I’m not sure how this happened, but it’s time to get started with holiday baking again. Now – I will say, things are a LOT different this year.

For one, the giant annual bake-palooza that I’ve traditionally done is definitely NOT happening this year. With the pandemic, my husband and I are working from home – our jobs are mainly behind a computer, so while I miss the water cooler environment of the office, my day-to-day job tasks really weren’t that impacted. HOWEVER, I have gotten a few hints and nudges to still bake – some coworkers even want to do a curbside pick-up thing. (Huge compliment, for sure!)

The only baking that is FOR SURE happening is for family and neighbors (which I plan on doing via door drops). We have personally kept our safe COVID bubble to just my husband and I since March, and we do not have any plans to change that. Does it still feel like Christmas? Of course not – but we will do what we can to make things as festive as we possibly can.

Baking is one of them – and these chocolate chip cookies? While they aren’t festive, they are 100% perfection. I’ve tested multiple chocolate chip cookies, and no other recipe holds a candle to this recipe. It’s perfectly chewy with a butterscotch-y flavor from the brown sugar, and the mix of different chocolate chunks make this cookie an absolute dream. Just promise me you won’t skimp on the dough chill time, ok?

Also, check out the wonderful recipes that other bloggers are sharing for #ChristmasSweetsWeek (below the chocolate chip cookie recipe).

The Best Chocolate Chip Cookies
Source: slightly adapted from For Me, For You

Ingredients:

  • 2 cups minus 2 tbsp. cake flour (8 1/2 oz)
  • 1 2/3 cups bread flour (8 1/2 oz)
  • 1 1/4 tsp. baking soda
  • 1 1/2 tsp. baking powder
  • 1 1/2 tsp. coarse kosher salt
  • 2 1/2 sticks (10 oz.) unsalted butter, softened
  • 1 1/4 cups (10 oz.) light brown sugar
  • 1 cup plus 2 tbsp. (8 oz.) granulated sugar
  • 2 large eggs
  • 2 tsp. vanilla extract
  • 3/4 lb. bittersweet chocolate chips or chunks (about 60% cacao content)
  • 1/2 lb. milk chocolate chips or chunks
  • Sea salt or kosher salt for garnishing (I use Maldon salt)

Directions:

  1. Combine the flours, baking soda, baking powder and salt in a medium-sized bowl. Whisk the ingredients together until well-blended and set aside.
  2. Using a stand mixer fitted with the paddle attachment, cream the butter and sugars together until the mixture is light and fluffy – about 3-5 minutes. Scrape down the bowl, and add in the eggs, one at a time, mixing the dough well after each addition. Add in the vanilla extract, and scrape down the sides of the bowl.
  3. Turn the mixer on low speed, and add in the dry ingredients. Mix the dough together, until JUST combined. Using a spatula or spoon, mix in the chocolate chips, until they are incorporated into the dough.
  4. Press plastic wrap on top of the dough, and refrigerate the dough for 24-36 hours (no more than 72 hours).
  5. When it’s time to bake, remove the bowl of dough from the fridge, and allow the dough to soften slightly. Preheat the oven to 350 degrees F, and prepare a baking sheet by lining it with parchment paper or a silicone baking mat.
  6. Using a large cookie scoop (about 3 oz in size), scoop 6 dough balls onto the baking sheet, making sure to space them out evenly. Sprinkle the tops of the dough with sea salt, and bake the cookies for 15-20 minutes, until the cookies are just turning golden brown. To cool the cookies, place the baking sheet on a wire cooling rack for 10 minutes, and then transfer the cookies to the wire cooling rack to finish cooling. Enjoy!

Welcome to #ChristmasSweetsWeek 2020! Co-hosted by Terri from Love and Confections and Christie from A Kitchen Hoor’s Adventures! What better way to celebrate the holidays than with food and fun? 21 bloggers from around the country have come together to share some of their favorite sweet Christmas recipes!! Deck the halls and get ready for very merry sweet treats, like fudge, cookies, Christmas morning breakfasts, layer cakes, cocoa, and more! Follow along on social media with our #ChristmasSweetsWeek hashtag. Happy Holidays!

Enjoy these #ChristmasSweetsWeek recipes from our bloggers:

Breakfast and Baked Goods Recipes
Easy Cranberry Orange Monkey Bread by Love & Confections
Eggnog French Toast by Sweet Beginnings

Candy and Fudge Recipes
Easy Peanut Butter Fudge by House of Nash Eats
Popcorn Three Ways by Christmas Tree Lane

Pastry and Dessert Recipes
Dark Chocolate Graham Crackers by A Kitchen Hoor’s Adventures
Salted Chocolate Chip Cookies by The Nifty Foodie
Toffee Chip Cookies by Kathryn’s Kitchen Blog
Gingerbread Cupcakes by Magical Ingredients
Instant Pot Gingerbread Cheesecake by Kate’s Recipe Box

Filed Under: Chocolate, Cookies, Desserts Tagged With: chocolate, cookies, holidays

Classic Cinnamon Rolls

December 7, 2020 by Amy 6 Comments

Happy Holidays, y’all! ‘Tis the season for the holiday shopping bustle, office parties, holiday bake-palooza….wait…

I’ll be honest – without the normal traditions, I’m struggling with feeling the holiday spirit. We put up the tree – heck, we even splurged on a new 9 ft. tree – but with the way things are currently, it’s so different. SO much is different.

I haven’t felt the holiday funk since the year our sweet dog, Millie, passed away from cancer. I couldn’t face the doggie decor – I knew her ornaments and stocking would be there. This year, I’m sitting in our house and kind of mourning the loss of what I have ever known the holidays to be (as most of us are).

I know what you are about to say – count your blessings, Amy. Oh trust me – I absolutely am. I’m lucky to have a job that puts safety at the forefront – I’ve been working from home since March. I’m lucky to even have a job at all. I know so many people are suffering this year, and for that reason alone – I shouldn’t be in a funk. I’m lucky that no one in our families have gotten sick this year. There’s a lot to be thankful for – yet here I am.

So, I’m trying to force some holiday happy into my life by doing what I do best around the holiday season – bake. This week, I’m sharing 3 classic baking recipes with y’all by participating in #ChristmasSweetsWeek 2020 – these classic cinnamon rolls are one of the recipes. Check out what other bloggers are sharing this week as well – I have the links below this recipe!

Classic cinnamon rolls to me are fluffy, gooey & flavorful – this recipe has a brioche-type of bread dough with a sweet (yet not TOO sweet) cream cheese icing. It’s insanely delicious! These aren’t a quick recipe by any means, but it’s SO worth it!

Classic Cinnamon Rolls
Source: slightly adapted from The Vanilla Bean Blog

Ingredients:

For the dough:

  • 4 large eggs, at room temperature
  • 3/4 cup whole milk (warmed to 100-110 degrees F)
  • 1/4 cup honey
  • 4 cups all-purpose flour
  • 2 1/4 tsp. active dry yeast
  • 2 tsp. salt
  • 10 tbsp. (1 1/4 sticks) unsalted butter, softened

For the filling:

  • 1/2 cup packed light brown sugar
  • 1 tbsp. cinnamon
  • pinch of salt
  • 2 tbsp. unsalted butter, melted and cooled

For the icing:

  • 8 tbsp. (1 stick) unsalted butter, softened
  • 4 oz. cream cheese, softened
  • 1 1/2 tsp. vanilla extract
  • 1 cup confectioners sugar

Directions:

  1. To make the dough, prepare a large bowl by greasing it well. In a large liquid measuring cup, whisk together the eggs, warmed milk and honey.
  2. In the bowl of a stand mixer with the paddle attachment, mix the flour, yeast, and salt together – stir on low until combined. Add the egg mixture to the flour mixture, and mix until just combined. With the mixer on low, add the butter in 1 tbsp. at a time. Once the butter has been added, increase the mixer’s speed to medium and beat the butter into the dough, until the butter pieces are mixed into the dough (about 1 minute).
  3. Using a spatula, transfer the dough to the greased bowl. Cover the bowl with plastic wrap, and allow the dough to rise for 30 minutes. Once the dough has risen, use your fingers or a spatula to reach under the dough and gently pull it up over the rest of the dough. Turn the bowl and repeat the “folding” process until the dough has been pulled up from the bottom of the bowl. Re-cover the bowl with plastic wrap, and allow the dough to rise for another 30 minutes. Repeat this process three more times. Once the folding process is done, cover the bowl with plastic wrap and refrigerate the dough overnight (or up to 72 hours).
  4. Once the dough has been refrigerated, flour a work surface and knead the dough 10-12 times. Once the dough has been kneaded, shape the dough into a ball, cover the top of the dough with a light dusting of flour and then cover the dough with a tea towel while the dough comes to room temperature.
  5. Prepare a 9×13 inch baking pan by greasing it well or line it with parchment paper. In a small bowl, mix together the filling ingredients (brown sugar, cinnamon and salt).
  6. Roll the dough into a 16×12 inch rectangle. Then, brush the dough with the melted butter and sprinkle the cinnamon/sugar/salt mixture evenly over the top of the dough. Once that has been sprinkled on, take a little time to lightly press the cinnamon/brown sugar/ salt mixture into the butter to help it stick together. Starting at a longer side of the rectangle, carefully roll the dough into a tight cylinder shape. Pinch the seam of the dough gently to seal it, and then shift the dough to be seam side down.
  7. Use a serrated knife to gently cut the dough into 12 even pieces. Transfer the pieces of dough to the prepared pan, and place the dough pieces cut-side up. Then, cover the pan loosely with plastic wrap and allow the dough to rise until it has doubled (about 1 to 1 1/2 hours).
  8. Just before the end of this dough rise, move an oven rack to the middle position. Preheat the oven to 350 degrees F. Once the oven has preheated, remove the plastic and bake the cinnamon rolls for 27-32 minutes, rotating the pan halfway through. If you find that the rolls are browning too fast, but are not done baking, use oven mitts carefully cover your pan with foil to finish baking.
  9. While the rolls are baking, prepare the icing. Using the paddle attachment of a stand mixer, beat the softened butter and softened cream cheese on medium speed, until fluffy and creamy. Add the vanilla extract and salt & mix on low to combine. Scrape the bowl of the stand mixer, and mix the confectioners sugar in the icing mixture on low until everything is combined. Scrape the bowl once more, and then mix the icing on medium until the icing is fluffy and creamy (about 3-4 minutes).
  10. When the rolls are done baking, transfer the pan to a wire rack to allow it to cool for 5 minutes. Generously spread the icing over the tops of the rolls, and enjoy!

Welcome to #ChristmasSweetsWeek 2020! Co-hosted by Terri from Love and Confections and Christie from A Kitchen Hoor’s Adventures! What better way to celebrate the holidays than with food and fun? 21 bloggers from around the country have come together to share some of their favorite sweet Christmas recipes!! Deck the halls and get ready for very merry sweet treats, like fudge, cookies, Christmas morning breakfasts, layer cakes, cocoa, and more! Follow along on social media with our #ChristmasSweetsWeek hashtag. Happy Holidays!

Enjoy these #ChristmasSweetsWeek recipes from our bloggers:

Beverage Recipes
Homemade Dark Hot Chocolate Mix by Bear & Bug Eats

Breakfast and Baked Goods Recipes
Easy Cranberry Orange Monkey Bread by Love & Confections
Classic Cinnamon Rolls by The Nifty Foodie
Spiced Pear Quick Bread by Simply Inspired Meals
Cherry Croissant Breakfast Bake by Making Miracles
Cranberry Eggnog French Toast Bake by The Redhead Baker

Candy and Fudge Recipes
3 Ingredient Old Fashioned Potato Candy by Blogghetti
Bourbon Caramels with Chocolate and Vanilla by Christmas Tree Lane
Star Bread by House of Nash Eats
Chocolate Peppermint Graham Crackers by Kathryn’s Kitchen Blog

Pastry and Dessert Recipes
Peanut Butter Cut Outs by A Kitchen Hoor’s Adventures
Banana Cake by Palatable Pastime
Cranberry Orange Sugar Cookie Bars by Sweet Beginnings
Peppermint Dipped Chocolate Chip Cookies by An Affair from the Heart
Hazelnut & Raspberry Balsamic Brownie Cookies by The Spiffy Cookie
Lemon Ricotta Cookies by A Little Fish in the Kitchen Lemon
Egg Nog Ice Cream by A Day in the Life on the Farm
Eggless Blue Curaco Velvet Cake by Magical Ingredients
Pecan Crusted Pecan Pie by The Mandatory Mooch
St Louis Gooey Butter Cake by For the Love of Food
Hot Chocolate Sweet Rolls by Kate’s Recipe Box

Filed Under: Breads/Muffins, Breakfast, Desserts, Holiday Tagged With: bread, cinnamon rolls, dessert, holidays, pastry, yeast

Bakery-Style Blueberry Muffins

June 25, 2020 by Amy Leave a Comment

Since this pandemic became prevalent in this country, my husband and I tried our hardest to avoid going in stores. We were thankful for services like Walmart pick-up and Instacart – but as the state started opening up again, I have only gone into stores that require masks. One of those stores is Costco.

I can’t tell you how petrified and anxious I was to step foot in Costco for the first time in months. I went at 7:30 at night, about an hour before closing, just hoping that it wouldn’t be too crowded. There were maybe 30 cars in the parking lot, so it wasn’t bad. What used to be a fun weekend errand for my husband and I quickly felt like something out of a twilight zone. Shelves were nearly empty, everyone was in masks, and it was dead quiet. I filled up my cart as quickly as possible, and I got out of there.

On the way to the meat department was a familiar department – the bakery. I really wanted to get some of those crazy giant blueberry muffins, but at the time, I was too anxious to get prepared foods. Each time I’ve gone to Costco since, I have thought about those darn muffins – but I just never pick them up. I thought that it would be pretty cool to try to make them at home, and while these weren’t a spot-on replication of the Costco muffins – these were still really flavorful, had a tender crumb & were simple to make.

Bakery-Style Blueberry Muffins
Source: King Arthur Flour

Ingredients:

  • 8 tablespoons butter, at room temperature
  • 1 cup granulated sugar
  • 2 large eggs
  • 2 tsp. baking powder
  • 1/2 tsp. salt
  • 1 tsp. vanilla extract
  • 2 cups all-purpose flour
  • 1/2 cup milk
  • 2 1/2 cups blueberries, fresh preferred (I used frozen, thawed)
  • 1/4 cup sugar, for topping

Directions:

  1. Preheat the oven to 375 degrees F. Prepare a muffin tin by either lightly greasing the insides of the tin or lining the tin with cupcake papers & grease the papers.
  2. In the bowl of a stand mixer, mix together the butter and sugar until well-combined. Add in the eggs, one at a time, scraping the inside of the bowl & beating the mixture well after each egg is added.
  3. Mix in the baking powder, salt and vanilla extract.
  4. With the mixer on low, add in the 1/2 of the flour, and then 1/2 of the milk. Alternate adding in 1/2 of the flour, then 1/2 of the milk one more time, until the mixture is just mixed.
  5. Using a fork, mash 1/2 cup of the blueberries. Add in the mashed and whole berries to the muffin mixture, folding in until just combined.
  6. Scoop 1/4 cup of the batter into each muffin tin, and sprinkle about 1 tsp. of the granulated sugar topping on top of each muffin. Bake the muffins for about 30 minutes, until they start to turn a light golden brown color & a toothpick inserted into the center of the muffin comes out cleanly.
  7. Once they are taken out of the oven, allow them to cool in the pan for about 5 minutes & then transfer the muffins to a cooling rack to finish cooling. Enjoy!

Check out what other bloggers are sharing during Brunch Week this week:

Beverages Recipes

  • Bourbon Peach Sweet Tea by Love & Confections

Bread, Grains, and Cereal Recipes

  • Bakery-Style Blueberry Muffins by The Nifty Foodie
  • Breakfast Gnocchi by Simply Healthyish Recipes
  • Oatmeal Raisin Cookie Granola by The Spiffy Cookie
  • Pretzel Brat Buns by Making Miracles
  • Strawberry Overnight Oats by The Mandatory Mooch
  • Vegan Breakfast Toast Three Ways by Happily Curated Chaos

Egg Recipes

  • Sausage Egg and Cheese Grits by A Kitchen Hoor’s Adventures

Meat, Poultry, and Fish Recipes

  • Mississippi Pot Roast with Veggies by Making Miracles

Dessert Recipes

  • DIY Crepe Bar by The Redhead Baker
  • Earl Grey Macaron by April Golightly
  • Keto Fudge by Keto Basic AF

Filed Under: Breads/Muffins, Fruit

Bacon, Egg & Cheese Quiche

June 23, 2020 by Amy Leave a Comment

The first few weeks of the COVID-19 crisis was really impacting my mental health. I was having nightmares about my loved ones getting sick, I was mourning the loss of what I used to know as normal, and I was almost completely immersed in the news. It was just so negative, and what I was missing was some semblance of positivity.

I turned to gratitude journaling (counting my blessings), and I realized that one of the things that helps me during a tragedy is to somehow help. When Hurricane Katrina hit, I volunteered on my college campus. I was at LSU at the time, and the campus turned into a hub for buses full of people after the storm passed. Emotions were high, but small things like an open ear and a hot meal went a long way.

However, how was I able to help for this? In a tragedy where you can’t be near others, this was a tough one. I thought long and hard about it, until I saw on Facebook that there was a need for fabric masks in the local hospitals.

It wasn’t much, but I took out my sewing machine & sewed up 50 masks for a local hospital. It was comforting to know that I was somehow able to help in this crisis – even if it was something as minuscule as fabric masks.

When it comes to finding comfort, I have also found it in the kitchen. I admit that I was not much of a cook during the week – my commute is about an hour each way, so by the time I got home, it was pretty darn late. It has been really nice to be back in the kitchen almost every night, and one of my favorite meals is BRINNER (breakfast for dinner, of course).

These individual quiches are an easy option for brinner, breakfast – whatever you want! This makes 9 quiches too, so if you are looking to make breakfasts ahead of time, these freeze really well!

Bacon, Egg & Cheese Quiche
Source: an original

Ingredients:

  • 5 large eggs
  • 1/4 tsp. dried thyme
  • 1 tsp. onion salt
  • 1 tsp. cajun seasoning
  • 1 cup heavy cream
  • 4 slices cooked bacon, diced
  • 1/2 cup shredded cheddar cheese
  • cooking spray
  • 1 frozen puff pastry sheet, thawed

Directions:

  1. Preheat the oven to 400 degrees with the rack in the center position, and spray the inside of a muffin tin with cooking spray.
  2. In a medium sized bowl, whisk the eggs, dried thyme, onion salt, cajun seasoning, and heavy cream together until the ingredients are well-mixed. Add the bacon and cheese to the egg/cream mixture, and mix well. Set aside.
  3. Prepare the puff pastry sheet by rolling it into a 12×12 inch square. Cut the puff pastry into 9 equal squares.
  4. Place each square into the inside of a muffin tin, being sure to leave a little piece of each corner hanging over the edge. Pour 1/4 cup of the egg/bacon/cheese mixture into each puff pastry-lined muffin well.
  5. Bake the individual quiches for 20-25 minutes, until the quiches are golden brown.

Check out what other bloggers are sharing during Brunch Week this week:

Beverage Recipes

  • Avocado Dalgona Coffee by Simply Healthyish Recipes
  • Peach Smoothie by The Redhead Baker

Bread, Grains, and Cereal Recipes

  • French Toast Casserole by Making Miracles

Egg Recipes

  • Bacon, Egg & Cheese Quiche by The Nifty Foodie
  • Steak and Potato Hash by A Kitchen Hoor’s Adventures

Fruit and Veggie Recipes

  • Caramelized Grapefruit with candied mint by Happily Curated Chaos

Meat, Poultry, and Fish Recipes

  • Southern Brunch Board by Love & Confections

Dessert Recipes

  • Keto Lemon Cake by Keto Basic AF
  • Raspberry Macarons Recipe by April Golightly

Filed Under: Breakfast, Pork/Ham/Bacon

Cinnamon Crunch French Toast

June 22, 2020 by Amy 2 Comments

Is anyone else over the summer already? Maybe it’s just me, but something about the impending months of heat/humidity, along with a big desire to just take a breather (when it’s really hard to go anywhere right now) – I’m just ready for fall. At least fall has pumpkins?

I know that sounds a little glass half empty, but I am counting my blessings. My husband and I have been extremely lucky. We have not gotten ill – no one in our immediate families has fallen ill – and our jobs have been extremely accommodating to keep us safe during these hard times.

To keep the news off of the TV, I’ve tapped into my creative side a good bit. I’ve sewn 200+ fabric face masks, I’ve taken up knitting again & I’m cooking a LOT more. It feels good to be productive, I guess? My craft room is incredibly organized lately too – which is awesome.

When it comes to cooking, I thought I would use this time to get back into blogging regularly, but I’m a little late on that one. I figured a good way to ease back into it is to share some carb-y goodness, and who doesn’t love a good carb-y dish during brunch? That’s right, y’all – it’s BRUNCH WEEK!

Welcome to #BrunchWeek 2020 hosted by Love and Confections and A Kitchen Hoor’s Adventures! This is our 8th year of #BrunchWeek and while it is a little different this year, 22 bloggers are excited to share all our favorite Brunch recipes. We have a huge variety including French toast, danish, waffles, pancakes, hash, fruit salad, cocktails, mocktails, vegan, keto, and plenty of desserts! We hope you enjoy all our Brunch recipes!


Today, I’m sharing some simple, yet indulgent french toast with a dreamy, crunchy cinnamon topping. It’s so good – really adds some great texture to baked french toast! I purchased apple cinnamon brioche bread for the base for this french toast, but I have also made it with vanilla/plain brioche – either way is fantastic and tasty!

Cinnamon Crunch French Toast
Source: mildly adapted from Simply Recipes

Ingredients:

For the french toast/custard:

  • 1 large loaf of brioche bread, cut into 1-inch cubes
  • 5 large eggs
  • 1 1/2 cups milk (I used 2%)
  • 1/4 cup packed dark brown sugar
  • 1/2 tsp. cinnamon
  • 1/4 tsp. salt

For the topping:

  • 4 tbsp. unsalted butter (melted)
  • 3 tbsp. dark brown sugar
  • 1 tsp. cinnamon
  • pinch of salt

Directions:

  1. Place the oven rack in the center position of the oven, and preheat the oven to 375 degrees F.
  2. Prepare a 9×13 inch baking dish by lining it with butter or spraying a baking/cooking spray on the inside. Then, place the cubes of bread evenly in the baking dish.
  3. In a medium sized bowl, prepare the custard. First, whisk the eggs together, and then add the milk, dark brown sugar, 1/2 tsp. of cinnamon and 1/4 tsp. of salt. Whisk the mixture well, and pour the custard mixture over the bread, ensuring that there are no dry pieces of bread in the baking dish.
  4. In a small bowl, mix together the unsalted butter, dark brown sugar, 1 tsp. cinnamon and pinch of salt. Using a spoon, drizzle the butter mixture evenly over the bread chunks.
  5. Bake the french toast in the oven for 35-45 minutes. Allow the french toast to cool until warm (about 10-15 minutes) before serving. Enjoy!

Check out the other great recipes that the other Brunch Week bloggers are sharing today:

Beverages Recipes

  • Easy Peach Frosé by Love & Confections
  • Healthy Banana Smoothie by Simply Healthyish Recipes

Bread, Grains, and Cereal Recipes

  • Blueberry Bread Pudding by Big Bears Wife
  • Buttermilk Waffles by The Redhead Baker
  • Chocolate Banana Muffins by The Mandatory Mooch
  • Cinnamon Crunch French Toast by The Nifty Foodie
  • Double Chocolate Banana Muffins by Family Around the Table
  • Pear Chocolate Chip Sourdough Muffins by Caroline’s Cooking
  • Sourdough Belgian-Style Waffles by Karen’s Kitchen Stories
  • Vegan Anise French Toast by Happily Curated Chaos

Egg Recipes

  • Bacon, Brie & Asparagus Quiche by Sweet Beginnings
  • Breakfast Tostadas by A Kitchen Hoor’s Adventures
  • Gyro Omelette by Cheese Curd In Paradise

Fruit and Veggie Recipes

  • Duchess Potatoes by Amy’s Cooking Adventures
  • Greek Broccoli Pasta Salad by Making Miracles

Meat, Poultry, and Fish Recipes

  • Carolina Shrimp And Grits by Nik Snacks
  • Everything Breakfast Pizza by The Spiffy Cookie

Dessert Recipes

  • Keto Macarons by Keto Basic AF
  • Lemon Macarons Recipe by April Golightly
  • Pasta Frola (Argentinian Lattice Tart) by Tara’s Multicultural Table
  • Sprinkle Biscotti by Hezzi-D’s Books and Cooks
  • Strawberry Scones by Kate’s Recipe Box

Filed Under: Breads/Muffins, Breakfast

King Cake Bread Pudding

February 24, 2020 by Amy Leave a Comment

Happy Lundi Gras, y’all! Mardi Gras brings back fond memories of parades with my family, getting a week off of school (yep – south Louisiana kind of shuts down for the big MG!), and of course – the multitude of king cakes to consume for 2 months. 🙂

We really don’t go to New Orleans for Mardi Gras anymore – I think parades lost their luster for me after I graduated from college. However, that could change when we have kids someday – who knows!

When it comes to king cakes, I feel like there’s so many versions nowadays – the nostalgic ones from childhood and the newer bakeries trying to break the barrier on what should be considered a king cake. It’s a big industry, for sure – my favorite is the nostalgic type (Randazzo’s and Haydel’s in the New Orleans area are up there for me – Ambrosia Bakery in Baton Rouge is also pretty darn good)! I finally tried the social media sensation that is Dong Phuong’s king cake this past week, and it was pretty good! Theirs is more of a flaky croissant-type dough with an icing that won’t hurt your teeth (which I also can appreciate). However, for two people, it was a LOT of king cake – so here we are. 3/4 of a king cake left, and I’m not trashing it! It’s time for a bread pudding, y’all!

This recipe is SO easy – take that leftover king cake, cube it up, mix a quick custard – BOOM! I made a delicious cold brew coffee glaze to drizzle over the top, but if there’s no coffee drinkers in your home – you can enjoy it just as it is! It’s sweet enough with the king cake base!

King Cake Bread Pudding with Coffee Glaze
Source: mildly adapted from Fake Ginger

Ingredients:

  • 1 medium king cake (cut into cubes)
  • 3 large eggs
  • 1/2 cup heavy cream
  • 1 1/2 cups milk (I used reduced fat)
  • 1/4 cup granulated sugar
  • 1 1/2 tsp. vanilla extract
  • 1/4 tsp. salt
  • 2 tbsp. cold brew coffee concentrate
  • 1 cup confectioners sugar

Directions:

  1. Preheat your oven to 350 degrees F. Prepare a 9×13 baking pan by spraying it with non-stick baking spray and spreading it evenly in the dish.
  2. Place the king cake cubes in your baking pan, spreading the cubes out as evenly as possible. In a medium-sized bowl, whisk together the eggs, heavy cream, milk, granulated sugar, vanilla extract and salt, until the mixture is homogenous. Pour the mixture over the king cake cubes in the pan, and lightly mix the king cake and custard, until all of the king cake has soaked up the custard.
  3. Bake the bread pudding for 30 minutes, covered with foil. Remove the foil, and bake the bread pudding for another 15-20 minutes, until the custard is set. While the bread pudding is baking, make the coffee glaze! Place the 1 cup of confectioners sugar and 2 tbsp. of cold brew coffee concentrate in a small bowl & whisk together.
  4. Enjoy this dessert warm with or without coffee glaze on top!

Filed Under: Breads/Muffins, Desserts

Confetti Cookies

February 10, 2020 by Amy Leave a Comment

Disclosure: I’m participating in this year’s Cookies for Kid’s Cancer food blogger event. I was not compensated to write this post – I did receive items from this year’s sponsors.

Hi. Hello – it’s good to be writing again! I have so much to share with y’all, but I want to make today’s focus on a charity that I believe in. I’m so excited to participate in this Valentine’s event (again). This is the fourth year for our event, and we want to continue to make a difference in the fight against pediatric cancer.

Cancer is the #1 cause of death of children by disease in the U.S. There are 40,000 U.S. children actively battling cancer right now. The National Cancer Institute’s budget for childhood cancer is less than 4%. It’s such a small number and that’s why I got involved.

Help us make a difference by donating to Cookies for Kids’ Cancer!

Our goal is to raise at least $3000. Because these three companies: OXO, Mediavine and Dixie Crystals have each pledged to match our donations raised through this campaign up to $3000! That means when we raise $1, it turns into $4!

Thank you to so many of you who have already donated, please help us reach our goal so we can get the full matching donations and help us make an even huge difference!

Donate here today.

Since this is a Cookies for Kids’ Cancer event, it would be wrong of me to share this charity with y’all without bringing some freshly baked cookies to the table. These confetti cookies are the BEST version of a sugar cookie that I have ever had – and that’s saying a lot (since I declared these sugar cookies to be the best ever previously). No – these cookies beat it!

A crispy exterior and a perfectly chewy interior – and the sugar cookie/vanilla flavor? OMG. Yes, please! This recipe is from the Momofoku Milk Bar cookbook – I mildly adapted it, based on experience I’ve had with cookies in this particular cookbook. I’m not sure if it’s my oven or my kitchen scale, but the three cookie recipes that I’ve made from this book (with zero changes) either burn at the edges or spread into a pancake. The flavor is there – but something almost always goes wrong! This time, though? Perfection!

Confetti Cookies
Source: mildly adapted from Momofoku Milk Bar cookbook

Ingredients:

For the Birthday Cake Crumb:

  • 1/2 cup granulated sugar
  • 1 1/2 tbsp. light brown sugar, lightly packed
  • 3/4 cup cake flour
  • 1/2 tsp. baking powder
  • 1/2 tsp. kosher salt
  • 2 tbsp. rainbow sprinkles
  • 1/4 cup grapeseed oil
  • 1 tbsp. clear vanilla extract

For the Cookies:

  • 16 tbsp. (2 sticks) butter, at room temperature
  • 1 1/2 cups granulated sugar
  • 1 tbsp. corn syrup
  • 2 eggs
  • 2 tsp. clear vanilla extract
  • 2 1/2 cups + 1 tbsp. all-purpose flour
  • 2/3 cup milk powder
  • 2 tsp. cream of tartar
  • 1 tsp. baking soda
  • 1 1/4 tsp. kosher salt
  • 1/4 cup rainbow sprinkles
  • 1/2 recipe Birthday Cake Crumb

Directions:

  1. To make the birthday cake crumb, preheat the oven to 300 degrees F.
  2. Combine the dry ingredients (granulated sugar, brown sugar, cake flour, baking powder, salt, and sprinkles) in a medium-sized mixing bowl and mix together until everything is well-blended. Add the oil and vanilla extract to the bowl, and mix the ingredients together until the mixture resembles small clusters.
  3. Spread the mixture on a parchment-paper or silicone mat lined sheet pan, and bake the mixture for 20 minutes (breaking the mixture up occasionally). The mixture should still be slightly moist to the touch, but as the crumbs cool down, they will dry and harden. Allow the crumbs to fully cool before using these in the cookie recipe. (I made these the day before I made the cookies – I find that it helps to break up this recipe into sections.)
  4. To make the cookies, combine the butter, sugar and corn syrup in the bowl of a stand mixer (fitted with the paddle attachment) and cream the mixture together on medium-high speed for 2-3 minutes. Scrape down the sides of the bowl, and add in the eggs & vanilla. Beat the mixture for another 7-8 minutes.
  5. Reduce the mixer speed to low and add in the dry ingredients (flour, milk powder, cream of tartar, baking soda, salt and sprinkles). Mix the dough on low, until it just comes together. Scrape down the sides of the bowl with a spatula, and then carefully mix in the birthday cake crumbs, until they are just barely mixed in. (You want to be careful NOT to overmix this dough.)
  6. Using a large cookie scoop, scoop out the dough onto a parchment or silicone mat lined sheet pan. Gently press the tops of the cookie dough scoops flat. Wrap the sheet pan in plastic wrap, and refrigerate the dough for at least an hour (or up to 1 week). (Note: do not skip this part!)
  7. Preheat the oven to 325 degrees F. Place the chilled cookie dough a minimum or 4 inches apart on a parchment 0r silicone mat lined sheet pan. Bake the cookies for 18 minutes, rotating the pan halfway through baking. The cookies should be lightly browned on the edges of the cookies. Allow the cookies to cool completely on the sheet pan. Enjoy!

Be sure to visit the other bloggers participating in the Valentine’s Day event and check out their recipes!

Brownie Cups from Julie of The Little Kitchen
Valentine’s Day Delight Recipe from Jennifer of The Rebel Chick
Strawberry Cake Rolls from Coleen of The Redhead Baker
Perfect M&M Cookies from Carlee of Cooking With Carlee
Paleo Almond Butter Cookies from Taryn of Hot Pan Kitchen
Black Tahini Truffles from Camilla of Culinary Adventures with Camilla
Pink Glitter Drink fo Valentine’s Day from Jenn of Ever After in the Woods
Vegan Matcha Rose Shortbread from Carolann of Apron Warrior
Star Wars Kylo Ren Emoji Cookies from Jenn of justJENN recipes
Double Chocolate Chip Cookies from Faith of An Edible Mosaic
Andes Mint Cookies from Rebekah of Kitchen Gidget
Chocolate Pots from Kristin of On the Home Front
Red Velvet Cake Mix Cookie Bars from Melissa of Persnickety Plates
Dark Chocolate and Smokey Blue Cheese Gougères from Lisa of Taste Cook Sip
Nutella Cookies from Raquel of Organized Island
Strawberry Sandwich Cookies from Heather of Delicious Not Gorgeous
Mini Chocolate Lava Kiss Cakes from Sue of It’s Okay to Eat the Cupcake
Strawberry Cheesecake Cookies with White Chocolate from Lisa of Blogghetti
Chewy Dark Chocolate Coconut Cookies from Jessica of A Kitchen Addiction
Butterscotch Cookies from Marlynn of Urban Bliss Life
Gluten Free Hot Cocoa Cookies from Elaine of Small Farm Big Life
Cherry and Chocolate Chip Cookie Cutter Cookies from Brenda of Meal Planning Magic
Cherry Cheesecake Bars from Laura of Untwisted Vintage
Grapefruit Gin Spritz from Sarah of Chef Sarah Elizabeth
Gluten Free Peanut Butter Cookies from Brianna of Flippin’ Delicious
chocolate heart cookies from Meaghan of the decorated cookie
Red Velvet Cheesecake Brownies from Gwynn of Swirls of Flavor
Salted Caramel Bars from Marybeth of Baby Savers
Cotton Candy Buttercream Cupcakes from Nina of Crazy for Cookies and More
Valentine’s Day Cookie Cake from Bree of Baked Bree
Red Velvet White Chocolate Chips Cookies from Maria of The Cookware Geek
Valentine’s Blondie Bars from Becca of The Salted Cookie
Confetti Cookies from Amy of The Nifty Foodie
Heart of Gold Chocolate Sprinkle Blossoms from Erin of The Spiffy Cookie
Ancho Chili Brownies from Dee of Martin

Filed Under: Cookies, Desserts

Iced Caramel Latte with Apple Whipped Cream #ad #backtoschooltreats

August 1, 2019 by Amy Leave a Comment

Disclosure: I received product samples from sponsor companies to aid in the creation of the #BacktoSchoolTreats week recipes. All opinions are mine alone.

I am a huge coffee drinker, y’all. If I don’t have my coffee in the mornings, I end up feeling groggy with a dull headache all day. I used to HATE coffee as a teenager – it was bitter, and I never understood the appeal. Then, college happened. Coffee was my everything! One of my indulgences is a caramel latte/macchiato/frappuccino – essentially ANYTHING with coffee + caramel, y’all!

The generous sponsors at Torani sent me their apple syrup + caramel sauce, and I just knew that coffee had to be involved! This recipe is a slight twist on the average iced caramel latte – it has APPLE whipped cream! I was worried about the combination with the coffee, but it works!

Iced Caramel Latte with Apple Whipped Cream
Source: The Nifty Foodie

Ingredients:

For the coffee:

  • 4 oz. strong cold brew coffee
  • 4 oz. milk (whatever kind you would like)
  • 1 tsp. Torani Caramel Sauce, to taste (plus extra for drizzling)

For the topping:

  • 4 oz. heavy whipping cream
  • 1/2 tbsp. powdered sugar
  • 1 tsp. Torani Apple Syrup

Directions:

  1. Using a hand mixer, beat the heavy whipping cream with powdered sugar until soft peaks form. Gently mix in the apple syrup and set aside.
  2. Mix the coffee, milk and caramel sauce (to taste) in a large glass filled with ice. Top with the whipped cream, and drizzle with extra caramel sauce. Enjoy!

Summer is winding down, and we are celebrating with #BacktoSchoolTreats hosted by Terri from Love and Confections and Christie from A Kitchen Hoor’s Adventures. All week-long 30 bloggers will be sharing 100+ fantastic recipes for both parents and kids, with breakfasts, snacks, desserts, and drinks to get you back in the school routine. Thank you sponsors for providing the prize packages. Don’t forget to enter the giveaway below!


Dixie Crystals is giving away a Keurig for BrunchWeek 2019

PRIZE #1 DIXIE CRYSTALS

Dixie Crystals is giving one winner a Keurig K-Select Single-Serve K-Cup Pod Coffee Maker.

Since 1917, Dixie Crystals® has been the South’s choice for high-quality sugar and sweeteners. For generations, Dixie Crystals has been at the heart of family traditions and celebrations. Our pure cane, non-GMO sugar products guarantee that treasured family recipes will turn out right every time. Bake with love and Dixie Crystals.


Sweets & Treats prize package

PRIZE#2 SWEETS & TREATS

Sweets & Treats is giving one winner the Year of Sprinkles that contains holiday mixes, classic sprinkles, and some of their most popular sprinkles.
Sweets & Treats, a party and baking supplies manufacturer and wholesaler, started out of a baking industry need for truly grease-proof cupcake liners. From there, the company expanded into a handful of specialized categories including the latest, Sweet Sprinkles, their one of a kind sprinkles and sprinkle mix line. With hundreds of truly unique products, they are a one stop shop for your next party!
Torani Prize

PRIZE#3 TORANI

Torani is giving one winner a year supply of Torani: 12-750ml glass bottles, flavors will be winner’s choice, plus pumps for each bottle.

We believe in flavor for all and opportunity for all. In the beginning, Rinaldo and Ezilda Torre visited family in Lucca, Italy. They returned home to San Francisco with handwritten recipes, which they used to create authentic flavored syrups. Needless to say, the syrups we’re a hit. A lot has happened since then, but our belief has remained the same: Flavor for All, Opportunity for All. It means that not only are the products we make inclusive and approachable, but so is our success. We believe everything starts with people, and the only way to truly succeed is to succeed together. Today, you can use more than 100 of our naturally flavored syrups, sauces and beverage bases in coffees, sodas, teas, smoothies, cocktails and more.


Taylor & Colledge Prize Package

PRIZE#4 TAYLOR & COLLEDGE

Taylor & Colledge is giving one winner a selection of their gourmet extract pastes, including Organic Vanilla Bean Baking Paste, Lavender Baking Paste, Almond Baking Paste, Coconut Baking Paste, Lemon Baking Paste, and Peppermint Baking Paste.

Taylor & Colledge has been making award winning Vanilla products since 1897. As a family owned business, Taylor & Colledge has always been committed to the fair, ethical and sustainable sourcing of Vanilla. Over the years they have pioneered a number of country specific programs to support growers, their families and to make the vanilla industry more sustainable. They have also taken this knowledge and expertise and applied it to their full range of baking pastes. Whether it’s sourcing the finest peppermint (mentha piperita) to make the best Peppermint Oil, or using only real Almond Milk and Oil of Bitter Almond for their natural Almond Extract Paste, Taylor & Colledge is committed to transform your baking with premium quality pastes, made with only the finest ingredients from around the world.


Flahavan's Oats

PRIZE#5 FLAHAVAN’S

Flahavan’s is giving one winner an oat prize package including a jar for overnight oats and a selection of Rolled Oats, Quick to Cook Oats, and Steel Cut Oats.

Ireland’s oldest family-owned food business is situated at the family mill in the Southeast of Ireland. Flahavan’s can trace its oat milling history back to 1785 and its expertise in producing naturally creamy oatmeal back over 230 years. A seven-generation family business, Flahavan’s is the bestselling oatmeal brand in Ireland, where people eat more oatmeal per capita than anywhere else in the world. Flahavan’s is a founding member of Origin Green, the first-ever national initiative to mandate 100% sustainability for food exports.

a Rafflecopter giveaway

Thank you to #BacktoSchoolTreats Sponsors: Dixie Crystals, Sweets & Treats, Torani, Taylor & Colledge, and Flahavan’s for providing the prizes free of charge. These companies also provided the bloggers with samples and product to use for #BacktoSchoolTreats recipes. All opinions are my own. The #BacktoSchoolTreats giveaway is open to U.S. residents, age 18 & up. All entries for the winner will be checked and verified. By entering you give the right to use your name and likeness. The number of entries received determines the odds of winning.

Five (5) winners will be selected. The prize packages will be sent directly from the giveaway sponsors. Winners have 48 hours to respond once chosen, or they forfeit the prize and alternate winner(s) will be chosen. The #BacktoSchoolTreats Bloggers are not responsible for the fulfillment or delivery of the prize packages. Bloggers hosting this giveaway and their immediate family members in their household cannot enter or win the giveaway. No purchase necessary. Void where prohibited by law. This promotion is in no way sponsored, endorsed or administered by, or associated with Facebook, Instagram, Pinterest, Twitter or any other social channel mentioned in the #BacktoSchoolTreats posts or entry.

Check out these #BacktoSchoolTreats recipes from our Bloggers:

Back to School Breakfasts:
Breakfast Banana Splits from For the Love of Food
Cherry Muffins from Hezzi-D’s Books and Cooks
Overnight Vanilla Oats in Under an Hour from Culinary Adventures with Camilla
Vanilla Bean Pancakes from Kelly Lynn’s Sweets and Treats

Back to School Snacks:
Easy Caramel Apple Slices on a Stick from Jen Around the World
Vanilla Pudding Cups from Home Sweet Homestead

Back to School Desserts:
Almond Shortbread Skillet from A Day in the Life on the Farm
Back to School Confetti Cookie Bars from The Mandatory Mooch
Berries Vanilla Pies from My Sweet Zepol
Birthday Cake Truffles from Karen’s Kitchen Stories
Brown Sugar Milk Tea Popsicles from Simply Healthyish
Cereal Milk Macaron from A Kitchen Hoor’s Adventures
DIY Mini Caramel Apples from Jen Around the World
Funfetti Whoopie Pies from Jolene’s Recipe Journal
Mrs. Field’s Chocolate Chip Cookies from Comfortably Domestic

Back to School Drinks:
Caramel Apple Cider Punch from Love and Confections
Caramel Cold Brew Coffee from The Redhead Baker
Felix Felicis Potion Smoothies from The Spiffy Cookie
Iced Caramel Latte with Apple Whipped Cream from The Nifty Foodie
Iced Caramel Mocha from Tara’s Multicultural Table

Filed Under: Beverages

  • Go to page 1
  • Go to page 2
  • Go to page 3
  • Interim pages omitted …
  • Go to page 85
  • Go to Next Page »

Primary Sidebar

Hey Y’all!

Image Credit: Leslie Pendleton Photography


Hey y’all!

Thanks so much for reading! I’m Amy, and I live in south Louisiana with my husband and our rescue dog. I enjoy sharing my love for cooking, baking, crafts & more! Follow my daily adventures on social media!

Follow my Daily Adventures

  • Email
  • Facebook
  • Instagram
  • Pinterest
  • Twitter

Footer

  • Email
  • Facebook
  • Instagram
  • Pinterest
  • Twitter

Archives

Copyright © 2025 · Foodie Pro Theme by Shay Bocks · Built on the Genesis Framework · Powered by WordPress