• Skip to primary navigation
  • Skip to main content
  • Skip to primary sidebar
  • Skip to footer

The Nifty Foodie

  • Home
  • About
  • Recipes
    • Appetizers
    • Beverages
    • Breads/Muffins
    • Breakfast
    • Canning
    • Desserts
    • Dog Treats
    • Entertaining/Parties
    • Fruit
    • Holiday Recipes
    • Louisiana Cuisine
    • Main Dishes
    • Mexican
    • Nifty Foodie Original
    • Nifty Tricks
    • Project Food Blog
    • Pumpkin
    • Salads
    • Sauces/Dips
    • Side Dishes
    • Skinny
    • Slow Cooker
    • Spices
    • Stews/Soups
    • The Disasters
  • My Weight Loss Journey
    • Races
    • Running
    • Weight Loss Milestones
  • Crafts
  • Contact Me

Cookies

Salted Chocolate Chip Cookies

December 8, 2020 by Amy 2 Comments

I’m not sure how this happened, but it’s time to get started with holiday baking again. Now – I will say, things are a LOT different this year.

For one, the giant annual bake-palooza that I’ve traditionally done is definitely NOT happening this year. With the pandemic, my husband and I are working from home – our jobs are mainly behind a computer, so while I miss the water cooler environment of the office, my day-to-day job tasks really weren’t that impacted. HOWEVER, I have gotten a few hints and nudges to still bake – some coworkers even want to do a curbside pick-up thing. (Huge compliment, for sure!)

The only baking that is FOR SURE happening is for family and neighbors (which I plan on doing via door drops). We have personally kept our safe COVID bubble to just my husband and I since March, and we do not have any plans to change that. Does it still feel like Christmas? Of course not – but we will do what we can to make things as festive as we possibly can.

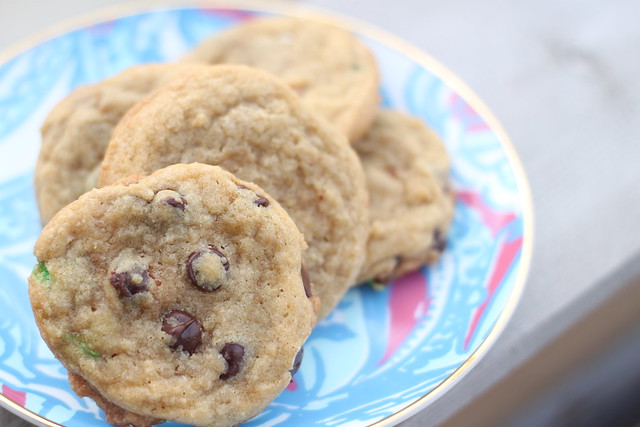
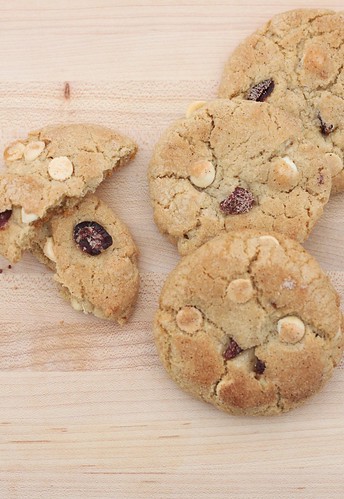
Baking is one of them – and these chocolate chip cookies? While they aren’t festive, they are 100% perfection. I’ve tested multiple chocolate chip cookies, and no other recipe holds a candle to this recipe. It’s perfectly chewy with a butterscotch-y flavor from the brown sugar, and the mix of different chocolate chunks make this cookie an absolute dream. Just promise me you won’t skimp on the dough chill time, ok?

Also, check out the wonderful recipes that other bloggers are sharing for #ChristmasSweetsWeek (below the chocolate chip cookie recipe).

The Best Chocolate Chip Cookies
Source: slightly adapted from For Me, For You

Ingredients:

  • 2 cups minus 2 tbsp. cake flour (8 1/2 oz)
  • 1 2/3 cups bread flour (8 1/2 oz)
  • 1 1/4 tsp. baking soda
  • 1 1/2 tsp. baking powder
  • 1 1/2 tsp. coarse kosher salt
  • 2 1/2 sticks (10 oz.) unsalted butter, softened
  • 1 1/4 cups (10 oz.) light brown sugar
  • 1 cup plus 2 tbsp. (8 oz.) granulated sugar
  • 2 large eggs
  • 2 tsp. vanilla extract
  • 3/4 lb. bittersweet chocolate chips or chunks (about 60% cacao content)
  • 1/2 lb. milk chocolate chips or chunks
  • Sea salt or kosher salt for garnishing (I use Maldon salt)

Directions:

  1. Combine the flours, baking soda, baking powder and salt in a medium-sized bowl. Whisk the ingredients together until well-blended and set aside.
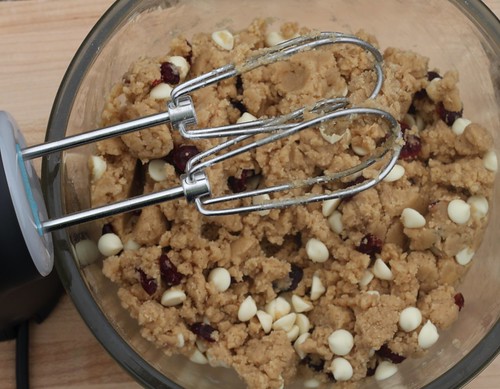
  2. Using a stand mixer fitted with the paddle attachment, cream the butter and sugars together until the mixture is light and fluffy – about 3-5 minutes. Scrape down the bowl, and add in the eggs, one at a time, mixing the dough well after each addition. Add in the vanilla extract, and scrape down the sides of the bowl.
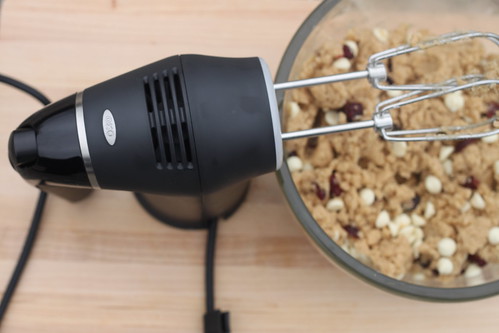
  3. Turn the mixer on low speed, and add in the dry ingredients. Mix the dough together, until JUST combined. Using a spatula or spoon, mix in the chocolate chips, until they are incorporated into the dough.
  4. Press plastic wrap on top of the dough, and refrigerate the dough for 24-36 hours (no more than 72 hours).
  5. When it’s time to bake, remove the bowl of dough from the fridge, and allow the dough to soften slightly. Preheat the oven to 350 degrees F, and prepare a baking sheet by lining it with parchment paper or a silicone baking mat.
  6. Using a large cookie scoop (about 3 oz in size), scoop 6 dough balls onto the baking sheet, making sure to space them out evenly. Sprinkle the tops of the dough with sea salt, and bake the cookies for 15-20 minutes, until the cookies are just turning golden brown. To cool the cookies, place the baking sheet on a wire cooling rack for 10 minutes, and then transfer the cookies to the wire cooling rack to finish cooling. Enjoy!

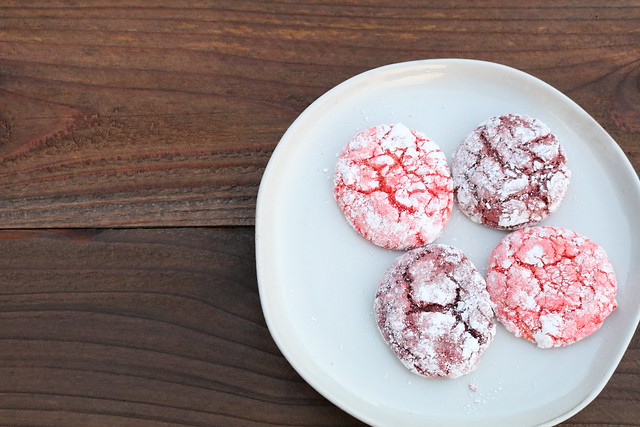
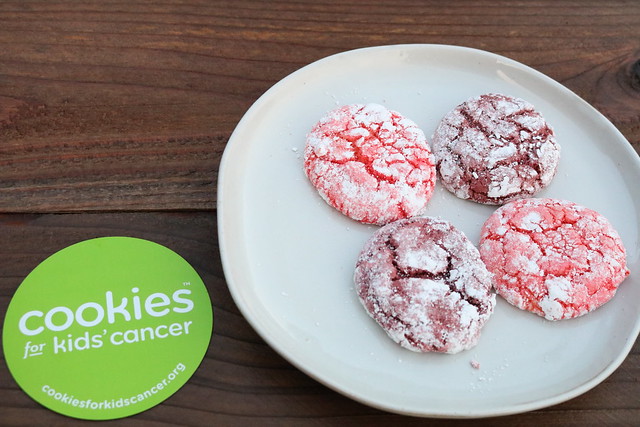
Welcome to #ChristmasSweetsWeek 2020! Co-hosted by Terri from Love and Confections and Christie from A Kitchen Hoor’s Adventures! What better way to celebrate the holidays than with food and fun? 21 bloggers from around the country have come together to share some of their favorite sweet Christmas recipes!! Deck the halls and get ready for very merry sweet treats, like fudge, cookies, Christmas morning breakfasts, layer cakes, cocoa, and more! Follow along on social media with our #ChristmasSweetsWeek hashtag. Happy Holidays!

Enjoy these #ChristmasSweetsWeek recipes from our bloggers:

Breakfast and Baked Goods Recipes
Easy Cranberry Orange Monkey Bread by Love & Confections
Eggnog French Toast by Sweet Beginnings

Candy and Fudge Recipes
Easy Peanut Butter Fudge by House of Nash Eats
Popcorn Three Ways by Christmas Tree Lane

Pastry and Dessert Recipes
Dark Chocolate Graham Crackers by A Kitchen Hoor’s Adventures
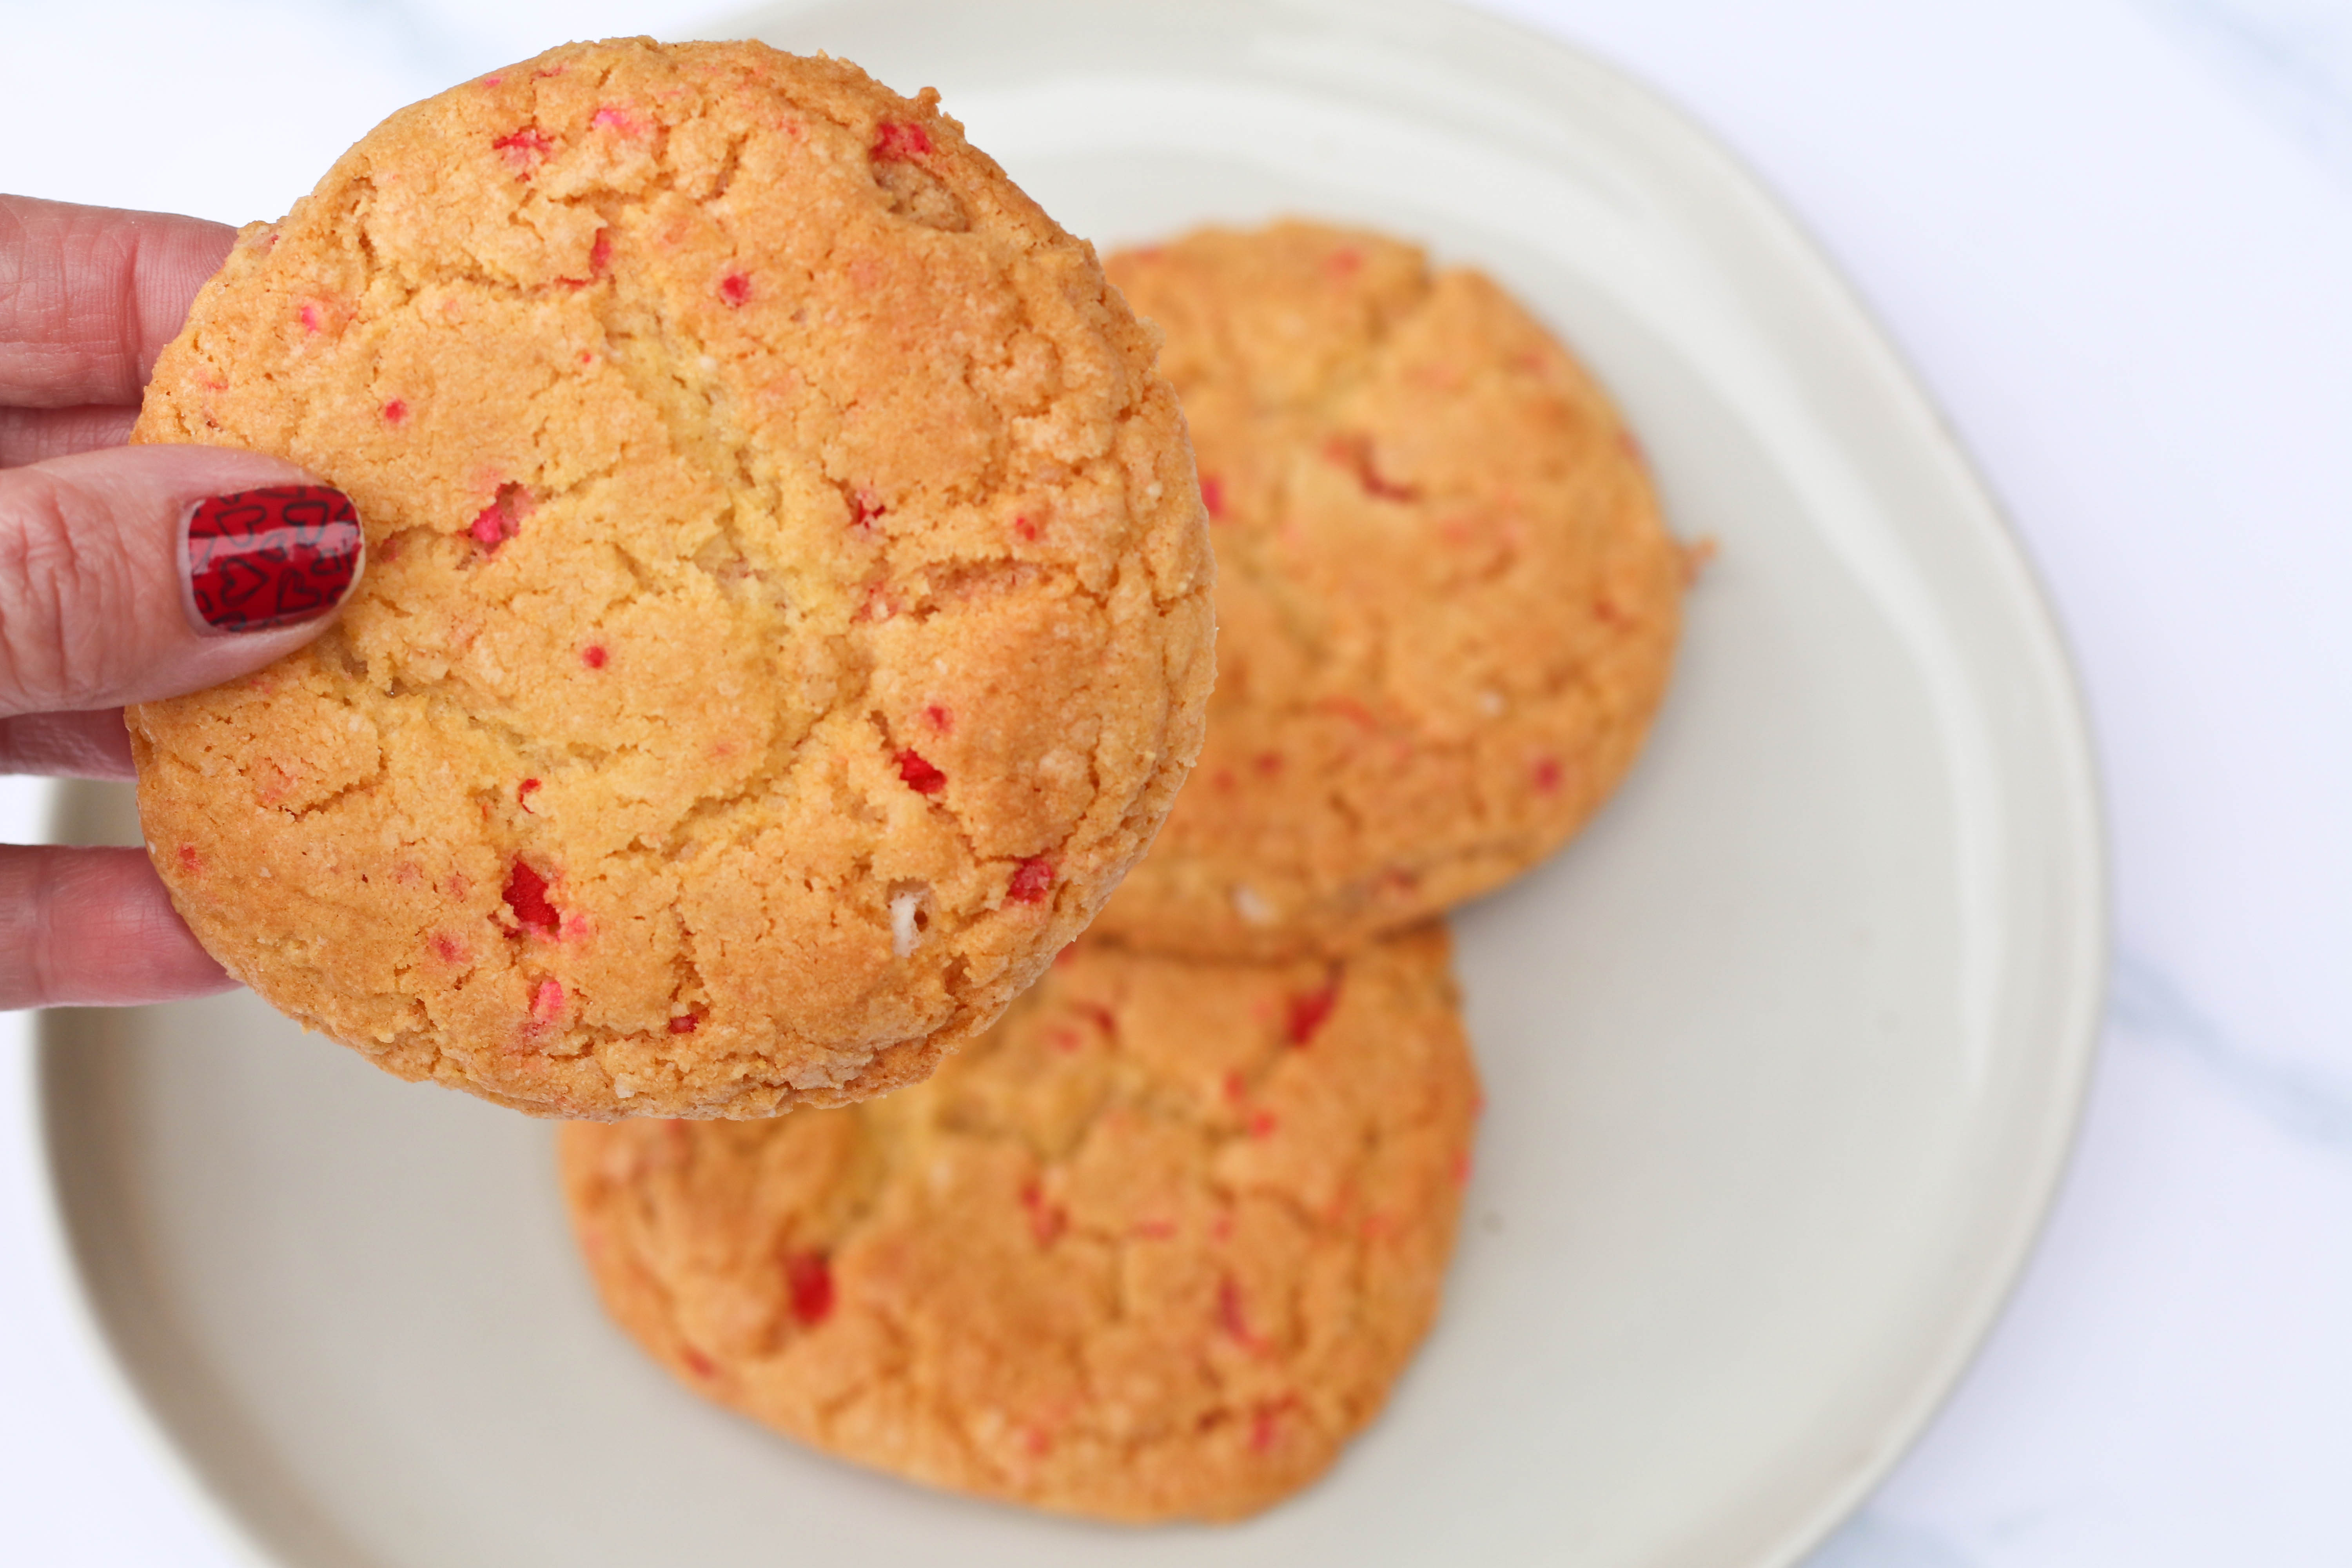
Salted Chocolate Chip Cookies by The Nifty Foodie
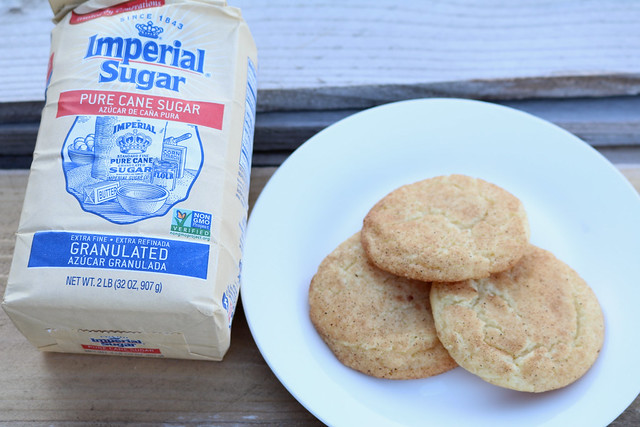
Toffee Chip Cookies by Kathryn’s Kitchen Blog
Gingerbread Cupcakes by Magical Ingredients
Instant Pot Gingerbread Cheesecake by Kate’s Recipe Box

Filed Under: Chocolate, Cookies, Desserts Tagged With: chocolate, cookies, holidays

Confetti Cookies

February 10, 2020 by Amy Leave a Comment

Disclosure: I’m participating in this year’s Cookies for Kid’s Cancer food blogger event. I was not compensated to write this post – I did receive items from this year’s sponsors.

Hi. Hello – it’s good to be writing again! I have so much to share with y’all, but I want to make today’s focus on a charity that I believe in. I’m so excited to participate in this Valentine’s event (again). This is the fourth year for our event, and we want to continue to make a difference in the fight against pediatric cancer.

Cancer is the #1 cause of death of children by disease in the U.S. There are 40,000 U.S. children actively battling cancer right now. The National Cancer Institute’s budget for childhood cancer is less than 4%. It’s such a small number and that’s why I got involved.

Help us make a difference by donating to Cookies for Kids’ Cancer!

Our goal is to raise at least $3000. Because these three companies: OXO, Mediavine and Dixie Crystals have each pledged to match our donations raised through this campaign up to $3000! That means when we raise $1, it turns into $4!

Thank you to so many of you who have already donated, please help us reach our goal so we can get the full matching donations and help us make an even huge difference!

Donate here today.

Since this is a Cookies for Kids’ Cancer event, it would be wrong of me to share this charity with y’all without bringing some freshly baked cookies to the table. These confetti cookies are the BEST version of a sugar cookie that I have ever had – and that’s saying a lot (since I declared these sugar cookies to be the best ever previously). No – these cookies beat it!

A crispy exterior and a perfectly chewy interior – and the sugar cookie/vanilla flavor? OMG. Yes, please! This recipe is from the Momofoku Milk Bar cookbook – I mildly adapted it, based on experience I’ve had with cookies in this particular cookbook. I’m not sure if it’s my oven or my kitchen scale, but the three cookie recipes that I’ve made from this book (with zero changes) either burn at the edges or spread into a pancake. The flavor is there – but something almost always goes wrong! This time, though? Perfection!

Confetti Cookies
Source: mildly adapted from Momofoku Milk Bar cookbook

Ingredients:

For the Birthday Cake Crumb:

  • 1/2 cup granulated sugar
  • 1 1/2 tbsp. light brown sugar, lightly packed
  • 3/4 cup cake flour
  • 1/2 tsp. baking powder
  • 1/2 tsp. kosher salt
  • 2 tbsp. rainbow sprinkles
  • 1/4 cup grapeseed oil
  • 1 tbsp. clear vanilla extract

For the Cookies:

  • 16 tbsp. (2 sticks) butter, at room temperature
  • 1 1/2 cups granulated sugar
  • 1 tbsp. corn syrup
  • 2 eggs
  • 2 tsp. clear vanilla extract
  • 2 1/2 cups + 1 tbsp. all-purpose flour
  • 2/3 cup milk powder
  • 2 tsp. cream of tartar
  • 1 tsp. baking soda
  • 1 1/4 tsp. kosher salt
  • 1/4 cup rainbow sprinkles
  • 1/2 recipe Birthday Cake Crumb

Directions:

  1. To make the birthday cake crumb, preheat the oven to 300 degrees F.
  2. Combine the dry ingredients (granulated sugar, brown sugar, cake flour, baking powder, salt, and sprinkles) in a medium-sized mixing bowl and mix together until everything is well-blended. Add the oil and vanilla extract to the bowl, and mix the ingredients together until the mixture resembles small clusters.
  3. Spread the mixture on a parchment-paper or silicone mat lined sheet pan, and bake the mixture for 20 minutes (breaking the mixture up occasionally). The mixture should still be slightly moist to the touch, but as the crumbs cool down, they will dry and harden. Allow the crumbs to fully cool before using these in the cookie recipe. (I made these the day before I made the cookies – I find that it helps to break up this recipe into sections.)
  4. To make the cookies, combine the butter, sugar and corn syrup in the bowl of a stand mixer (fitted with the paddle attachment) and cream the mixture together on medium-high speed for 2-3 minutes. Scrape down the sides of the bowl, and add in the eggs & vanilla. Beat the mixture for another 7-8 minutes.
  5. Reduce the mixer speed to low and add in the dry ingredients (flour, milk powder, cream of tartar, baking soda, salt and sprinkles). Mix the dough on low, until it just comes together. Scrape down the sides of the bowl with a spatula, and then carefully mix in the birthday cake crumbs, until they are just barely mixed in. (You want to be careful NOT to overmix this dough.)
  6. Using a large cookie scoop, scoop out the dough onto a parchment or silicone mat lined sheet pan. Gently press the tops of the cookie dough scoops flat. Wrap the sheet pan in plastic wrap, and refrigerate the dough for at least an hour (or up to 1 week). (Note: do not skip this part!)
  7. Preheat the oven to 325 degrees F. Place the chilled cookie dough a minimum or 4 inches apart on a parchment 0r silicone mat lined sheet pan. Bake the cookies for 18 minutes, rotating the pan halfway through baking. The cookies should be lightly browned on the edges of the cookies. Allow the cookies to cool completely on the sheet pan. Enjoy!

Be sure to visit the other bloggers participating in the Valentine’s Day event and check out their recipes!

Brownie Cups from Julie of The Little Kitchen
Valentine’s Day Delight Recipe from Jennifer of The Rebel Chick
Strawberry Cake Rolls from Coleen of The Redhead Baker
Perfect M&M Cookies from Carlee of Cooking With Carlee
Paleo Almond Butter Cookies from Taryn of Hot Pan Kitchen
Black Tahini Truffles from Camilla of Culinary Adventures with Camilla
Pink Glitter Drink fo Valentine’s Day from Jenn of Ever After in the Woods
Vegan Matcha Rose Shortbread from Carolann of Apron Warrior
Star Wars Kylo Ren Emoji Cookies from Jenn of justJENN recipes
Double Chocolate Chip Cookies from Faith of An Edible Mosaic
Andes Mint Cookies from Rebekah of Kitchen Gidget
Chocolate Pots from Kristin of On the Home Front
Red Velvet Cake Mix Cookie Bars from Melissa of Persnickety Plates
Dark Chocolate and Smokey Blue Cheese Gougères from Lisa of Taste Cook Sip
Nutella Cookies from Raquel of Organized Island
Strawberry Sandwich Cookies from Heather of Delicious Not Gorgeous
Mini Chocolate Lava Kiss Cakes from Sue of It’s Okay to Eat the Cupcake
Strawberry Cheesecake Cookies with White Chocolate from Lisa of Blogghetti
Chewy Dark Chocolate Coconut Cookies from Jessica of A Kitchen Addiction
Butterscotch Cookies from Marlynn of Urban Bliss Life
Gluten Free Hot Cocoa Cookies from Elaine of Small Farm Big Life
Cherry and Chocolate Chip Cookie Cutter Cookies from Brenda of Meal Planning Magic
Cherry Cheesecake Bars from Laura of Untwisted Vintage
Grapefruit Gin Spritz from Sarah of Chef Sarah Elizabeth
Gluten Free Peanut Butter Cookies from Brianna of Flippin’ Delicious
chocolate heart cookies from Meaghan of the decorated cookie
Red Velvet Cheesecake Brownies from Gwynn of Swirls of Flavor
Salted Caramel Bars from Marybeth of Baby Savers
Cotton Candy Buttercream Cupcakes from Nina of Crazy for Cookies and More
Valentine’s Day Cookie Cake from Bree of Baked Bree
Red Velvet White Chocolate Chips Cookies from Maria of The Cookware Geek
Valentine’s Blondie Bars from Becca of The Salted Cookie
Confetti Cookies from Amy of The Nifty Foodie
Heart of Gold Chocolate Sprinkle Blossoms from Erin of The Spiffy Cookie
Ancho Chili Brownies from Dee of Martin

Filed Under: Cookies, Desserts

Easy Crinkle Cookies

February 8, 2018 by Amy 28 Comments

IMG_1351

Disclosure: This post benefits the amazing organization, Cookies for Kids’ Cancer. I personally donated to the cause, and I am also writing this blog post in exchange for a charitable donation from our generous sponsors!

Happy February, y’all!

I feel like I’ve been constantly telling you guys that life is crazy, and well..it still is. Ha!

January just flew by…I’ve had a big life change happening (which I’ll eventually share), but I need time to slow down! Like, seriously…SLOW DOWN, TIME (please?).

We’re in February though, which is super fun. Not only is it Valentine’s Day, but being in south Louisiana, we also celebrate Mardi Gras! So many fun, festive events to enjoy with family and friends. 🙂

To make things a little more festive on the blog, I wanted to share these easy crinkle cookies with y’all (in fun Valentine’s Day colors). All you need is a box of cake mix (of your choice) and four other ingredients! That’s it! I have quite a few friends and family members who just don’t like baking from scratch, and if you’re in that number, this recipe is for you! It’s easy and pretty darn impressive!

IMG_1353

Easy Crinkle Cookies
Source: mildly adapted from Betty Crocker

Ingredients:

  • 1 box cake mix (of your choice – I used yellow)
  • 2 large eggs
  • 1/3 cup canola oil
  • 1/4 tsp. almond extract
  • 1/2 cup confectioners sugar
  • food coloring (optional)

Directions:

  1. Preheat your oven to 375 degrees F. Line a baking pan with a silicone baking mat or parchment paper.
  2. In a large bowl, mix the cake mix, eggs, oil and extract together until a dough forms. Place the confectioners sugar in a separate bowl. Scoop cookies using a medium scoop, coat them in the confectioners sugar (lightly tapping off the excess sugar), and place them on the lined baking pan 2 inches apart.
  3. Bake the cookies for 9-11 minutes, until the tops of the cookies are crackly and dry on top.
  4. Cool the cookies in the cookie sheet for about 10-15 minutes, and then move them to a cooling rack.
  5. Enjoy!

I’m writing this blog post to also let you guys know about an amazing cause: Cookies for Kids’ Cancer. I’ve blogged about this wonderful cause a few times on my blog, and I truly love what they are doing. They’re bringing awareness “one good cookie at a time”.

This is the second year for our Valentine’s event! We want to make a difference in the fight against pediatric cancer!

Did you know that cancer is the #1 cause of death of children by disease in the U.S.? There are 40,000 U.S. children actively battling cancer right now. With less than 4% of the National Cancer Institute’s budget going to all childhood cancer combined, I knew it was important for me to get involved.

Help us make a difference by donating to Cookies for Kids’ Cancer! Our goal is to raise at least $3000. Because these three companies: Dixie Crystals, Mediavine and OXO have each pledged to match our donations raised through this campaign up to $3000!!!

Thanks to many of you, we have reached our goal. You can still donate and help us make an even bigger difference! <3

Donate here.

Also, please take some time to check out some of these great recipes from fellow bloggers participating in this campaign!

Yellow Heart-Shaped Rainbow Funfetti Cookies from Julie of The Little Kitchen
Peanut Butter Cookie Cake from Julie of Julie Blanner
Cherry Coconut Macaroons from Miranda of Cookie Dough and Oven Mitt
Brownie Cookies from Mel of Mel’s Kitchen Cafe
No-Bake Chocolate Candy Cookies from Debi of Life Currents
Double Dark Chocolate Chery Black Forest Cookies from Jamie of Southern Revivals
White Chocolate Valentine Madeleine Cookies from Marlynn of Urban Bliss Life
Pillowy Soft Sugar Cookies from Stephie of Stephie Cooks
Steak with Peppercorn Sauce from Sonja of Ginger & Toasted Sesame
Creamy Beet Risotto from Rachel of Copper & Verdigris
Valentine’s Day Chocolate Sugar Cookies from Denise of Chez Us
Red Velvet Donuts from Gwynn of Swirls of Flavor
Brown Butter Panbanging Cookies from Marybeth of babysavers
Gluten-Free Chocolate Kiss Cookies from Audrey of Mama Knows Gluten Free
Gluten-Free Red Velvet Crinkle Cookies from Brianna of Flippin’ Delicious
Rose Meringue Cookies from Kirsten of Comfortably Domestic
Raspberry Chipotle Chicken Curry from Shashi of Savory Spin
Double Chocolate Meringue Cookies from Dee of Meatloaf and Melodrama
Food Bloggers’ Valentine’s Event from Sarah of Sarah Cooks the Books
Cream Wafer Cookies from Kelly of Live Laugh Rowe
White Chocolate and Raspberry Cookies from Wanda of My Sweet Zepol
Raspberry Fudge Cookies from Jessica of A Kitchen Addiction
Raspberry Cookies from Courtney of Know Your Produce
Syltkakor Raspberry Jam Cookies from Megan of Stetted
No-Bake Chocolate Tart from Rachel of Rachel Cooks
Heart-Shaped Chocolate Chip Cookies from Angela of About a Mom
Mexican Hot Chocolate Cookies from Lisa of TasteCookSip
Chai Latte Shortbread Hearts from Sue of It’s Okay to Eat the Cupcake
Soft and Sweet Sugar Cookie Bars from Carlee of Cooking With Carlee
Strawberry and Cream Cookies from Ashley of A Cup of Charming
Cherry Cream Cheese Cookies from Lisa of Blogghetti
Galete Waffle Cookies from Shaina of Food for My Family
Almond Shortbread Cookies from Denise of addicted 2 recipes
Easy Strawberry Fudge from Chrysa of Thrifty Jinxy
Valentine’s Day Mug Hug Cookies from Aimee of Southern From Scratch
Doughnut Sandwich Cookies from Bree of Baked Bree
Chocolate Nutella Cookies from Melissa of Modern Honey
Easy Crinkle Cookies from Amy of The Nifty Foodie
Chocolate Sugar Cookies from Becca of The Salted Cookie
Love Cake from Sara of Confectionary Tales

Filed Under: Cookies, Desserts

Snickerdoodles

November 7, 2017 by Amy 10 Comments

Disclosure: This post is sponsored by Imperial Sugar, as a part of #GiveAFriendACookie campaign.

IMG_1313

I can’t believe we are a month away from the holiday season! This is the time of the year where I start to finalize my ideas for my huge bake-palooza that happens every December, so I’m always up for trying new cookie recipes. 🙂

Now I know it’s not exactly the holidays yet, but I find that sharing something homemade with someone you care about is one of the best gifts. I feel like baked goodies can easily bring a smile to someone’s face. Since it’s been a tough year all around this country (and the world), a small gesture (like baked goodies for a neighbor) can mean so much! If you love to bake for others around the holidays, why not surprise someone you care about with a dish full of cookies this week? No one will be expecting it, but I’m 99.9% sure the gesture would be well-received! <3

For me, I decided to bake these snickerdoodles for my neighbors and coworkers. A simple, classic cookie that is a favorite of mine. 🙂 This is the first time I’ve ever made this recipe, but it’s from my favorite baking book, so I knew this wouldn’t let me down!

Look at all of these amazing cookies from other bloggers participating in #GiveAFriendACookie:

Snickerdoodles from The Nifty Foodie
Fall Flower Cookies from The Decorated Cookie
Peanut Butter Cookies from The Bearfoot Baker
Spiced Chocolate Chip Cookie Bars from Baked Bree
Apple Pie Wedge Cookies from Munchkin Munchies
Peppermint Crunch Sugar Cookies from The Domestic Rebel
Pecan Chocolate Fudge Chunk Cookies from Country Cleaver
Everything Cookies from Confessions of a Cookbook Queen
Chocolate Chip Cookies from LilaLoa
Lemon Cardamom Crinkle Cookies from Fifteen Spatulas
Apple Cinnamon Cookies from Dine and Dish
Triple Chocolate Peanut Butter Cookies with Sea Salt from A Farmgirl’s Dabbles
Fall Wreath Sugar Cookie from Tikkido
Homemade Oatmeal Cream Pie Cookies from A Southern Fairytale
Chocolate Turtle Cookies from Bake at 350

For nearly 175 years, Imperial Sugar has been helping people communicate thanks, appreciation, love, and sympathy through home-baked treats. At the heart of baking for others is the very act of giving, and Imperial Sugar encourages everyone to bake and share, both in times of celebration and in times of crisis. Together we can make someone’s day just a little bit sweeter. If you are looking for cookie inspiration, visit the Imperial Sugar website for 350+ time-tested cookie recipes.

For nearly 175 years, Imperial Sugar has been helping people communicate thanks, appreciation, love, and sympathy through home-baked treats. At the heart of baking for others is the very act of giving, and Imperial Sugar encourages everyone to bake and share, both in times of celebration and in times of crisis. Together we can make someone’s day just a little bit sweeter. If you are looking for cookie inspiration, visit the Imperial Sugar website for 350+ time-tested cookie recipes.

Snickerdoodles
Source: Cooks Illustrated

Ingredients:

  • 1 1/2 cups granulated sugar, plus 1/4 cup for rolling
  • 1 tbsp. ground cinnamon
  • 2 1/2 cups all-purpose flour
  • 2 tsp. cream of tartar
  • 1 tsp. baking soda
  • 1/2 tsp. salt
  • 8 tbsp. unsalted butter, softened
  • 8 tbsp. vegetable shortening
  • 2 large eggs

Directions:

  1. Place the oven rack on the middle rack, and preheat the oven to 375 degrees F. Prepare 2 cookie sheets by lining them with either parchment paper or a reusable silicone liner.
  2. Prepare the rolling mixture by combining 1/4 of the granulated sugar with the cinnamon in a shallow dish and mix well with a fork or spoon.
  3. In a medium-sized bowl, whisk together the flour, cream of tartar, baking soda, and salt. Set aside.
  4. In the bowl of a stand mixer, mix the butter, shortening and remaining 1 1/2 cups of granulated sugar on medium speed until light and fluffy, for about 3-6 minutes. Mix in the eggs, one at a time, for about 30 seconds (or until incorporated). Scrape down the bowl.
  5. With the mixer on low speed, slowly add in the flour mixture and mix until just combined. Turn off the mixer, and give the dough a final stir to make sure no flour pockets remain in the dough.
  6. Using a medium-sized cookie scoop, scoop the dough out and roll them into balls. Roll half of the dough ball in the cinnamon sugar mixture, and place the non-cinnamon side down on the prepared cookie sheets. Place cookie dough balls 2 inches apart on your cookie sheets.
  7. Bake your cookies one sheet at a time in the oven, until the edges of the cookies are set and are barely beginning to brown (with the centers still looking soft/puffy), about 10-12 minutes, rotating the cookie sheet halfway through the baking time.
  8. Allow the cookies to cool on the cookie sheet for about 10 minutes, and then transfer them to a cooling rack to finish cooling. Once they are completely cooled, enjoy!

Filed Under: Cookies, Desserts

Thick and Chewy Chocolate Chip Cookies

February 16, 2017 by Amy 3 Comments

Thick & Chewy CC Cookies

A while back, I realized that quite a few of my recipes lost their pictures when my previous website hosting company lost a bunch of my photos. I’m making it a mini goal of mine to update the pictures. I’m going to try my hardest not to edit the original wording on the posts (so you may see fiance in there…we’ve been married for almost 8 years now haha!).

I do have to admit that this recipe is STILL my go-to recipe years later, and I’ve passed it to many friends as well. 🙂 Give this recipe a try, if you’re looking for a classic chocolate chip cookie recipe. I sometimes add in M&Ms to add something extra to these cookies (pictured above).

————

I’ve read a lot of great reviews about this recipe for Chocolate Chip cookies. The only reason I made these (since they are SO not diet friendly) is because our over-generous neighbors were landscaping at the same time as my fiance and I. They gave us ALL of their leftover top soil (which was more than what we needed.we didn’t even have to open any bags that we purchased at Lowe’s). So, my fiance suggested that I bake them something. Any excuse to bake works for me! AND it felt good not to use applesauce haha!

Thick and Chewy Chocolate Chip Cookies
Source: Brown Eyed Baker from Baking Illustrated

Makes about 18 large cookies.

Ingredients:

  • 2 cups plus 2 tablespoons (10 5/8 ounces) unbleached all-purpose flour
  • 1/2 teaspoon baking soda
  • 1/2 teaspoon salt
  • 12 tablespoons (1 1/2 sticks) unsalted butter, melted and cooled until warm
  • 1 cup packed (7 ounces) light or dark brown sugar
  • 1/2 cup (3 1/2 ounces) granulated sugar
  • 1 large egg plus 1 egg yolk
  • 2 teaspoons vanilla extract
  • 1-1 1/2 cups semisweet chocolate chips (I used milk chocolate chips)

Directions:

  1. Adjust the oven racks to the upper- and lower-middle positions and heat the oven to 325 degrees. Line 2 large baking sheets with parchment paper or spray them with nonstick cooking spray.
  2. Whisk the flour, baking soda, and salt together in a medium bowl; set aside.
  3. Either by hand or with an electric mixer, mix the butter and sugars until thoroughly blended. Beat in the egg, yolk, and vanilla until combined. Add the dry ingredients and beat at low speed just until combined. Stir in the chips to taste.
  4.  Roll a scant 1/4 cup of the dough into a ball. Hold the dough ball with the fingertips of both hands and pull into 2 equal halves. Rotate the halves 90 degrees and, with jagged surfaces facing up, join the halves together at their base, again forming a single ball, being careful not to smooth the dough’s uneven surface. Place the formed dough balls on the prepared baking sheets, jagged surface up, spacing them 2 1/2 inches apart.
  5. Bake until the cookies are light golden grown and the outer edges start to harden yet the centers are still soft and puffy, 15 to 18 minutes, rotating the baking sheets front to back and top to bottom halfway through the baking time. Cool the cookies on the sheets. Remove the cooled cookies from the baking sheets with a side metal spatula.

I will admit, these are some crazy procedures on this recipe (jagged edges on top, what?). However, follow them to the T! The cookies will come out a little gooey, but if you leave them on the baking sheet, they will finish baking into a perfect cookie! The jagged edges do bake into a neat looking top as well.

Filed Under: Chocolate, Cookies

Thick & Chewy Double Chocolate M&M Cookies

November 15, 2016 by Amy Leave a Comment

Double Chocolate Cookies

A couple of weeks ago, I had the itch to bake. Life has been a bit crazy since the flood happened out here, but when work brought up that there was going to be a Halloween potluck, I just needed to bake SOMETHING.

Baking is one of those things that just makes me stop thinking about the other stressors in life. When it comes to baking, I just need to follow a recipe…no other thoughts required. 🙂 Also, the end product is usually something delicious.

I was flipping through my Cook’s Illustrated Baking Book, and this recipe just stood out to me. It calls for one full pound of chocolate, which to me, is always a winner. I just happened to have one of those pound bars of Trader Joe’s chocolate, so I think it was fate. These cookies had to happen. 🙂 In this recipe, there’s the option to make them triple chocolate, by mixing in chocolate chips, but I decided to add in some M&M candies instead.

These cookies were almost like fudge-y brownies in cookie form. They were soft/chewy and super rich, which always makes for a good cookie! You definitely need a glass of milk with a cookie like this, and I really couldn’t eat more than one. It is jam-packed with chocolate! I imagine these are going to be added to my holiday baking list, since they were such a hit with coworkers. How festive would these be with holiday M&Ms?

Thick & Chewy Double Chocolate M&M Cookies
Source: Cook’s Illustrated

Ingredients:

  • 2 cups unbleached all-purpose flour
  • ½ cup Dutch-processed cocoa powder
  • 2 tsp. baking powder
  • 1 tsp. table salt
  • 16 oz. semisweet chocolate, chopped
  • 4 large eggs
  • 2 tsp. vanilla extract
  • 2 tsp. instant coffee or espresso powder
  • 10 tbsp. unsalted butter (1 ¼ sticks), softened but still firm
  • 1 ½ cups light brown sugar
  • ½ cup granulated sugar
  • 1 cup M&M candies

Directions:

  1. Melt the semisweet chocolate in the microwave, by heating the chopped chocolate at 50% power for 2 minutes. Then, stir the chocolate, and heat the chocolate again at 50% power for 1 minute. Stir again, and if it isn’t melted, heat the chocolate for an additional 30-45 seconds at 50% power. Allow to cool, while completing the next steps.
  2. Sift the flour, cocoa powder, baking powder and salt in a medium bowl and set the dry mixture aside. Place the eggs and vanilla extract in a small bowl and beat the mixture lightly with a fork. Sprinkle the espresso/coffee powder over the egg/vanilla mixture and set it aside.
  3. In the bowl of a stand mixer fitted with a paddle attachment, beat the butter at medium speed for about 5 seconds, until smooth and creamy. Mix in the light brown and granulated sugars on medium speed until combined, for about 45 seconds (the mixture will look granular). Reduce the speed of the mixer to low and gradually add in the egg mixture, beating for about 40 seconds (or until incorporated). Turn off the mixer, and scrape the bottom and sides of the mixer bowl with a rubber spatula. Putting the mixer back on low speed, add in the melted chocolate in a steady stream and beat for another 40 seconds (or until combined). Turn off the mixer, and scrape the bottom and sides of the mixer bowl with a rubber spatula once again.
  4. With the mixer on low speed again, add in the dry flour mixture and mix the dough for another 40 seconds (or until combined). Be careful not to overbeat the dough. Carefully fold in the M&M candies. Cover the dough with plastic wrap, and allow it to stand at room temperature until the dough appears to be scoopable and fudge-like (about half an hour).
  5. While the dough is resting, adjust the oven racks to the upper-middle and lower-middle positions. Then, preheat the oven to 350 degrees F. Prepare 2 cookie sheets by lining them with parchment paper or a silicone baking mat.
  6. Once the dough is ready, scoop the dough using a 1 3/4 inch diameter ice cream scoop and place each dough ball on a cookie sheet, being sure to leave about 1 1/2 inches between each dough ball.
  7. Bake the cookies until the edges have begun to set, but the centers of the cookies are still very soft (about 10 minutes), being sure to turn the cookie sheets from front to back and switching from the top rack to the bottom rack about halfway into baking the cookies.
  8. Remove the cookie sheets from the oven, and allow the cookies to cool on the cookie sheets for about 10 minutes. Transfer the cookies to the cooling sheets, and allow the cookies to finish cooling until they reach room temperature. Enjoy!

Filed Under: Candy, Chocolate, Cookies

Coconut Oatmeal Cookies with Caramel Drizzle

April 21, 2016 by Amy Leave a Comment

Disclosure: I was sent this cookbook at no cost to me for a fair and honest review. All opinions are 100% my own.

Coconut Oatmeal Cookies with Caramel Drizzle

A few years ago, I went to IFBC when it was held in New Orleans. It was my first blog conference, and I had no idea what to expect. I gained so much from that conference, from inspiring sessions to meeting wonderful bloggers like Andie. Andie stood out to me, because her weight-loss journey inspired me, and after meeting her, I can’t even begin to describe how awesome she is. When I introduced myself (in probably the most dorky way possible), she was just so sweet and genuine. She’s just such a wonderful person, and her positivity is contagious.

If you haven’t read her blog before, I urge you to take a minute (or a few hours haha) to check it out. She’s a fantastic writer with an inspiring story. Her memoir, It Was Me All Along, was the first book that I read in a long time, and I couldn’t put it down. In fact, I read her memoir again recently to inspire me on the start of my weight loss journey.

When Andie announced that she was writing a cookbook, I knew it would be perfect for someone like me. Her book, Eating in the Middle, features the perfect combination of recipes for enjoying a healthier life without sacrificing the foods that most people crave (in moderation, of course). From Greek Yogurt Pancakes to Jerk Shrimp Salad with Mango & Avocado to these lovely cookies, there’s a huge variety of recipes in this book! If you have yet to read her memoir, I feel like this book is beyond recipes…she relates her recipes to different aspects of her life and experiences that make you feel like old friends. 🙂 Also, the photography is just drop-dead gorgeous. Because of Andie’s book, we’re going to have several new dinner ideas to try.

Eating in the Middle Cover
Source: Andie Mitchell

Now, these cookies. When I was flipping through the book, of course the dessert section grabbed my attention. These cookies have a little bit of everything delicious in it…sweetened coconut, oatmeal, walnuts, chocolate chips, and of course…caramel! When I brought these to share them with my coworkers, I was shocked that all 36 cookies (ok, 35…quality control haha!) disappeared. 🙂 I even had a couple of emails asking for the recipe (well here it is, y’all)! These were a home-run, Andie! I can’t wait to try other recipes in the book. 🙂

Coconut Oatmeal Cookies with Caramel Drizzle


Coconut Oatmeal Cookies with Caramel Drizzle
Source: Eating in the Middle

Ingredients:

For the cookies:

  • 1 1/4  cups all-purpose flour
  • 3/4 tsp. baking powder
  • 1/2 tsp. baking soda
  • 1/2 tsp. salt
  • 2 cups old-fashioned rolled oats
  • 1 cup unsalted walnuts, toasted and chopped
  • 1 cup sweetened shredded coconut
  • 3/4 cup semisweet chocolate chips
  • 10 tbsp. (1 1/4 sticks) unsalted butter, at room temperature
  • 1 1/4 cups packed dark brown sugar
  • 1 large egg
  • 2 tsp. pure vanilla extract

For the drizzle:

  • 12 soft caramels, unwrapped
  • 2 tbsp. heavy cream

Directions:

  1. Preheat the oven to 350 degrees F, and line 2 large baking sheets with parchment paper or a silicone mat.
  2. Add the flour, baking powder, baking soda and salt to a medium-sized bowl and whisk until combined.
  3. In another medium-sized bowl, stir together the oats, walnuts, coconut and chocolate chips.
  4. In the bowl of a stand mixer fitted with the paddle attachment, mix together the butter and dark brown sugar on medium-high speed for about 3 minutes, until whipped and smooth. Scrape the bowl, and add in the egg and vanilla. Mix for about a minute, until combined.
  5. Change the speed on the mixer to low, and gradually add the flour mixture, beating until the dough is just combined. Using a spatula or wooden spoon, add in the oats mixture and stir until just combined, being mindful not to overmix.
  6. Using a medium cookie scoop (or 2 tbsp.), scoop out the dough and place the dough balls 2 inches apart on the baking sheet. Using your hands or the bottom of a glass, gently flatten the dough balls.
  7. Bake the cookies, rotating the baking sheets halfway (front to back and top to bottom) until the edges of the cookies are crisp, the cookies are a golden color, and the centers are still soft and underdone (about 13-15 minutes). Allow the cookies to cool completely on the baking sheets before transferring the cookies to a wire cooling rack.
  8. Once the cookies have completely cooled, prepare the caramel drizzle. In a small microwave-safe bowl, add the caramels and heavy cream. Microwave the mixture on high, stirring every 30 seconds, until the caramels have melted and the mixture is smooth (about 1-2 minutes). Drizzle the caramel over the cookies, and allow the caramel to cool completely until the caramel is set. Enjoy!

Filed Under: Chocolate, Cookies, Desserts, Review

Spiced Cranberry White Chocolate Cookies

December 4, 2015 by Amy Leave a Comment

Disclosure: OXO sent me an illuminating hand mixer, in exchange for a fair and honest review. All opinions are 100% my own.

Spiced Cranberry White Chocolate Cookies

Today, I went to our local party/baking supply store to stock up on holiday gift packaging. I honestly can’t believe it’s December. I know I say that a lot, but the whole house building process has just thrown me off, time-wise. My life is measured by the house countdown, because well…I’m pretty darn excited about it!

This year, I’m not going to do my usual bake-palooza. Since we live with relatives while the house is being built, I just don’t feel right taking over their entire kitchen for a full weekend (which is what I usually do). I’m going to scale back and make some candy (fudge, caramels), as well as these cookies.

Spiced Cranberry White Chocolate Cookie

I love the combination of dried cranberries with white chocolate. The chewy, tart berries, combined with sweet white chocolate works so well together, and to top these cookies off, I rolled part of the dough in a cinnamon/sugar combination to add a little crunchiness to the cookies. When I brought these to work, I kept getting compliments on how great they tasted, which made me think that I definitely have to make these again for holiday gifts. 🙂

To make these cookies, I put away the stand mixer and used OXO’s Illuminating Digital Hand Mixer.

Spiced Cranberry White Chocolate Cookies

While I love using my stand mixer for baking, this hand mixer is pretty awesome. It worked like a dream when I was mixing this cookie dough, and the illuminating feature is something I would have never thought was handy until I used it. I also love the digital control….it’s a simple up or down button to change the speed of the mixer. OXO also took care to make sure that storage was a cinch. The cord wraps around the unit, and there’s a special cap for you to snap the beaters into. It just goes neatly into the cabinet, which is a nice added touch (at least it is to me). I’m definitely going to use this hand mixer more often, especially for quicker baking recipes like this one!

Spiced Cranberry White Chocolate Cookies
Source: an original

Ingredients:

  • 2 1/4 cup all-purpose flour
  • 3/4 tsp. baking soda
  • 3/4 tsp. salt
  • 1/2 tsp. cinnamon
  • 12 tbsp. (1 1/2 sticks) unsalted butter, melted and cooled
  • 3/4 cup light brown sugar, lightly packed
  • 3/4 cup granulated sugar
  • 1 large egg + 1 large egg yolk
  • 2 tsp. vanilla extract
  • 1/2 cup white chocolate chips
  • 1/2 cup dried cranberries

For rolling:

  • 1/4 cup granulated sugar
  • 1 1/2 tsp. cinnamon

Directions:

  1. Preheat the oven to 325°F.
  2. Whisk the flour, baking soda, salt and cinnamon together in a medium-sized bowl.
  3. Using a mixer in a large bowl, mix the butter and sugars together until well-mixed. Beat in the egg/egg yolk and vanilla extract until well-mixed.
  4. Add the dry ingredients to the wet ingredients, and mix on low until just combined. Using a spoon or spatula, mix in the white chocolate chips and dried cranberries.
  5. Mix together the granulated sugar and cinnamon in a separate small bowl for rolling. Roll the dough into balls (about 2 tbsp. in size) and dip one half of each dough ball into the sugar/cinnamon mixture.
  6. Place each dough ball on a cookie sheet, about 2 inches apart, with the un-sugared side down. Bake the cookies for 12-15 minutes, until the edges are starting to brown, being sure to turn the pans halfway through the baking process. After the cookies have cooled for about 10 minutes, transfer the cookies to fully cool on a cooling rack. Enjoy!

Filed Under: Chocolate, Cookies, Desserts, Fruit, Review

Meyer Lemon Cranberry Biscotti

December 22, 2014 by Amy Leave a Comment

Meyer Lemon Cranberry Biscotti Wreath

Last year’s winter was one of the harshest winters we’ve had in years. I was so used to having hardy plants that could survive the winter, but sadly, we had to redo most of our garden. We also lost our meyer lemon tree, which was just starting to produce more than 5 lemons/year. 🙁

So, last spring, we replaced our plants and lemon tree, and we even added a satsuma tree to the collection. This year, we were surprised to get about 10 lemons! I guess it’s a happy tree. 🙂 I’m slowly but surely learning how to NOT kill anything that we plant. 🙂

So, of course with all of these lemons, I had to bake something with them for the holidays. While lemon flavor isn’t typical of holiday baked goodies, I mixed in dried cranberries and arranged them in a wreath type of display to make things more festive.

This biscotti isn’t overwhelming as far as lemon flavor goes. Since it’s not too heavy of a lemon flavor, it goes really well with the dried cranberries, and the extra drizzle of white chocolate doesn’t hurt either. This really isn’t that difficult to make either. While biscotti looks a bit intimidating, it’s simply cookies that are baked twice, until dry in the oven.

Meyer Lemon Cranberry Biscotti
Source: a Nifty Foodie original

Ingredients:

  • 1.5 tbsp. unsalted butter, melted
  • 2 tbsp. light olive oil
  • 3/4 cup sugar
  • 2 tbsp. meyer lemon juice
  • 1 tsp. vanilla extract
  • 2 eggs
  • 1 3/4 cup all-purpose flour
  • 1 1/4 tsp. baking powder
  • 1/4 tsp. salt
  • 1 tbsp. meyer lemon zest
  • 1/2 cup dried cranberries
  • 8 oz. white chocolate chips
  • 1/4 tsp. canola oil
  • Sprinkles and pearl dust (food safe) spray, for decoration

Directions:

  1. Preheat the oven to 300 degrees F (150 degrees C).
  2. In a large bowl, mix together the oil, butter and sugar until well-blended. Mix in the lemon juice and vanilla extract, and then beat in the eggs. Combine flour, salt, zest and baking powder in another medium sized bowl; gradually stir the flour mixture into the egg mixture. Mix in cranberries by hand, until a dough forms.
  3. Divide dough in half. Form two logs (12×2 inches) on a cookie sheet that has been lined with parchment paper or a silicone baking sheet. If the dough seems sticky, wet your hands with warm water to work with the dough more easily.
  4. Bake for 35 minutes in the preheated oven, or until logs are light brown. Remove from oven, and set aside to cool for 10 minutes. Reduce oven heat to 275 degrees F (135 degrees C).
  5. Cut logs on diagonal into 3/4 inch thick slices. Lay on sides on parchment covered cookie sheet. Bake approximately 8 to 10 minutes, or until dry; cool.
  6. Form into a wreath or tree on a cake plate, using melted white chocolate as a sort of glue to hold the biscotti in place. When done, drizzle the remaining white chocolate on top of the wreath. For a finishing touch, add large sprinkles and pearl dust.

Filed Under: Cookies, Desserts, Fruit

Raspberry, Pistachio & Dark Chocolate Rugelach

December 2, 2014 by Amy 1 Comment

Disclosure: I received a copy of “Baking Chez Moi”, as well as a gift card and coupons for ingredients used in this recipe, in exchange for this sponsored post. All opinions are 100% my own.

Raspberry, Pistachio & Dark Chocolate Rugelach

So, this past long weekend threw me way off. Our house is decorated for Christmas, and it’s officially the holiday season. Maybe it’s because I’m getting older, but it really doesn’t feel like December. Sure, the UPS guy probably knows us on a first name basis by now, and my dog is randomly bringing me ribbon scraps, but it just doesn’t FEEL like the holiday season. I’m sure the 70 degree weather outside isn’t helping right now, either. Where did the year go?!

I’m actually fairly behind on things. By now, I would normally have my homemade holiday gifts planned out, but I haven’t even made the cookie dough yet to place in the freezer..heck, I haven’t even chosen the recipes to make! Yikes. I still need to do that…haha.

In the meantime, I’m still baking on the weekends (and my/my husband’s coworkers are loving it). I was recently sent a copy of Dorie Greenspan‘s latest book, “Baking Chez Moi“. I just adore Dorie Greenspan, so when I was approached about this post idea, I couldn’t reply soon enough! Her tall and creamy cheesecake is my favorite recipe of hers, which I make at least 5 times in November and December (between Thanksgiving and Christmas). One of the things that makes Dorie so wonderful is that she makes intimidating recipes completely approachable to the home baker. She writes out everything in perfect detail to where you feel like she’s right there in the kitchen with you. This book is no different. The instructions are perfectly detailed, and her recipes are mouth-watering. Her book contains recipes, like limoncello cupcakes, gingerbread buche de noel, cocoa linzer cookies, caramelized rice krispies…just to name a few. I have so many recipes bookmarked already!

For this post, I was asked to incorporate Driscoll’s berries into her famous rugelach recipe. While I’ve had rugelach before, I’ve never made it. After a bit of brainstorming, I thought that raspberry, pistachio and dark chocolate would go together perfectly in this bite-sized dessert. I’ve used the cranberry/pistachio/white chocolate combination before in biscotti, so I had a feeling this combination would work. Also, after making it, if you look at the picture, don’t they look like peppermint swirls? So festive for the holiday season!

As for the recipe, it tasted great! I reduced a pint of Driscoll’s fresh raspberries (along with sugar, lemon juice and zest) to a spread-like consistency (to avoid watering down the cookies), and sprinkled finely chopped chocolate and pistachios on top of the raspberry spread to make the filling for the rugelach. This combination works so well…sweet raspberries, melted chocolate with a hint of crunch from the pistachios? Oh man, I love it! My coworkers also went crazy over these the next day…they were perfect with a morning coffee. 🙂

Raspberry, Pistachio & Dark Chocolate Rugelach
Source: Baking Chez Moi by Dorie Greenspan (filling adapted)

Ingredients:

For the dough:

  • 4 oz. cold cream cheese
  • 1 stick (8 tbsp.) cold, unsalted butter
  • 1 cup all-purpose flour
  • 1/4 tsp. fine sea salt

For the filling:

  • 1 pint fresh Driscoll raspberries, washed
  • 1/4 cup granulated sugar
  • 1/2 tsp. lemon juice
  • 1/4 tsp. lemon zest
  • 1/2 cup shelled pistachios
  • 1/2 cup semi-sweet chocolate chips
  • 2 tbsp. unsalted butter, melted and cooled
  • 3 tbsp. granulated sugar, mixed with 1/4 tsp. ground cinnamon
  • 1 large egg (for glazing dough)
  • sanding or granulated sugar, for dusting

Directions:

  1. Remove the cream cheese and butter from the refrigerator 10 minutes before you’re ready to make the dough and cut each into 4 equal pieces. This will allow them to slightly soften, but still be cold.
  2. After the 10 minutes, place the flour and salt in the bowl of a food processor, and scatter the pieces of butter and cream cheese over the flour/salt. Pulse the mixture 6-10 times, until flour coats the cream cheese and butter. Then, process the mixture, stopping to scrape down the sides of the bowl ever so often, until large curds form in the dough (before it processes into a ball of dough).
  3. Place the dough onto a lightly floured surface, mold it into a ball, and divide the dough in half. Then, shape each dough half into a square and wrap the squares in plastic film or wax paper. Place in the refrigerator to chill for at least 2 hours (or up to a day).
  4. To make the filling, cook the raspberries, 1/4 cup granulated sugar, lemon juice and lemon zest in a small pot over medium heat. Cook the mixture, stirring ever so often, until it reaches a boil. Reduce the heat to low, and simmer until the mixture thickens (about 10 minutes) to a spread. Set the raspberry filling aside to cool.
  5. Place the pistachios and chocolate chips in the food processor and pulse the mixture until the mixture looks finely chopped, but not crumbs. Set aside.
  6. Working on a lightly floured surface, sprinkle flour on top of one piece of dough, and using a rolling pin, roll the dough until it’s about a 12″ square, making sure to turn the dough frequently while rolling (and flouring lightly, if necessary). It doesn’t need to be precisely a square. The dough will be rather thin when finished.
  7. Cut the rolled out square of dough in half, to where you will have two pieces of dough that are approximately 12″x 6″. Brush the tops of each half of dough with the melted butter, and then sprinkle the tops with the cinnamon sugar mixture. Thinly spread 1/4 of the raspberry filling on top of the butter/cinnamon sugar mixture. Then, add 1/4 of the pistachio/dark chocolate mixture, gently pressing it into the dough.
  8. Starting from the long (ragged) side of the dough, carefully roll the sheet snugly (like you would when making cinnamon rolls), ending with the neat, cut edge at the bottom of the roll.
  9. Wrap the roll in plastic wrap or wax paper, and place it in the freezer. Fill and roll the other rectangle the same way as above. Then, repeat the whole dough rolling/filling process with the other square of dough.
  10. Ideally, you want the dough to rest for an hour in the freezer, to allow for easier slicing, but you can take them out of the freezer and (carefully) slice them after about 15-20 minutes. You can also freeze these rolls for up to two months, if you don’t want to bake all of the cookies at once.
  11. To bake the cookies, place the oven racks to where it divides the oven into even thirds. Preheat the oven to 400 degrees F, and line two baking sheets with parchment paper or a silicone baking mat. Set aside.
  12. In a small bowl, beat the large egg lightly with a splash of cold water.
  13. Working with one roll at a time, remove the rolls from the freezer, and brush the top of each roll with egg wash. Then, generously sprinkle the tops of the rolls with sugar. Using a sharp knife and a gentle sawing motion, divide each roll into 12 slices, and place the cookies seam down on the baking sheet, with a little space between each cookie (each baking sheet held 24 cookies for me).
  14. Bake the cookies for 15-17 minutes, making sure to rotate the cookie sheets in the oven from top to bottom rack, and then flipping them front to back, being sure not to under-bake these. Transfer the cookies to a cooling rack and allow them to completely cool to room temperature. Enjoy!

Filed Under: Chocolate, Cookies, Desserts, Fruit, Giveaways/Reviews

  • Go to page 1
  • Go to page 2
  • Go to page 3
  • Interim pages omitted …
  • Go to page 8
  • Go to Next Page »

Primary Sidebar

Hey Y’all!

Image Credit: Leslie Pendleton Photography


Hey y’all!

Thanks so much for reading! I’m Amy, and I live in south Louisiana with my husband and our rescue dog. I enjoy sharing my love for cooking, baking, crafts & more! Follow my daily adventures on social media!

Follow my Daily Adventures

  • Email
  • Facebook
  • Instagram
  • Pinterest
  • Twitter

Footer

  • Email
  • Facebook
  • Instagram
  • Pinterest
  • Twitter

Archives

Copyright © 2025 · Foodie Pro Theme by Shay Bocks · Built on the Genesis Framework · Powered by WordPress