• Skip to primary navigation
  • Skip to main content
  • Skip to primary sidebar
  • Skip to footer

The Nifty Foodie

  • Home
  • About
  • Recipes
    • Appetizers
    • Beverages
    • Breads/Muffins
    • Breakfast
    • Canning
    • Desserts
    • Dog Treats
    • Entertaining/Parties
    • Fruit
    • Holiday Recipes
    • Louisiana Cuisine
    • Main Dishes
    • Mexican
    • Nifty Foodie Original
    • Nifty Tricks
    • Project Food Blog
    • Pumpkin
    • Salads
    • Sauces/Dips
    • Side Dishes
    • Skinny
    • Slow Cooker
    • Spices
    • Stews/Soups
    • The Disasters
  • My Weight Loss Journey
    • Races
    • Running
    • Weight Loss Milestones
  • Crafts
  • Contact Me

Wilton Decorating

Beachy Cookies

April 7, 2010 by Amy 5 Comments

cookies

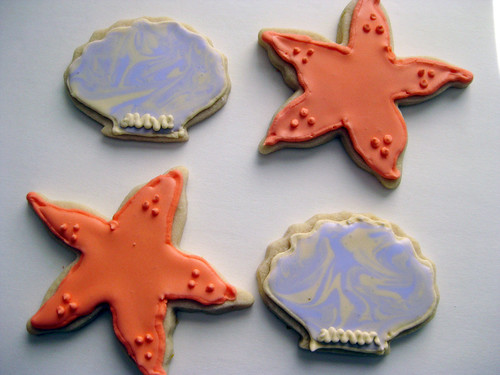
::offers plate of beachy cookies::

Hi everyone! Remember me? Well, I used to be Skinny Food by Amy, but it turns out that I bake too much, and it would make me a liar to post such buttery foods on a site that promises skinny food. So, I decided to make the move.

It’s a big move, but no worries, my posts won’t be changing. I just wanted a title that felt like a better fit.

I hope you like the new layout. I find it kind of, well, nifty. 🙂

Feel free to follow me on Twitter, Facebook, and heck, add me to your readers while you are at it. 🙂

Oh and if you have any feedback on the new look, I’d surely appreciate it!

Filed Under: Cookies, Other, Wilton Decorating

Cookie Cutters Aren’t Everything..

March 5, 2010 by Amy 8 Comments

Crawfish cookies don’t seem to be as popular as Christmas tree cookies or Teddy bear shaped ones, so finding a cookie cutter for these just did not happen. I was sad, but I had my paring knife on me and went to town.

I found a print out of a decent crawfish and generalized it for cutting purposes. I was going to pipe the details instead. 🙂

This took me about an hour to cut out 16 crawfish shaped cookies, but the overall shape looked good to me, so I baked them up.

Hilariously, these cookies are the two WORST colors to make on icing. Red and black are hard colors to get, and you have to use almost 1/3 of the bottle to attain the color. (Note: If you need to make red icing, buy no taste red or you’ll end up with bitter icing.) Just remember, let the icing sit a little after dying it. Lighter colors get richer when they sit!

At this point of piping and filling, the hubs pointed out that they look like ants. Great…

However, after the details were put in, they looked pretty much like cutesy crawfish! 🙂 So, if you can’t find the cutter you are looking for, definitely consider getting a template and cutting from there!

In case you are wondering how to decorate cookies and what recipes I use, click here.

Filed Under: Cookies, Wilton Decorating

Christmas Sugar Cookies

December 31, 2009 by Amy Leave a Comment

I might be a week late with these, but here’s proof that I did make Christmas cookies! 🙂

I excitedly drew up plans (which I did deviate from a bit) on my lunch break one day, and went to work the week before Christmas on these bad boys!

I was so excited to use pearl dust for the tree trunks. I mixed a little bit with some vodka, and just painted it on after the flood icing dried. It leaves a really pretty shimmery finish!

If you’re curious about the recipes and techniques that I use to make these happen, check out my tutorial here.

Filed Under: Cookies, Wilton Decorating

A fun cake decorating trick….

December 17, 2009 by Amy 2 Comments

This past weekend, I made red velvet cupcakes for a local nestie GTG. I was so excited to make these from scratch for the first time, and so, I enlisted the help from another southern gal, Paula Deen. Sadly, Paula Deen let me down with some dry, flavorless red velvet cupcakes. I was a little embarrassed to bring these, since I hate presenting flop recipes to anyone, but I didn’t have time or ingredients to try again! So, what’s a girl to do? Make them look pretty!

I decided to make a simple cream cheese frosting (block of cream cheese, stick of butter, vanilla extract and powdered sugar until you get the right texture). Then, I colored the batch red and green. You know where this is going…

Yep, I wanted to swirl colors. Let me tell you..the pastry bag and I usually have a good fight over getting icing in the bag without getting it all over the top of the bag, my hands, etc. So, I found this tip on Cake Central’s forums about how to swirl with wayy less mess! Let me tell you…get your saran wrap ready, because you will want to make everything swirl colors after seeing how easy this is!

First, place a good sized sheet of saran wrap on your counter and plop icing in the center.

Roll the saran wrap into a thin log, cutting off excess wrap on the ends.

Slip the two colors (or three if you so dare) in the pastry bag, and squeeze icing out until the colors all appear.

Then, pipe!

Easy peasy swirl colors without the mess! 🙂

Filed Under: Cakes/Cupcakes, Wilton Decorating

Turkey Cake Pops!

December 4, 2009 by Amy 6 Comments

For Thanksgiving, I knew I had a great excuse to try one of Bakerella’s creations again. I thought these were so so cute, and looked easy enough, so I started my adventures across Baton Rouge to find these cute decorations to make my turkeys!

I found everything I needed at Wal-Mart and Michael’s, so thankfully, it was easy to find what was needed. 🙂

I decided to start with making a basic white cake and add golden yellow and orange food coloring to each 8″ cake for Thanksgiving colors.

Turkey Cake Pops
Source: Bakerella

Ingredients:

  • 9×13 baked and cooled cake (any flavor)
  • chocolate candy melts or bark
  • 2 cups of buttercream (any flavor)
  • espresso beans (makes turkey’s head)
  • rainbow chip sprinkles (makes turkey’s beak)
  • red heart sprinkles (makes turkey’s snood…and yes, I googled to find the correct term for that body part LOL!)
  • stick pretzels (makes turkey’s legs)
  • caramel candy corn (makes turkey’s feathers)
  • black gel decorating icing or black food coloring pen (to draw eyes)
  • lollipop sticks

Directions:

  1. Using your hands, crumble cooled cake into small crumbs in a bowl. Add buttercream, one dollop at a time, mixing thoroughly, until the mixture can form easily into shapes. Be careful, because putting too much icing will make the mixture very sticky and difficult to dip into chocolate.
  2. Form the cake mixture into balls and then stick them in the freezer for about 20 minutes to set.
  3. In the meantime, put your chocolate in a double boiler to melt it. Take the cake balls out a few at a time, and put the lollipop stick in through the bottom. Then, dip in chocolate and set on a cookie sheet to dry.
  4. After all cake balls are dry, using chocolate as a glue, affix the decorations onto the cake ball to turn it into a turkey!

Filed Under: Cakes/Cupcakes, Wilton Decorating

Tutorial: The Basics of Decorated Sugar Cookies!

November 30, 2009 by Amy 4 Comments

These cookies are usually impressive when I bring them to a party. Sure, it’s time consuming, but all in all, very easy and cheap to do yourself!

Your cookies might not come out as perfect as you would like the first time, but give it 3-4 times, and you will see your skills improve and your creative juices start flowing with new cookie ideas. (Just in time for the holidays!)

Supplies you need to decorate:

  • Wilton icing tip(s) 2 and/or 3– Ultimately, it depends on how small or detailed the cookie shape is. Tip 2 is smaller, but tip 3 doesn’t show shaky hands as easily. So either of these two work.
  • Couplers– These are great to use, because let’s say you are doing tiny details, as well as  broad outlining with white icing, you can easily change out tips when you use these, rather than having to make a whole new bag of icing.
  • Decorating Bags- Pick your poison, basically. If you are feeling green, feel free to buy a couple of reusable bags. Royal icing is VERY easy to clean, since there is no grease in the icing, so this is a good option. There are also disposable plastic or parchment triangles to use as well. I use plastic disposables, because I can deal with many colors at a time without worrying about running out of reusables.
  • Squeeze Bottles– These bottles just make working with flood icing a lot easier, in my opinion.
  • Toothpicks – These will quickly become your cookie decorating miracles, and you will see why in this post.

First, of course, you roll and cut your sugar cookies. This is my favorite recipe.

Rolled Sugar Cookies
Source: Cookie Craft

Ingredients:

  • 3 cups AP flour
  • 1/2 tsp. salt
  • 1 cup (2 sticks) unsalted butter, softened
  • 1 cup sugar
  • 1 large egg
  • 1 tsp. almond extract
  • 1 tsp. lemon zest

Directions:

  1. Whisk the flour and salt together in a bowl.
  2. Using a mixer, cream butter and sugar together for about 2 minutes, until it is light and fluffy. Add the egg and extract/zest and mix until blended.
  3. Gradually add the flour/salt mixture to the wet mixture until the two are thoroughly combined.
  4. Divide the dough into 2-3 portions and form them into a disk shape. Then, wrap each portion in wax paper and chill in the fridge for a couple of hours.
  5. Once chilled, roll dough out into desired shapes and place on a Silpat or parchment paper lined cookie sheet. Bake at 350 for 12-16 minutes, until cookies start to turn golden along the edges.

Then, whip up some royal icing (This is the recipe I use, and I sub 2 tsp. of almond extract for 2 tsp. of the water called for in the recipe.). Really mix it well until it gets fluffy and stops looking shiny. It takes a while, especially with a hand mixer (I’ve been there…), so if you are using a hand mixer, be prepared to mix for a good 10 minutes.

Of course, color your icing the colors you want. Flood icing is simply royal icing with a little bit more water added until it’s fairly liquidy. The best way to find out if your icing is the right consistency is to mix it well and let it drip from a spatula or whisk, into the bowl. If the icing holds its shape in the liquid for about 5 seconds, it’s good to go! Then, just pour it into your squeeze bottles.

Now that all of your icings are prepared, fill your icing bag about a quarter of the way full. This allows you to maintain good control of your icing, and overfilled bags can really be strenuous on your hands to squeeze. Depending on the complexity of the cookie, choose tip 2 or 3. Tip 2 is good for more detailed cookies, but I used tip 3 for the below cookie since the shape is fairly simple.

Then, pipe your outlines. If you happen to mess up, use a toothpick to guide the icing to the right spot. Make sure there are no gaps in your icing, because if you leave gaps, flood icing will spill right out of your cookie.

After all of your cookies are outlined, start squeezing your flood icing in.

After you squeeze a fair amount in, use a toothpick to spread icing into the corners of the cookies.


Now, your cookies should look something like this. If you have detailing to add, like I did, allow the flood icing to set for a couple of hours so that it just doesn’t sink into the flood icing.

I can’t stress this enough: Allow your cookies to dry for 24 hours. I tried 12 hours once, but one good squish crunched the flood icing in, revealing some flood icing that was still very wet underneath.

I hope this helps those of you who were curious about royal icing decorating. It’s not that bad at all, and the results are really awesome!

Cool cookies on a cooling rack.

Filed Under: Cookies, Wilton Decorating

Birthday Cake-Palooza

October 26, 2009 by Amy Leave a Comment

IMG_0530

Last weekend, my husband’s family celebrated his Dad’s birthday! I was honored that my MIL asked me to make the cake for his birthday. Little did she know that I’d be bringing two cakes!

One being carrot cake, which my husband told me is his favorite. Apparently, he loved it so much that he was sad when it got stale, and he had to throw it away! That’s a big baking compliment right there!

I halved the original recipe to make a personal 6 inch cake, since everyone else in the family usually goes for the standard birthday cake.

I also made a different cream cheese frosting than the recipe indicates, which was inspired by this recipe which I used last year.

Carrot Cake with Spiced Cream Cheese Frosting
Source: Epicurious (Gourmet)

Ingredients:

  • 2 cups all purpose flour
  • 2 teaspoons baking soda
  • 1 teaspoon salt
  • 1 teaspoon ground cinnamon
  • 2 cups sugar
  • 1 1/4 cups canola oil
  • 4 large eggs
  • 3 cups grated peeled carrots
  • 1 1/4 cups coarsely chopped walnuts (omitted)
  • 2 tablespoons minced peeled ginger

Directions:

  1. Preheat oven to 350°F. Butter two 9-inch-diameter cake pans. Line bottom of pans with waxed paper. Butter and flour paper; tap out excess flour.
  2. Whisk flour, baking soda, salt and cinnamon in medium bowl to blend. Whisk sugar and oil in large bowl until well blended. Whisk in eggs 1 at a time. Add flour mixture and stir until blended. Stir in carrots, walnuts and ginger. Divide batter between prepared pans.
  3. Bake cakes until tester inserted into center comes out clean, about 40 minutes. Cool cakes in pans 15 minutes. Turn out onto racks. Peel off waxed paper; cool cakes completely. For my cakes, it took about 20-25 minutes in the oven, since they were 6 inch

IMG_0532

For the standard birthday cake, I used Duncan Hines French Vanilla mix with 2 tsp. almond extract added. Shocker, I know, but I was also preparing for a garage sale that weekend. I was pretty swamped! This is covered in Wilton Buttercream using ALL butter! 🙂

.

Filed Under: Cakes/Cupcakes, Wilton Decorating

Baby Sheep Cookies

October 2, 2009 by Amy 11 Comments

cookie1
My fellow blogger friend from Taste of Home Cooking is expecting a baby girl in a few short weeks!

I wanted to send them a gift card to Target, but doing only that seemed impersonal since we are both food bloggers. Looking for any excuse to bake, I decided to make her some cookies! As I was looking through my cookie cutters, I found a sheep one, and thought aww, baby sheep.

Then, the icing ideas started flowing. I ended up making a good bit, but I was picky and wanted to make sure they got the prettiest ones. My husband was anxiously awaiting the rejects, since he kept smelling almond extract throughout the day!

I made these using the recipes for cookies and royal icing from Cookie Craft. I can’t recommend this book enough! It’s so great for ideas and how-to’s. Even Bakerella recommends it! I’m not a pro, but I’m getting better with my cookie skills.

I think the mom-to-be was really surprised! Congrats! 🙂

cookie2

Filed Under: Cookies, Wilton Decorating

My first tiered cake

September 13, 2009 by Amy 10 Comments

cake

I must be losing my mind! I could have SWORN that I blogged about my first tiered cake. This was the final cake that I made for Wilton Course 3 (Fondant & Tiered Cakes). Our instructor was super awesome, and let our minds run wild for the final cake. Since my family reunion was the next day, I decided to make a funky LSU colored cake.

This cake was made using boxed white cake mix (gasp!), Wilton buttercream and homemade marshmallow fondant. The filling was a homemade pineapple filling. My husband and I absolutely love this filling. It’s so simple to make too!

To explain why this baker used cake mix, I had a pretty busy week, so I wanted the baking day, which was a Thursday night, to be as simple as possible. I know from scratch isn’t much harder, but hey, I did add some extracts to make it a little more flavorful. Give a girl some credit! 🙂

My family LOVED the cake. They wanted to make it part of the reunion raffle, but I was too embarrassed for them to make it into a prize. (I have a lot of trouble getting compliments on my cakes…I’d just rather people dig in and enjoy!)

So, I made my dad make the first cut into it, because my aunts and uncles refused since they wanted it in the raffle so badly. Thanks Dad!

A cool thing that came out of it was that my cousin, who just had a precious baby boy, asked me to make her little boy’s 1 year birthday party cake and smash cake! I’m so flattered, and I cannot WAIT to do this next Spring! 🙂

Filed Under: Cakes/Cupcakes, Wilton Decorating

Wilton Course 3: Class 2

July 23, 2009 by Amy 6 Comments

I’m really enjoying Course 3 so far. I’ve learned a lot of new buttercream techniques ,and while I know a good bit about fondant, I have also learned a few new tips and tricks as well. The thing that was the most fun was making the fondant rose (with Gum-Tex mixed in, essentially making it into gumpaste).

rose

I really enjoy making gumpaste/fondant flowers. In Fondant and Gumpaste, I learned how to make the carnation and fantasy flower, which I really enjoyed. So, I’m happy about making some of these flowers for my future final cake!! Our teacher is giving us the freedom to make whatever for the class, so I’m excited about the design!

We also made a present cake at the end of the class, which was really cool to make. I was a little afraid of bows, but these are easy peasy. Ignore the cracks in my bow though, because my gum-tex fondant was drying very quickly on me. 🙁 The kleenex in the bow is to help it set in a bow shape, rather than falling in.

cake
For this cake, I wanted to do a simple yellow cake. For this, I turned to Joy of Baking. I would say this cake wasn’t that impressive tasting, so I’ll keep on searching for something more promising next time. 🙂

I covered the cake with homemade marshmallow fondant – recipe here.

Yellow Butter Cake
Source: Joy of Baking

Ingredients

  • 6 large egg yolks
  • 1 cup (240 ml) milk
  • 2 teaspoons (8 grams) pure vanilla extract
  • 3 cups (300 grams) sifted cake flour
  • 1 1/2 cups (300 grams) granulated white sugar
  • 1 tablespoon + 1 teaspoon (20 grams) baking powder
  • 3/4 teaspoon (5 grams) salt
  • 12 tablespoons (170 grams) unsalted butter, room temperature and cut into pieces

Directions

  1. Preheat oven to 350 degrees F (177 degrees C).  Spray two 9-inch x 1 1/2 inch (23 x 3.75 cm) cake pans with Bakers Joy, line bottoms with parchment paper, then spray again with Bakers Joy.  Set aside.
  2. In a medium bowl lightly combine the egg yolks, 1/4 cup (60 ml) milk, and vanilla extract.
  3. In the bowl of your electric mixer combine the dry ingredients (flour, sugar, baking powder and salt) and mix on low speed for about 30 seconds or until blended.  Add the butter and remaining 3/4 cup (180 ml) milk.  Mix on low speed until the dry ingredients are moistened.  
  4. Increase the mixer speed to medium and beat for about 2 minutes to aerate and develop the cake’s structure.  Scrape down the sides of the bowl.  Gradually add the egg mixture, in 3 additions, beating about 30 seconds after each addition to incorporate the egg.
  5. Divide the batter and pour into the prepared pans, smoothing the surface with an offset spatula.  (Pans will be about half full.)  Bake 25 to 35 minutes or until a toothpick inserted into the center of the cake comes out clean and the cake springs back when pressed lightly in center.
  6. Place the cakes on a wire rack to cool, in their pans, for about 10 minutes.  Then invert the cakes onto a greased rack.  To prevent splitting, reinvert cakes so that tops are right side up.  Cool completely before frosting.

Filed Under: Cakes/Cupcakes, Wilton Decorating

  • Go to page 1
  • Go to page 2
  • Go to page 3
  • Go to Next Page »

Primary Sidebar

Hey Y’all!

Image Credit: Leslie Pendleton Photography


Hey y’all!

Thanks so much for reading! I’m Amy, and I live in south Louisiana with my husband and our rescue dog. I enjoy sharing my love for cooking, baking, crafts & more! Follow my daily adventures on social media!

Follow my Daily Adventures

  • Email
  • Facebook
  • Instagram
  • Pinterest
  • Twitter

Footer

  • Email
  • Facebook
  • Instagram
  • Pinterest
  • Twitter

Archives

Copyright © 2025 · Foodie Pro Theme by Shay Bocks · Built on the Genesis Framework · Powered by WordPress