• Skip to primary navigation
  • Skip to main content
  • Skip to primary sidebar
  • Skip to footer

The Nifty Foodie

  • Home
  • About
  • Recipes
    • Appetizers
    • Beverages
    • Breads/Muffins
    • Breakfast
    • Canning
    • Desserts
    • Dog Treats
    • Entertaining/Parties
    • Fruit
    • Holiday Recipes
    • Louisiana Cuisine
    • Main Dishes
    • Mexican
    • Nifty Foodie Original
    • Nifty Tricks
    • Project Food Blog
    • Pumpkin
    • Salads
    • Sauces/Dips
    • Side Dishes
    • Skinny
    • Slow Cooker
    • Spices
    • Stews/Soups
    • The Disasters
  • My Weight Loss Journey
    • Races
    • Running
    • Weight Loss Milestones
  • Crafts
  • Contact Me

Spices

Pumpkin Pie Spice

October 16, 2013 by Amy 1 Comment

pumpkinpiespice

I have a slight problem when it comes to baking with pumpkin. I seriously cannot stop. It’s something about the smell of spices baking in the house, combined with the warm comfort of something pumpkin-y. I just can’t…sorry Libby’s…I can’t quit you. So, to go with my mad pumpkin addiction, every fall, I make some version of pumpkin pie spice, and it’s crazy how quickly I go through a batch. So, this year, lesson learned… I made a double batch of the recipe below. 🙂

I do have to admit that this is an adaptation of the original recipe. I played around with this recipe last year, and finally found a mix that works well for me. Personally, cloves are just very strong to me, and it also reminds me of my wisdom tooth surgery a few years ago. Memories of percocet, dissolving stitches and some sort of medicine that tasted like cloves just don’t bring on those warm, fall-y feelings (hmm, I wonder why…haha). So for me, I found that I preferred to cut back on cloves and allspice in this mix, and then added in more nutmeg instead.

Pumpkin Pie Spice
Source: adapted from My Baking Addiction

Ingredients:

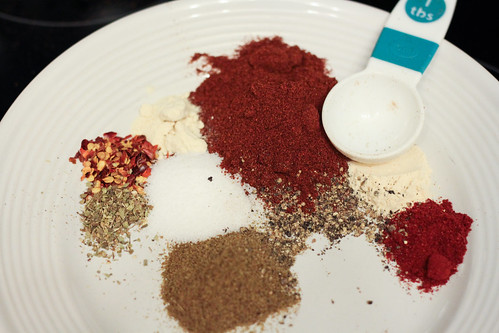
  • 3 tbsp. ground cinnamon
  • 2 tsp. ground ginger
  • 2 1/2 tsp. nutmeg
  • 1 tsp. ground allspice
  • 1 tsp. ground cloves

Directions:

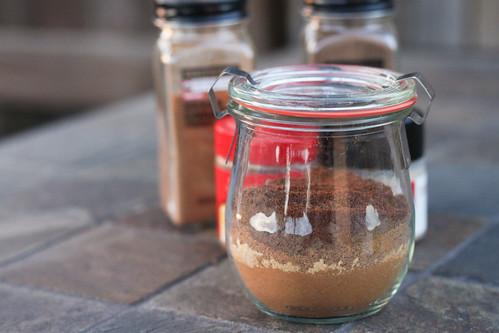
  1. Combine all ingredients in a jar and shake well until combined.

Filed Under: Spices

Taco Seasoning

September 26, 2012 by Amy 2 Comments

Taco Seasoning

When I was first learning to cook, I used to cook tacos all the time. I’d buy those little packages of seasoning mix and supper was figured out. The convenience was awesome. Then, I was just poking around Allrecipes a couple of years ago, and I saw “Taco Seasoning I” on the sidebar. I was totally intrigued, and made it that evening. I already had all of the spices for it, but the big question was did it taste as good as the seasoning packets I was so used to?

It did.

I love the idea that I can make my own taco seasoning, and the spices required for this particular one features fairly common spices. I also love that I know exactly what is in my taco seasoning, not to mention that it’s much cheaper to make this seasoning on your own.

I don’t use this for just taco seasoning. I also tend to use it when I make fajitas, I sprinkle a little bit in the blender before making salsa and use some of it when I’m making a quick salsa slow cooker chicken. It’s such a good seasoning blend for standard tex-mex dishes, in my opinion, and couldn’t be any simpler to throw together.

Taco Seasoning
Source: Allrecipes

Ingredients:

  • 1 tbsp. chili powder
  • 1/4 tsp. garlic powder
  • 1/4 tsp. onion powder
  • 1/4 tsp. crushed red pepper flakes
  • 1/4 tsp. dried oregano
  • 1/2 tsp. paprika
  • 1 1/2 tsp. ground cumin
  • 1 tsp. sea salt
  • 1 tsp. black pepper

Directions:

  1. Add all of the ingredients to a bowl and mix them together, until the seasoning mix is well blended. Store in an airtight container.


Filed Under: Mexican, Spices

Mexican Potatoes

September 6, 2009 by Amy 5 Comments

IMG_0396

My husband and I like to make our weeknight cooking as simple as possible. Just lately, we got into making tacos, but were shamefully using the kits for tacos and mexican rice.

After finding this recipe for Taco Seasoning on Allrecipes, I decided it was probably worth a shot to do this without the kit. Not only did we have all the spices on hand, but because it was a mix we made, it felt a little more homemade with not much extra effort!

For the side, I wanted to try something a little different, so I searched for ideas with mexican spiced potatoes and after looking at many ideas, I found a recipe for us to try.

These potatoes had a nice flavor, but I was hoping for more of a kick with them. So, next time, I’m going to probably adjust the spices a good bit or even try putting some of the Taco Seasoning in there with the recipe.

Mexican Roasted Potatoes
Adapted from The Nourishing Gourmet

Ingredients

  • 5 medium russet potatoes, diced
  • 1/3 cup of olive oil
  • 2 teaspoons dried oregano
  • 1 teaspoon ground cumin
  • 1/2 teaspoon sea salt (plus more to sprinkle on top)
  • freshly ground black pepper
  • 3 garlic cloves, minced
  • 1/4 teaspoon cayenne powder
  • 1 tablespoon Dijon style mustard
  • 1 lime, juiced (or more to taste)

Directions

  1. Preheat the oven to 400 degrees.
  2. Combine all of the ingredients, except the potatoes and lime in a jar and shake to thoroughly mix ingredients (or whisk in a bowl).
  3. Pour your diced potatoes into a jelly roll pan, and toss with the oil mixture. Sprinkle with salt and freshly ground pepper.
  4. Roast for about 40 minutes, until the potatoes are well cooked, and browning on the edges. Take out of the oven, and sprinkle the juice of one lime over it. Taste test, and add more lime juice or salt, if needed and serve.

The Skinny – per serving, serves 6

Calories 250.5
Fat 12.1 g
Fiber 4 g

Filed Under: Mexican, Side Dishes, Skinny, Spices

Vanilla MADNESS!

August 19, 2008 by Amy 2 Comments

Check out my vanilla extract after a little over 2 months later…I made two batches…one for my family’s house and one for my fiance’s house..it looks great and I can’t wait to bake with it!! See the extract before a good 2 month soak here. I’m gonna keep the beans soaking in there for longer, but that rich amber color shows me that it’s already ready!!

My newest project with these fine beans is making some vanilla sugar for gifts around the holidays. Target was charging $1.99 for maybe 3 oz. of vanilla infused sugar, and with so many uses for it, I’m sure it will be a great gift for the coworkers…I love giving homemade items. Last year was truffles and pretzels (which I’ll probably continue anyway)…but I want to add vanilla sugar to the mix with some fun recipe ideas! I followed Culinary Concoctions proportions for the vanilla sugar in her post here.

Filed Under: Spices

Vanilla Extract (attempt)

May 21, 2008 by Amy 5 Comments

I have been putting this off for quite some time. Thanks to ebay seller, Arizona Vanilla Company for selling me these gorgeous dozen of beans for a little over $1 each (including shipping)

See, I’m not a vodka drinker, never have been (more of a rum girl). So, I only wanted to buy what I was going to use for my attempt at making vanilla extract. So, I wanted to make a small amount, using a half pint or pint of vodka. After going to retailers, pints and smaller don’t exist there. I’m too lazy to stop by the convenience store, so two weeks later (yep, I’ve had the beans for that long, maybe longer), I find myself in the middle of CVs buying uber cheap paper towels (since I stacked a coupon on top of a sale YAY) and saw SMALL SMALL SMALL bottles of liquor. I had 4 choices of vodka, so I bought a middle of the line Smirnoff half pint. 🙂

These vanilla beans are so long, and amazingly easy to get the seeds out of. Look at how gorgeous these are.

It seemed like the average was 5 beans/pint of vodka (tons of recipes on the internet), so since this is a half pint, I used 3 beans.

To extract the seeds from a vanilla bean, all you have to do is slice the bean all the way down, then take the blunt part of the knife and run it on the inside, scraping the seeds off the bean. Easy right?

Place the seeds and scraped bean leftovers in the vodka bottle. After it’s all sliced and scraped, close the vodka and give it a good shake.


Store the bottle in a dark, cool place, shaking it every 2 days or so. Keep this going for about 2 months. Then, voila! Fresh extract for your baking! (well you want to pour the contents out into a strainer first to make sure it’s nothing but liquid too)

Then, I read, use the leftover beans (dried out of course) to make vanilla sugar afterward! Talk about nifty!! Great gift idea for the coffee drinkers 🙂

Filed Under: Spices

Primary Sidebar

Hey Y’all!

Image Credit: Leslie Pendleton Photography


Hey y’all!

Thanks so much for reading! I’m Amy, and I live in south Louisiana with my husband and our rescue dog. I enjoy sharing my love for cooking, baking, crafts & more! Follow my daily adventures on social media!

Follow my Daily Adventures

  • Email
  • Facebook
  • Instagram
  • Pinterest
  • Twitter

Footer

  • Email
  • Facebook
  • Instagram
  • Pinterest
  • Twitter

Archives

Copyright © 2025 · Foodie Pro Theme by Shay Bocks · Built on the Genesis Framework · Powered by WordPress