• Skip to primary navigation
  • Skip to main content
  • Skip to primary sidebar
  • Skip to footer

The Nifty Foodie

  • Home
  • About
  • Recipes
    • Appetizers
    • Beverages
    • Breads/Muffins
    • Breakfast
    • Canning
    • Desserts
    • Dog Treats
    • Entertaining/Parties
    • Fruit
    • Holiday Recipes
    • Louisiana Cuisine
    • Main Dishes
    • Mexican
    • Nifty Foodie Original
    • Nifty Tricks
    • Project Food Blog
    • Pumpkin
    • Salads
    • Sauces/Dips
    • Side Dishes
    • Skinny
    • Slow Cooker
    • Spices
    • Stews/Soups
    • The Disasters
  • My Weight Loss Journey
    • Races
    • Running
    • Weight Loss Milestones
  • Crafts
  • Contact Me

Amy

The Advocate Cypress 5K Recap

January 21, 2013 by Amy 2 Comments

A few months ago, my friend and I decided to sign up for The Advocate Cypress 5K. It’s organized by the Louisiana Marathon, and the 5K race is held the day before the Louisiana Half/Marathon, so we knew the crowds wouldn’t be so bad, but it would probably be well-organized since this race was very popular last year.

Fast forward to January, and well, the past couple of weeks have been terrible. Non-stop rain and super cold weather just made everything seem miserable. Add being under the weather for a week, and well…preparing for this 5K just wasn’t getting any easier. Oh, and not to mention this gal didn’t run at all from Thanksgiving until after Christmas. I had no excuses…I just got lazy during the holidays. I told my friend who did the 5K with me….as long as I cross that finish line, I’ll be happy. Oh, and as long as it doesn’t rain, because if it rained during the race while I was getting over my illness, I was definitely going to stay home.

Well, I checked the 10 day forecast, and each day, it said the same thing: Sunny weather with lows in the lower 40s, highs in the lower 60s. Perfection. It was sort of a joke the Thursday before the race when the rain ended. So many pictures on Facebook of Mr. Sun, with people what this bright ball of light was. HA! Even my dog did a double take when she went outside…I’m telling y’all…we’re aren’t used to that type of weather!

On Friday, I went to the expo to pick up my bib and shirt. I was so excited about this shirt, because it was supposed to be a nice running shirt. However, when I got there, the lady at the table insisted that the “L” on my registration form = women’s large. Um…no. I ordered unisex large, but she said I’d have to go back after the race to switch it. Bummer…I never did switch it, because the expo opened about an hour after I was done with the race. My husband told me to just think of it as motivation to lose weight to fit into it….I guess in about 30 lbs. it’ll fit? Right now, it’s super tight…I’m surprised I got the shirt over my shoulders. LOL! This was the only bummer about my race experience…I know it had nothing to do with the organizers…it was just that particular volunteer at the expo.

Anyway, so Saturday morning came and the weather couldn’t have been more beautiful. Slightly chilly with barely any wind, and the Sun was just beaming. I had a feeling it would be a good race at that point, and then I checked my email one last time before leaving the house…

The Advocate Cypress 5K

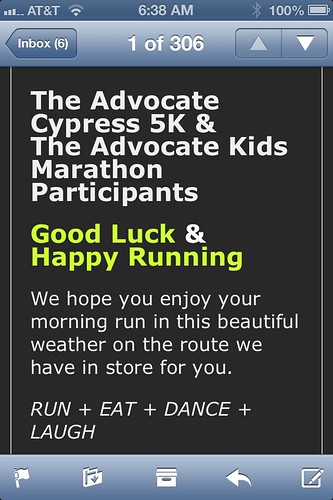
That’s the first time I’ve ever gotten that type of email. Way awesome, in my opinion.

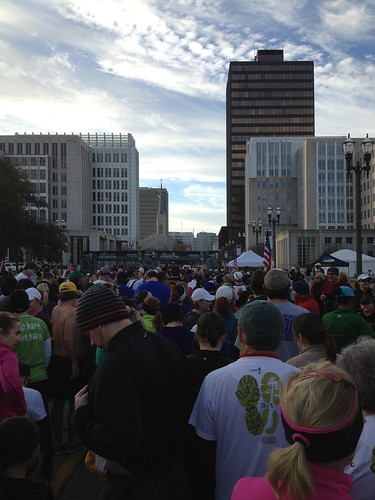
So, I picked up my friend, and we easily parked downtown and took our time walking to the starting line. When we turned the corner, this is what we saw.

The Advocate Cypress 5K

I’m used to a small balloon arch or something, but wow…once again I was pretty impressed.

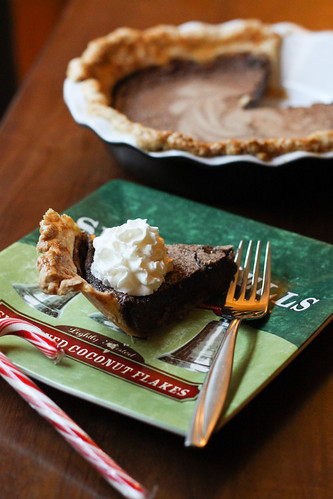
My friend and I found a spot on the sidewalk to talk a bit and get ready, and we decided it would probably be best to take a picture before we looked a sweaty mess. 😛 Seriously…look at that sky, too! PERFECT day.

The Advocate Cypress 5K

Before we knew it, we were lining up at the starting line. 🙂

The Advocate Cypress 5K

The race organizers were right on time with the start. 8:00am and everyone was on their way. I had my RunKeeper app on, and checked my phone every block to watch my pace. I still tend to get a little adrenaline rush, and go 4-5 minutes faster a minute at the very beginning if I don’t watch myself. So to avoid burn out, I moved to the far right of the group and slowed down to a 14 minute mile, which is still fast for me, but I knew a big bridge was coming up TWICE in the race, and I wanted a PR, if possible.

To recap, my first 5K in August was 51:06, and my second 5K in October was 49:47. As you all know, I’m VERY slow, and I’ve yet to run a full 5K without walking breaks.

The Advocate Cypress 5K

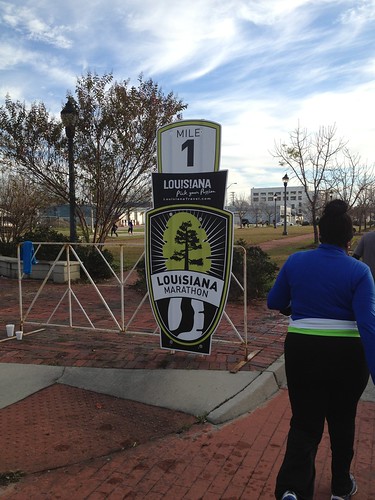
Right before the dreaded bridge, I saw this sign. WHAT? Mile 1 ALREADY?? Oh man…awesome.

Then I hit the bridge. I had a plan to walk a 16:00 minute/mile pace, and used my height to my advantage. Long strides…my time was looking great! When I got to the decline of the bridge, I took advantage of the slope and ran down. 🙂 Sometime around there, I saw my friend on the way back (she’s super fast lol) and gave her a high five! It definitely gave me a little pep in my step to see her, and exchange some “YOU GO GIRL!”s. 🙂

I made it around the loop shortly after, and realized OMG…I’m already halfway done?! YES! My pace was looking great, too!

I hit the bridge the second time with the same goal…walk with long strides. I had a lady that was sort of back and forth with me most of the race, which was great motivation to stay on pace. (Does anyone else have silent competition in these 5Ks? This lady was my competition, sort of….is that wrong?) Then, once again, I ran down the bridge and right after the bridge, I saw this.

The Advocate Cypress 5K

Mile 2…oh HECK yes! Y’all this race was FLYING. I was still doing well with my pace, and I turned around quickly and the lady I was back and forth with during the race was way back there. Um, mini victory? That has NEVER happened y’all. They usually pass ME up! I sound so silly, I know, but I’m the person counting where I was in reference to last place. My first 5k….6th to last. Second 5K….about 20th to last. There were quite a few people behind me at this point, so I decided to keep on keeping on. 🙂

About a block from the last turn, I walked one last time so I could run the entire last stretch. Once I hit that turn, I started jogging again, but noticed my pace wasn’t as good as the beginning. Oh well…I was still doing OK, and figured if I sprinted the last block, I would be good to go!

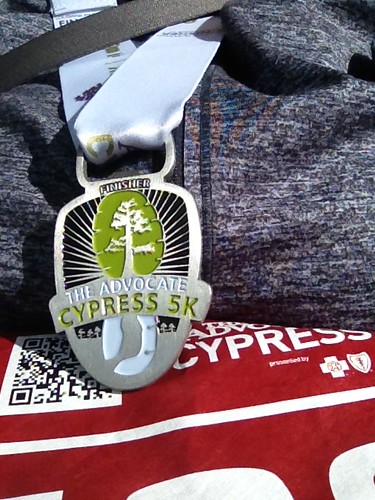
My friend texted me about that time “Come on girl…you got this!” (My friend is really the best!) It made me realize that I was really almost done, and I could make this a PR! At the last block, my friend was there, and she helped me sprint to the finish! Right at the finish, I was like OMG I GET A MEDAL! Then, I looked down at my RunKeeper and I saw it…a PR!!! I was SO stoked. I took a couple of steps to get my medal, looked up and saw that Zach Mettenberger (LSU’s quarterback) was giving out medals. Stupid me should have gotten a picture in case he’s super famous in the NFL someday, but all I wanted was a dang banana and water. LOL!

Check out this medal! I love it. 🙂

The Advocate Cypress 5K

Now, a bit of bummer news. I guess I started my RunKeeper after my chip crossed the starting line, because my official time with the 5K was just a few seconds shy of a PR. That’s OK though…I was very close and felt GREAT after the race. 🙂

This has been my favorite 5K so far. Thanks to the Louisiana Marathon organizers for putting on such an amazing event. I think my next goal is to one day do their half marathon, but we’ll see where my running journey takes me. 🙂

Filed Under: Races

Meyer Lemon Bliss Cake + 5 year blogiversary

January 20, 2013 by Amy 2 Comments

Meyer Lemon Bliss Cake

Five years ago, I started writing a food/recipe blog. It was really meant to be an online space for me to keep my favorite recipes, and for me to challenge myself more in the kitchen, since my kitchen skills = a mean scrambled egg or boxed macaroni and cheese. I never really thought anyone would read it, besides me.

Five years later, I feel like I’m a part of a wonderful blogging community. I’m so thankful for every comment, email and pin from y’all. I’ve made some amazing friends through blogging, and I’ve learned to become a lot more comfortable in my cooking and baking. So, from the bottom of my heart–thank you for everything.

I thought I would make an elaborate cake for this post, but sometimes simple is best. I made this cake on a whim when my husband’s coworkers offered him some meyer lemons from their tree. I figured I should bake his coworker (and the office) something as a “thank you” featuring the lemons, and I came across this recipe on Food Librarian’s blog. In case you didn’t know, Mary’s blog is THE blog for bundt cakes (at least in my opinion). Her “I like Big Bundts” feature is truly awesome, and I always find myself going to her blog first to find a bundt cake recipe. 🙂

Now personally, I do not like lemon desserts. I love lemonade, love lemons in savory dishes, but for some reason, lemon desserts just aren’t appetizing to me. However, my husband’s fruit preference in desserts is lemon (along with pineapple…it’s probably a tie between the two actually). After putting the glaze on this cake, my husband was definitely eager to give this cake a taste for me. He told me this was probably one of the best cakes I’ve ever made, in his opinion. He loved how moist and flavorful it was…there’s no shortage of lemon flavor in this cake! He absolutely loved it, as did his coworkers.

Meyer Lemon Bliss Cake
Source: originally from King Arthur Flour, found on Food Librarian

Ingredients:

For the cake:

  • 1 cup (2 sticks) unsalted butter, room temperature
  • 2 cups sugar
  • 4 large eggs
  • 3 cups all-purpose flour
  • 2 tsp. baking powder
  • 1 tsp. salt
  • 1 cup milk
  • finely grated rind of 2 meyer lemons

For the glaze:

  • 1/3 cup freshly squeezed meyer lemon juice
  • 3/4 cup sugar

Directions:

  1. Preheat the oven to 350 degrees, and prepare your bundt pan by spraying the inside with baking spray, making sure to get the spray in every nook and cranny (I use a pastry brush for this).
  2. In the bowl of a stand mixer, beat the butter, sugar and salt together for about 3-4 minutes, until light and fluffy. Scrape down the bowl, and add the eggs in one at a time, thoroughly mixing the batter well after each addition. Scrape down the bowl once again, and add the baking powder.
  3. With the mixer on low, alternatively add the flour and milk to the mixer, starting and ending with an addition of flour. Using a spatula, stir in the lemon rind.
  4. Add the batter to the prepared bundt pan, and spread the batter around the pan, until even and smooth.
  5. Bake the cake for 55-60 minutes, or until a toothpick inserted in the cake comes out clean. While the cake is baking, make your glaze by mixing together the lemon juice and sugar. Set this aside.
  6. Allow the cake to cool in the pan for 5 minutes, and then place a cooling rack over the cake pan and invert the cake into the cooling rack. Using a toothpick, gently poke the hot cake to prepare it for the glaze. Stir the glaze again to combine, and using a pastry brush, just brush the glaze all over the cake. Allow the glaze to sink in a bit, and brush it once again. Repeat this method until all of the glaze is used. Allow the cake to fully cool before slicing. Enjoy!


Filed Under: Cakes/Cupcakes, Fruit

Red Velvet White Chocolate Chip Cookies

January 11, 2013 by Amy 9 Comments

Red Velvet Cookies

I’ve been blogging for almost 5 years, and I never imagined what would come out of it. I’ve made so many wonderful friends through this blog, and when there’s good news in the blogging community, I feel like it’s happening to a real life friend. Sometimes, I actually almost tell my real life friends “OMG ::blogger name:: is engaged!”, but I thankfully stop myself because my friends would think I’m a little crazy. Oh well….

Today, I’m contributing a dessert to Amy’s (of Amy’s Kitchen Creations) virtual baby shower, which was organized by Carrie of Carrie’s Sweet Life. I know Amy from a cooking forum that we post to. I feel like this little cooking/food forum is just a big group of friends. While we no longer post on The Nest (where the original forum was), it’s great that someone started a forum elsewhere for us to remain in contact. A bunch of us on there are bloggers, and it’s just wonderful to discuss things with other bloggers. It’s not like I can go to my friends/family and ask them about a certain plug-in or blogging conference lol! So, being able to “talk” to these gals is just amazing.

Anywho, back to Amy. Amy is expecting a little girl very soon, and I figured I’d contribute a dessert (as always haha). I went to her blog to see what she enjoyed dessert-wise, and thought that I should contribute something chocolate, but well….chocolate isn’t very pink. I like to make pink desserts for showers haha! So, I kept reading and noticed her post about red velvet cupcakes…I thought, hrm….could I make something PINK velvet?! So, I went to Pinterest, and found these red velvet white chocolate chip cookies. They sounded awesome, and I thought if I added enough pink coloring, I could get the color to stand out over the cocoa. Well…they still turned out red lol, so it’s the thought that counts, right?

While the cookies aren’t that pink color I was hoping for, I will say that the taste of these cookies more than make-up for it! These cookies are thick and chewy…the cornstarch is an ingredient that I’m loving lately in cookies. It just gives cookies a wonderful texture, and the flavor of these cookies are spot-on. Definitely the red velvet that I know and love. 🙂

Congratulations, Amy! I wish I could really send you these cookies…I think you would enjoy them!

If you want to check out what other bloggers contributed to Amy’s shower, check out Carrie’s round-up post.

Red Velvet White Chocolate Chip Cookies
Source: Cooking Classy

Ingredients:

  • 1 1/2 cups all-purpose flour
  • 2 1/2 tbsp. cocoa powder
  • 1 tsp. cornstarch
  • 3/4 tsp. baking powder
  • 1/4 tsp. salt
  • 1/2 cup butter, softened
  • 1 cup granulated sugar
  • 1 tsp. distilled white vinegar
  • 1 large egg
  • 1 1/2 tsp. vanilla extract
  • 1 1/2 tsp. red food coloring
  • 3/4 cup white chocolate chips

Directions:

  1. Preheat the oven to 375 degrees. Line two cookie sheets with parchment paper or a silicone mat and set aside.
  2. In a medium sized mixing bowl, whisk together the flour, cocoa powder, cornstarch, baking powder and salt. Set this aside.
  3. Using a stand mixer, mix together the butter, sugar and vinegar for 3-4 minutes, until light and fluffy. Mix in the egg and scrape down the bowl. Add the vanilla extract and food coloring and mix until just blended.
  4. With the mixer on low, add in the dry ingredients and mix until everything is just combined. Using a spatula, mix in the white chocolate chips.
  5. Using a medium sized cookie scoop, scoop the dough out onto the prepared cookie sheets, leaving about 2 inches between each cookie for baking. Bake the cookies for 9-11 minutes, and allow them to cool on the cookie sheet for 10 minutes. Then, transfer the cookies to a cooling rack to finish cooling. Enjoy!

Filed Under: Cookies

The 9Chefs Baking Competition

January 3, 2013 by Amy 4 Comments

A couple of weeks ago, I posted about peppermint bark chess pie. I adapted the pie recipe for the 9Chefs Baking Competition, which was aired on WAFB (a local news station). I can’t tell you how many times I made that pie to practice, but it was to the point to where I pretty much didn’t need to look at the recipe for the competition.

I was INCREDIBLY nervous about this competition. The whole week of the competition, I would randomly get butterflies in my stomach just thinking about it. Would I drop my pie? Add salt instead of sugar? Look ridiculous on camera? I also had dreams about how it would go….I know it’s ridiculous sounding, but I’ve never done anything like this.

The morning of the competition, I left my house an hour early just to give myself ample time to settle in at the culinary institute (where it was held/taped). Well, typical Friday traffic didn’t happen, because there was a terrible accident on the Interstate, which, despite me leaving an hour early, I was 10 minutes late. I was the last one there…how embarrassing. 🙁 I seriously thought I was going to get kicked out for being late.

When I arrived, I learned that we were going to be wearing chef jackets. Um…WAY COOL. After that, it was a whirlwind, but I remember we had a few minutes to set up our stations (we were allowed to bring any tools/appliances from home, so I had a bit to unpack haha) before interviews. Then, right after, the competition would start.

The competition allowed us 3 hours to bake two pies. One for tasting and one for presentation. With the pie I wanted to make, I knew I had to get it in the oven within the first hour, to give it ample cooling time. One thing I didn’t expect was that there were culinary students there to help us gather ingredients, and while we were frantically rolling pie dough and making fillings, the students washed our dishes for us. It was so appreciated. I’m sure the students have no idea this blog exists, but if they happen to see this, Thank You. Also, a HUGE thanks to the Louisiana Culinary Institute (LCI) for allowing us to use their kitchen, their ingredients and their equipment. It was very interesting (intimidating at first) to use commercial equipment, but with the help of the students and instructors from LCI, it wasn’t bad at all.

That first hour, I was completely in the zone. The room was actually VERY quiet, and I thought it would be crazy/loud/hectic like you see on Chopped, but every competitor was quietly doing their thing. It was so cool to glance around to see what everyone was making, and to watch how everyone works differently in the kitchen. After the first hour, I relaxed a bit and worked on decorations/whipped cream topping. I also got to really take this whole experience in once the pies were in the oven….that first hour, the room felt so quiet, but after everyone had their pies in, we all would just randomly chat and it became a pretty friendly environment, which I didn’t expect at all. It was a relief, but we were all amateur home bakers…I think we were all pretty nervous about it. Once my pies were out of the oven (about 2 hours in), I concentrated on cleaning my station/packing my tools and letting my pies cool.

9Chefs Baking Competition

After 3 hours, this is the display that I left for the judges. My pies could have cooled a bit more, and man, I was SO nervous slicing the pie that quite a few of them just broke (compared to the blog photo from the recipe post). I was really hoping that the taste would make up for it. 🙂

9Chefs Baking Competition

Once the competition was over, we went to a waiting room to allow the judges to taste the pies and did our post-competition interviews. I think that’s when the butterflies really set in. My pies came out great but of course, I had to question if I did enough….

If you’d like to see how the competition went down, here’s the video on YouTube. If you want to skip to the results, just drag the player to about 20 minutes in. 🙂

One of the big questions my friends and family have asked me is if I would do this again. In a heartbeat. I really loved it!

Thanks again to WAFB and LCI for the wonderful opportunity, and congratulations to the winners!

Filed Under: Holiday Recipes, Other, Pies

You CAN do it!

January 1, 2013 by Amy 14 Comments

Last January, I told myself it was time to change. I told myself this every year (you know, the typical resolution), and for some reason, I just never had the motivation to do it. However, last year hit me hard. The scale was an ice cream sundae away from 300 pounds, and I just knew I couldn’t keep doing this to myself.

So, I downloaded MyFitnessPal on my phone, and started logging every bite of food. It was hard at first. I mean, how natural is it to remember to journal EVERY bite of food? It’s really not, but I knew this was the only way.

I slowly added in workouts, including Jillian’s 30 Day Shred, and then I told myself it was time to run. Running was something I was always terrible at, but I thought why not? I committed myself to the Couch to 5K workout program in the summer, which was fairly insane. I had to run at 7:30pm to make running slightly bearable.

2012 was hard. The weight I lost was not easy, but I’m proud of what I accomplished in 2012.

2012 Weight Loss

There are some times where I still question if I could have worked harder, and had better results, but the wonderful thing is I’m healthier than I was last year. All of my fat clothes (except for one “before” pair of jeans that I will probably keep forever) are in garbage bags, ready to be dropped off at a donation box, and I feel awesome. I still have a long way to go on my weight loss journey, but I’m hoping I can lose the same amount of weight in 2013. That would put me in the 100s, which I haven’t seen since MIDDLE SCHOOL.

That’s just exciting to me. 🙂

I really wanted to write this blog post to let you know that you can do this too. I sat on my sofa 120 lbs. overweight last January, and I was so overwhelmed. 120 lbs. is a lot, but I took it 10 lbs. at a time, and rewarded myself along the way. I LOVE those little rewards….they really gave/give me something to look forward to (besides weighing less).

I’m a big fan of calorie counting, because I didn’t have to give up any food. I still ate ice cream, went out to eat (and didn’t eat grilled chicken/veggies) and enjoyed my baking from time to time. I think my biggest wake up call were my portion sizes. I don’t eat nearly as much as I used to, which just happened over time. I’ve become a lot more conscious about when I’m feeling full, instead of just eating everything in front of me, then regretting it. I also LOVE having my BodyMedia Link armband…it’s good (at least for me) to have a better idea of how many calories I’m burning during a workout, and even throughout the day in general. 🙂

I know this is very cliche, but I’ve been overweight for a long time. A LONG time. I was the fat kid in school, and if I can do this, you really can too. Just realize the weight will take time to come off, and try not to obsess as crazily as I did over the scale. You’ll be surprised how much you can accomplish in a year. You don’t have to lose 100 lbs. You don’t have to lose 50. If you even lose 5 lbs. this year, you are 5 lbs. lighter than you were last year, and that’s just an awesome feeling. 🙂

You CAN do it!


Filed Under: Health/Weight Loss

Top 10 Recipes of 2012

December 28, 2012 by Amy 2 Comments

Man, what a year it has been! I hope everyone had a wonderful holiday season with their friends and family. 🙂

Most years, I feel like time has flown by, but for some reason, it feels like last January was truly a year ago. So many great things have happened to us this year (as well as some really crappy events).  

Some highlights and not so highlights:

  • It was our first full year in our new house, which has been such a blessing. It’s just awesome to finally have friendly neighbors, who don’t throw their trash in our backyard or play loud music at 2am (side-eye to the neighbors at the old house).
  • My husband and I have both decided to live healthier. Between us, we’ve lost over 150 lbs. this year. (I’m sure my husband is rolling his eyes at me sharing this, but seriously..I’m gonna brag here!) That’s just amazing to me. I’m so proud of us.
  • Another weight loss highlight. I fit into a clothes size that I haven’t been able to wear since 10th grade. That was 12 years ago. OMG!
  • A not so highlight. Hurricane Isaac…don’t want to go into too much detail with that one, but yeah, hurricanes suck. Oh, and for the record, labradors don’t care if the winds are 50 mph outside. If there’s rain/water, it’s playtime! (ugh)
  • I think I’m making some good progress on my 101 Goals in 1001 Days list.

And of course, it’s been another fun year blogging. I really appreciate all of y’all taking the time to read my tiny corner of the Internet. Thank you for your sweet comments, emails and tweets. In January, it’s gonna be this blog’s 5th anniversary, and I’m just amazed by all of the friends I’ve made and people I’ve “met”  through this blog. You guys are the best!

Just to round up the year, I wanted to share with y’all your top 10 most read posts from 2012.

Pumpkin Whoopie Pies w/ Salted Caramel Buttercream

10. Pumpkin Whoopie Pies with Salted Caramel Buttercream – These whoopie pies were made for a work fundraiser, and they were a huge success. Great pumpkin/spicy flavor, and the salted caramel buttercream just makes them super indulgent. Pumpkin + caramel is a wonderful combination!

Red Velvet Bundt Cake

9. Red Velvet Bundt Cake with Cream Cheese Frosting – I love anything red velvet. This bundt cake is a fun change from a regular cake, and it was pretty easy to throw together and bake!

Baked Oatmeal

8. Baked Oatmeal – My breakfast has been forever changed by this. This oatmeal is not soggy at all (which I hate about cooked oats), and it’s very sweet with the addition of bananas.

Peanut Butter Cookies

7. Peanut Butter Cookies – Just simple, classic peanut butter cookies. 🙂 Very good!

Candy Corn Oreo Truffles

6. Candy Corn Oreo Truffles – Oreo truffles are insanely good, and it was fun to make these with seasonal flavors. Always a favorite when I bring these truffles to work!

Fresh Strawberry Pie

5. Fresh Strawberry Pie – I’m SO glad strawberry season is back. I need to make this pie again…it’s not rich at all, and since it involves no cooking (except for the crust), it tastes so fresh!

Snickers Cupcakes

4. Snickers Cupcakes – Oh, I totally need to make these again. If you love Snickers, you will LOVE these!

Homemade Strawberry Lemonade

3. Homemade Strawberry Lemonade – Meyer lemon season + strawberry season? Um…guess I need to make this too and ASAP!

Red Velvet Swirl Brownies

2. Red Velvet Swirl Brownies – These were just delicious, and so pretty too! Perfect for Valentine’s Day!

Spinach Strawberry Salad with Feta

1. Spinach, Strawberry, Pecan and Feta Salad with Strawberry Vinaigrette – This is a huge favorite of y’alls. I think Pinterest made this a popular one, and it is VERY easy to throw together! This is a salad you want to make for your next party…it’s an awesome combination!

Thanks so much for reading this blog, and I hope everyone has a Happy New Year! Time to get used to writing/typing “2013”. 🙂

Filed Under: Beverages, Breakfast, Brownies/Bars, Cakes/Cupcakes, Candy, Chocolate, Cookies, Entertaining/Parties, Fruit, Holiday Recipes, Other, Peanut Butter, Pies, Pumpkin, Salads

Peppermint Bark Chess Pie

December 20, 2012 by Amy 1 Comment

Peppermint Bark Chess Pie

The past couple of months have been a whirlwind for me. I love to check the local news sites for random giveaways, because hey, you never know, right? While checking one of the station’s websites, I saw that they were accepting applications for a baking competition. I didn’t hesitate at all to apply, because it sounded pretty fun! A couple of weeks later, I got a call from someone at the station informing me that I was a finalist.

I was floored.

As one of the finalists, I had to bring cupcakes for tasting and an interview. Since it was just before Thanksgiving, I thought…why not pumpkin? So I brought these to the interview. Since my interview was one of the last interviews of the day, I think the interviewers were “cupcake-ed” out. I couldn’t really tell if they liked what I brought, so I left the interview feeling a bit unsure. However, a few days later, I got the call saying I would be one of the competitors! WHOA…

The person from the show told me that we had to bake a pie. Any pie, as long as it had some sort of holiday theme. When I heard pie, I have to admit that I cringed a little. I’ve mentioned this before, but pie is something I just haven’t worked with a lot. Cakes? Cookies? Cupcakes? I’m good. Pie? Ehhh…

First thing was first. I had to have a pie idea. I didn’t want to do anything too common, so sweet potato, pumpkin and pecan pie were all out. I brainstormed with eggnog and gingerbread, but nothing in particular really came to mind. Then I thought about chocolate. Everyone loves chocolate, but what could I do to make it more a holiday-ish. Then, it hit me….peppermint bark. Who doesn’t love the infamous chocolate/white chocolate/candy cane combination?

I started searching for chocolate pies online, and came across this idea for a chocolate chess pie. So, I adapted the recipe to make two pie fillings: one being chocolate, the other being white chocolate candy cane. Since the competition asked for the competitors to bake two pies, I simply put half of each filling into each pie crust (which is an amazing, flaky all butter crust…seriously, make this crust someday), and swirled them together. Then, I baked the pie up, tried a piece (hoping and praying I got the mint amount just right), and whew! I did. I brought to pies to my husband and I’s work asking for some tough love, and there really weren’t any complaints. Everyone seemed to love it!

I can’t wait to share the links to the show with you all (the show aired locally last night), but for now, here’s the recipe to my competition pie.

Peppermint Bark Chess Pie
Source: pie crust from Smitten Kitchen, filling adapted from Ezra’s Pound Cake

**makes two 9″ pies**

Ingredients:

For the crust:

  • 2 1/2 cups flour
  • 1 tbsp. sugar
  • 1 tsp. table salt
  • 2 sticks unsalted butter, cubed and very cold
  • 1/2 cup ice cold water

For the fillings:

  • 3 cups sugar, divided
  • 3 heaping tbsp. cocoa powder
  • 2 oz. of white chocolate, melted and slightly cooled (I used Baker’s squares)
  • 4 candy canes, grinded in a food processor until it’s a dust
  • 2 pinches of salt, divided
  • 10 oz. evaporated milk, divided
  • 1 stick butter, divided in half and melted (cooled)
  • 4 eggs, divided
  • 2 tsp. vanilla extract

Directions:

  1. In the bowl of a stand mixer, add the flour, sugar and table salt. Mix for about 30 seconds, and then add the cold, cubed butter on top and mix everything until the butter clumps are about pea sized. Drizzle in the ice water while the mixer is on low, a little at a time, until the pie dough is just wet enough to hold together in a dough ball.
  2. Divide into two 5″ wide disks, wrap in plastic wrap and allow to chill in the fridge for about an hour or two (or overnight).
  3. While the dough is chilling, you can make the fillings. Take out two large bowls, and add 1 1/2 cups of sugar to each, as well as a pinch of salt to each. To one of the bowls, add the cocoa powder. To the other, add the candy cane dust. Whisk the dry ingredients in each bowl.
  4. In the bowl with the cocoa powder mixture, add in 1/2 stick of melted butter, 5 oz. of evaporated milk, 2 eggs and a tsp. of vanilla extract. Whisk the mixture well and set aside. In the bowl with the candy cane mixture, add in the other 1/2 stick of melted butter, the last 5 oz. of evaporated milk, melted white chocolate, the other 2 eggs and the last tsp. of vanilla extract. Whisk the mixture well.
  5. Preheat the oven to 350 degrees.
  6. Take the pie dough disks out and roll them until they are about 1/8″ thick. Add each dough to a buttered pie dish (this is a fantastic tutorial), and then add half of the chocolate pie filling to each pie dish. After that, add half of the white chocolate candy cane filling to each pie dish. Then with a butter knife, gently swirl the two fillings (being mindful not to hit the crust).
  7. Place the pie dishes in a baking sheet, and bake the pies for 45-50 minutes. Allow the pies to cool for a couple of hours before serving (if you’d prefer to serve it warm) or after they cool, refrigerate overnight and serve cold. Serve with vanilla ice cream or whipped cream.

Filed Under: Chocolate, Pies

Molasses Spice Cinnamon Chip Cookies

December 18, 2012 by Amy Leave a Comment

Molasses Spice Cinnamon Chip Cookies

One of the biggest addictions I had as a kid around Christmas were the Little Debbie frosted gingerbread man cookies. If my Mom brought those home….oh man, they were gone within 2 days between us 4 kids. I’ve made rolled gingerbread cookies before, which tasted very good, but soft and chewy is my ideal preference when it comes to cookies.

When I was at the store a couple of weeks ago, I came across cinnamon chips. I’ve always seen them on blogs, but NEVER in the stores near me. Maybe I’m just not that aware or it could be a seasonal thing around here, but when I saw them, I knew I had to scoop them up. I was thinking of how I could use them, and I didn’t want to just make chocolate chip cookie base and replace chocolate chips with these, so I thought that a molasses-y cookie would taste wonderful with these! I went to my favorite cookbook, and dug around for a recipe that featured a soft, spicy molasses cookie. When I read soft, chewy and “gently spiced”…I was in.

I will admit, I burned a batch of these. It’s VERY easy to overbake these cookies, so it’s best to keep an eye on the first batch to see how long it takes to bake them up in your oven. They will look kind of raw out of the oven, but they finish “baking” on the cookie sheet during the first part of the cooling process. These cookies have a wonderful flavor, and the cinnamon chips are the perfect enhancement to these. I rolled them in Christmas-y sparkling sugar instead of the granulated sugar as originally called for, which gave them a more festive feel. (Y’all can tell I’m obsessed with Christmas sprinkles, eh?…if you follow my Instagram, you know what I mean!)

Molasses Spice Cinnamon Chip Cookies
Source: adapted from Cooks Illustrated Cookbook

Ingredients:

  • 1/2 cup + 1/3 cup granulated sugar (can sub 1/2 cup sugar for 1/2 cup festive sparkling sugar)
  • 2 1/4 cups all purpose flour
  • 1 tsp. baking soda
  • 1 3/4 tsp. ground cinnamon
  • 1 1/2 tsp. ground ginger
  • 1/4 tsp. ground cloves
  • 1/4 tsp. black pepper
  • 1/4 tsp. salt
  • 12 tbsp. unsalted butter, softened
  • 1/3 cup packed dark brown sugar
  • 1 large egg yolk
  • 1 tsp. vanilla extract
  • 1/2 cup light or dark molasses
  • 1 cup cinnamon chips

Directions:

  1. Preheat the oven to 375 degrees and make sure the oven rack is in the middle position. Prepare your cookie sheets by lining them with parchment paper or a silicone sheet liner and set aside. Place 1/2 cup of granulated (or sparkling) sugar in a baking dish or pie plate and set aside for later.
  2. In a medium bowl, whisk together the flour, baking soda, cinnamon, ginger, cloves, pepper and salt. Set aside.
  3. In the bowl of a stand mixer, beat the butter, brown sugar and remaining 1/3 cup of granulated sugar on medium-high speed for 2-3 minutes, until light and fluffy. Reduce the speed to medium-low and add in the egg yolk and vanilla extract. Once those are added, increase the speed a bit and beat until everything is incorporated (about 20 seconds).
  4. Reduce the speed to medium-low again and add in the molasses. Beat the molasses in until the batter is well-mixed. Scrape down the bowl at this time, if it’s necessary. Reduce your mixer speed to low and add in the flour mixture. Mix everything until the dough is just incorporated. Using a spatula or large spoon, stir in the cinnamon chips.Scoop the dough into tbsp. sized scoops, and place the top half of the balls in the leftover sugar. Place the balls of dough 2 inches apart on the prepared baking pans.
  5. Bake the cookies 1 pan at a time, until the cookies are browned but still puffy, about 11 minutes, making sure to rotate the pans halfway through baking. The centers of the cookies will still be soft, and look raw between the cracks. Do not overbake these cookies…they can overbake very easily (within a minute, I found).
  6. Allow the cookies to cool on the baking sheet for 5 minutes, and then transfer them to a cooling rack to finish cooling.

Filed Under: Cookies

Chewy Chocolate Mint Chip Cookies

December 13, 2012 by Amy 2 Comments

Chocolate Peppermint Chip Cookies

Last Christmas, my in-laws got me this awesome cookbook as a gift. I’m a big fan of Cook’s Illustrated’s recipes, and so I was so thrilled to unwrap this book last year. I immediately skimmed through it while we still had family at the house…I just couldn’t wait! While the cookbook doesn’t have pictures throughout, I have to say it’s a VERY comprehensive cookbook, full of tips and recipes that are well-tested. Whenever I think of a recipe I want to make in the kitchen, this is the first book I look to for a recipe, and it hasn’t let me down yet!

I wanted to try a new cookie this year for food gifts, so of course I had to flip to the index to find a chocolate cookie.  The original recipe calls for chopped semi-sweet chocolate, but I just had to use up the Andes chips that I had in the pantry. (I used both the creme de menthe and peppermint crunch varieties since I made a ::gulp:: triple batch of this dough..)

This cookie is insanely rich and fudgey…I could barely finish one without gulping down water! The addition of the mint chips makes it so festive, not just flavor wise, but color wise, since the two chips are green and red. 🙂

Chewy Chocolate Mint Chip Cookies
adapted from: The Cook’s Illustrated Cookbook

Ingredients:

  • 1/2 cup + 1/3 cup granulated sugar (separated)
  • 1 1/2 cups all purpose flour
  • 3/4 cup dutch processed cocoa
  • 1/2 tsp. baking soda
  • 1/4 tsp. + 1/8 tsp. salt
  • 1/2 cup dark corn syrup
  • 1 large egg white
  • 1 tsp. vanilla extract
  • 12 tbsp. unsalted butter, softened
  • 1/3 cup packed dark brown sugar
  • 1 cup mint chips (like Andes)

Directions:

Preheat the oven to 375 degrees, and prepare two baking sheets by lining them with parchment or a silicone sheet.

In the bowl of a stand mixer, beat the butter, brown sugar and remaining 1/3 cup of granulated sugar for 2-3 minutes, until the mixture is light and fluffy.

Place the 1/2 cup of granulated sugar in a small, shallow baking dish or pie plate and set aside. Whisk the flour, cocoa, baking soda and salt together in a medium-sized bowl, and in a separate smaller bowl, whisk together the corn syrup, egg white and vanilla.

Reduce the speed of the mixer to medium-low, and add in the corn syrup mixture. Beat the mixture for about 20 seconds, until everything is fully incorporated, being sure to scrape down the bowl as needed.

Turn the mixer to a low speed, and add in the flour mixture, as well as the mint chips. Mix everything together until the dough is just incorporated (do not overmix), making sure to scrape down the bowl as needed. This should take about 30 seconds to mix. With a spatula, turn the dough a couple of times to make sure there are no pockets of flour in the dough. Chill the dough in the fridge for 30 minutes to allow it to firm a little.

Roll the dough into tbsp. sized balls, and then roll the top half of the dough balls into the sugar (in the baking dish or pie plate) to just coat them. Place the dough balls about 2 inches apart on a baking sheet (with sprinkled sugar halves facing up), and bake the cookies until they are puffed and cracked, about 10 minutes, rotating the baking sheets halfway into baking. The edges of the cookies will have begun to set, but the middle of the cookies will still be soft. Be mindful not to over-bake these.

Allow the cookies to cool on the baking sheets for 5 minutes, and then place them on a cooling rack to remain cooling. Enjoy!


Filed Under: Chocolate, Cookies

Pumpkin Chocolate Chip Oatmeal Bundt Cake

December 12, 2012 by Amy 1 Comment

Pumpkin Oatmeal Chocolate Chip Bundt

This time of the year is just crazy. Sunday’s weather was well into the 80s and then Monday evening, the low was in the 30s. We had a party to go to on Saturday that I bought a sweater dress for, and of course, it was 70s/80s outside. I still wore the dress, but it was a little odd wearing a sweater dress with tights and boots, considering mosquitoes were biting like crazy outside. Thankfully, we’re in for a freeze warning, so that should get rid of the darn bugs. 🙂

Since it finally feels like December again, it definitely feels more natural to bake up a storm. This past weekend was the big holiday bake-palooza, and after baking up dozens of cookies, I just feel like I should be baking something every day. This cake is one of those things…I love baking bundt cake. They’re so pretty right out of the pan, which makes decorating them super easy. You can easily decorate bundt cakes with a thinned icing type of glaze or sifted powdered sugar. I’m loving the powdered sugar topping lately, since it looks like a layer of snow. So festive, right?

This cake is a recipe that I had bookmarked for a while (story of my life), and I thought it sounded interesting…pumpkin with oatmeal in a cake. I decided to add mini chocolate chips to give it a little boost, and it came out amazing. I had some doubts since this batter was SUPER thick, but the cake came out beautifully.

Pumpkin Oatmeal Chocolate Chip Bundt Cake
Source: adapted from Erin’s Food Files, originally on Dine and Dish

Ingredients:

  • 2 cups granulated sugar

  • 1 cup quick cooking oatmeal

  • 1/4 cup boiling water

  • 1 cup butter, softened

  • 4 large eggs

  • 1 cup canned pumpkin

  • 2 tsp. vanilla extract

  • 3 cups all-purpose flour

  • 2 tsp. cinnamon

  • 1/2 tsp. nutmeg

  • pinch of cloves

  • 2 tsp. baking soda

  • 1 tsp. salt

  • 2 cups mini chocolate chips

  • powdered sugar

 Directions:

  1. Preheat your oven to 350 degrees. To prep the bundt pan, either spray it with non-stick baking spray (they usually include flour in them) or just butter/flour the pan.
  2. Place the oatmeal in a small bowl, pour in the boiling water over the oatmeal and stir the mixture together. Allow the oatmeal/water mixture to stand for 10 minutes.
  3. In the bowl of a stand mixer, add the butter and sugar and beat the mixture for about 2-3 minutes, until light and fluffy. Add the eggs in one at a time, and mix until everything is well incorporated.
  4. Add the pumpkin, oatmeal/water mixture and vanilla to the wet mixture, mixing on low until everything is well mixed.
  5. With the mixer still on low, add the flour one cup at a time, and then add the spices, baking soda and salt to the mixture. Mix everything until it’s well incorporated.
  6. Pour the cake batter into the bundt cake pan, and bake the cake for 60 minutes, or until a cake tested inserted into the center comes out clean.
  7. Cool the cake in the bundt pan for 10 minutes, then invert the cake onto a cooling rack to finish cooling. Dust with powdered sugar and enjoy!

Filed Under: Cakes/Cupcakes, Chocolate, Pumpkin

  • « Go to Previous Page
  • Go to page 1
  • Interim pages omitted …
  • Go to page 25
  • Go to page 26
  • Go to page 27
  • Go to page 28
  • Go to page 29
  • Interim pages omitted …
  • Go to page 85
  • Go to Next Page »

Primary Sidebar

Hey Y’all!

Image Credit: Leslie Pendleton Photography


Hey y’all!

Thanks so much for reading! I’m Amy, and I live in south Louisiana with my husband and our rescue dog. I enjoy sharing my love for cooking, baking, crafts & more! Follow my daily adventures on social media!

Follow my Daily Adventures

  • Email
  • Facebook
  • Instagram
  • Pinterest
  • Twitter

Footer

  • Email
  • Facebook
  • Instagram
  • Pinterest
  • Twitter

Archives

Copyright © 2026 · Foodie Pro Theme by Shay Bocks · Built on the Genesis Framework · Powered by WordPress