• Skip to primary navigation
  • Skip to main content
  • Skip to primary sidebar
  • Skip to footer

The Nifty Foodie

  • Home
  • About
  • Recipes
    • Appetizers
    • Beverages
    • Breads/Muffins
    • Breakfast
    • Canning
    • Desserts
    • Dog Treats
    • Entertaining/Parties
    • Fruit
    • Holiday Recipes
    • Louisiana Cuisine
    • Main Dishes
    • Mexican
    • Nifty Foodie Original
    • Nifty Tricks
    • Project Food Blog
    • Pumpkin
    • Salads
    • Sauces/Dips
    • Side Dishes
    • Skinny
    • Slow Cooker
    • Spices
    • Stews/Soups
    • The Disasters
  • My Weight Loss Journey
    • Races
    • Running
    • Weight Loss Milestones
  • Crafts
  • Contact Me

Brownies/Bars

M&M Cookie Bars

February 20, 2013 by Amy 1 Comment

M&MBars

This week has been pretty difficult on me (spoiler: first world problem). I gave up chocolate (and took on trying to be more patient on the road, which is REALLY hard around here), and I’m having terrible cravings for chocolate. I miss having the occasional fun size candy after lunch or grabbing a couple of kisses out of the freezer. I am an addict, and I have no intention of fixing said addiction. 😉 I’ll be happily eating a Cadbury Caramel egg on Easter Sunday, y’all.

I saw this recipe a while back, and thought it would be perfect with M&Ms thrown in. When I was told about a Valentine’s Day bake sale at work, I immediately ran to Target and grabbed a bag of festive M&Ms. It was so hard not to sneak a taste of these right out of the oven, but I did try some of the dough before adding in M&Ms haha! I honestly have no idea how these bars taste (baked), but based on coworker reviews, they were pretty awesome. I will say that recipe like this is perfect for a bake sale (or a party) since it makes a TON, and it’s very simple to throw together.
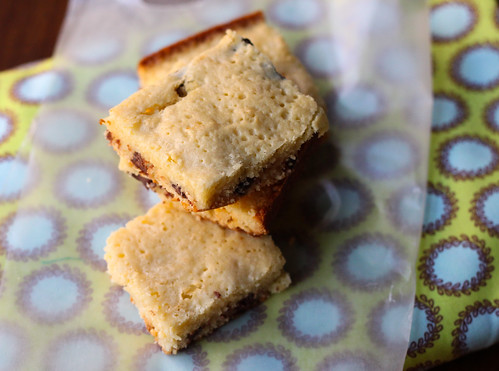
M&M Cookie Bars
Source: adapted from Martha Stewart

Ingredients:

  • 1 1/2 cups (3 sticks) unsalted butter, room temperature
  • 4 cups all-purpose flour
  • 2 tsp. baking soda
  • 3/4 tsp. salt
  • 1 cup granulated sugar
  • 1 1/2 cups packed light brown sugar
  • 2 large eggs
  • 1 tbsp. pure vanilla extract
  • 1 large bag plain M&Ms

Directions:

  1. Preheat your oven to 350 degrees, moving an oven rack to the center. Line a 12×17 rimmed baking sheet with parchment paper and set aside.
  2. In a medium sized bowl, whisk together the flour, baking soda and salt. Set aside.
  3. In the bowl of a stand mixer, cream the butter and both sugars on medium speed until light and fluffy, for about 2-3 minutes. Scrape down the bowl, and add the eggs and vanilla extract. Mix until well incorporated. Add the flour mixture to the wet mixture, and beat on low speed until just combined. Using a spatula, gently mix in the M&Ms.
  4. Place the dough in the baking sheet, and spread the cookie dough evenly across the pan (it’s easier to do this with your hands). Bake the bars, rotating the sheet halfway through, until the edges are browning and the top is a golden color, about 20-25 minutes. Cool the pan on a wire rack, and allow the bars to cool completely before slicing.

Filed Under: Brownies/Bars, Candy

One Bowl Brownies

February 8, 2013 by Amy Leave a Comment

onebowlbrownies

Ok ladies. You know how you have a craving and no matter how many times you try to shake it, you just can’t until you actually eat what you’re craving? Yeah, that was me this WHOLE week.

It was a burrito salad at this place called Izzo’s. I’ve been thinking about it all week, and while the salad that I enjoy is well within my calorie count for the day, for some reason the food there makes me bloat like crazy. Oh, TMI…whatever. You ladies who are reading this get it.

And with my latest DietBet ending today, I was able to go to that restaurant today (right after the gym, mind you) and I savored every last bite of that darn salad. I will never have the mentality of “eat to live”…but at least it wasn’t an order of nachos or something, right? I could have done worse…way worse. 😛

After Christmas, I had a similar craving for brownies. I just couldn’t shake it, and one night, I figured if the recipe was easy enough, the darn brownies were meant to be. And then I came upon this recipe. One bowl brownies.

Meant to be, I guess. 🙂 I only had one out of the pan (coworkers had the rest), and oh man, these brownies were so rich and fudgy. I was pleasantly surprised since the recipe was so simple! I ended up throwing some leftover Christmas Hershey kisses in there as well, just to get rid of the candy. The brownies are a great, basic recipe…they would probably be amazing with peanut butter or caramel sauce mixed in as well.

One Bowl Brownies
Source: Kraft

Ingredients:

  • 4 oz. Baker’s unsweetened chocolate
  • 3/4 cup butter
  • 2 cups sugar
  • 3 eggs
  • 1 tsp. vanilla extract
  • 1 cup all purpose flour

Directions:

  1. Preheat the oven to 350 degrees. Prepare a 13×9 inch cake pan by lining it with foil and spraying the inside with cooking spray.
  2. Microwave the chocolate and butter in a large bowl for two minutes, or until the butter is melted. Stir the mixture until the chocolate is completely melted, and stir in the sugar. Wait for the mixture to be cool to the touch, and whisk in the eggs and vanilla extract. Add in the flour and mix well. Pour the batter into the prepared pan.
  3. Bake the brownies for 30-35 minutes, or until a toothpick inserted in the center comes out with a few fudgy crumbs (making sure not to overbake). Allow the brownies to fully cool in the pan before serving.


Filed Under: Brownies/Bars, Chocolate

Top 10 Recipes of 2012

December 28, 2012 by Amy 2 Comments

Man, what a year it has been! I hope everyone had a wonderful holiday season with their friends and family. 🙂

Most years, I feel like time has flown by, but for some reason, it feels like last January was truly a year ago. So many great things have happened to us this year (as well as some really crappy events).  

Some highlights and not so highlights:

  • It was our first full year in our new house, which has been such a blessing. It’s just awesome to finally have friendly neighbors, who don’t throw their trash in our backyard or play loud music at 2am (side-eye to the neighbors at the old house).
  • My husband and I have both decided to live healthier. Between us, we’ve lost over 150 lbs. this year. (I’m sure my husband is rolling his eyes at me sharing this, but seriously..I’m gonna brag here!) That’s just amazing to me. I’m so proud of us.
  • Another weight loss highlight. I fit into a clothes size that I haven’t been able to wear since 10th grade. That was 12 years ago. OMG!
  • A not so highlight. Hurricane Isaac…don’t want to go into too much detail with that one, but yeah, hurricanes suck. Oh, and for the record, labradors don’t care if the winds are 50 mph outside. If there’s rain/water, it’s playtime! (ugh)
  • I think I’m making some good progress on my 101 Goals in 1001 Days list.

And of course, it’s been another fun year blogging. I really appreciate all of y’all taking the time to read my tiny corner of the Internet. Thank you for your sweet comments, emails and tweets. In January, it’s gonna be this blog’s 5th anniversary, and I’m just amazed by all of the friends I’ve made and people I’ve “met”  through this blog. You guys are the best!

Just to round up the year, I wanted to share with y’all your top 10 most read posts from 2012.

Pumpkin Whoopie Pies w/ Salted Caramel Buttercream

10. Pumpkin Whoopie Pies with Salted Caramel Buttercream – These whoopie pies were made for a work fundraiser, and they were a huge success. Great pumpkin/spicy flavor, and the salted caramel buttercream just makes them super indulgent. Pumpkin + caramel is a wonderful combination!

Red Velvet Bundt Cake

9. Red Velvet Bundt Cake with Cream Cheese Frosting – I love anything red velvet. This bundt cake is a fun change from a regular cake, and it was pretty easy to throw together and bake!

Baked Oatmeal

8. Baked Oatmeal – My breakfast has been forever changed by this. This oatmeal is not soggy at all (which I hate about cooked oats), and it’s very sweet with the addition of bananas.

Peanut Butter Cookies

7. Peanut Butter Cookies – Just simple, classic peanut butter cookies. 🙂 Very good!

Candy Corn Oreo Truffles

6. Candy Corn Oreo Truffles – Oreo truffles are insanely good, and it was fun to make these with seasonal flavors. Always a favorite when I bring these truffles to work!

Fresh Strawberry Pie

5. Fresh Strawberry Pie – I’m SO glad strawberry season is back. I need to make this pie again…it’s not rich at all, and since it involves no cooking (except for the crust), it tastes so fresh!

Snickers Cupcakes

4. Snickers Cupcakes – Oh, I totally need to make these again. If you love Snickers, you will LOVE these!

Homemade Strawberry Lemonade

3. Homemade Strawberry Lemonade – Meyer lemon season + strawberry season? Um…guess I need to make this too and ASAP!

Red Velvet Swirl Brownies

2. Red Velvet Swirl Brownies – These were just delicious, and so pretty too! Perfect for Valentine’s Day!

Spinach Strawberry Salad with Feta

1. Spinach, Strawberry, Pecan and Feta Salad with Strawberry Vinaigrette – This is a huge favorite of y’alls. I think Pinterest made this a popular one, and it is VERY easy to throw together! This is a salad you want to make for your next party…it’s an awesome combination!

Thanks so much for reading this blog, and I hope everyone has a Happy New Year! Time to get used to writing/typing “2013”. 🙂

Filed Under: Beverages, Breakfast, Brownies/Bars, Cakes/Cupcakes, Candy, Chocolate, Cookies, Entertaining/Parties, Fruit, Holiday Recipes, Other, Peanut Butter, Pies, Pumpkin, Salads

Pumpkin Spice Oreo Crispy Treats

October 3, 2012 by Amy 3 Comments

Pumpkin Spice Oreo Crispy Bars

I have a bone to pick with Hershey’s. Why are your pumpkin spice kisses ONLY out for the fall??! I understand pumpkin is a fall thing, but OH MY GOSH y’all…pumpkin spice kisses are one of my FAVORITE candies out there. Starting in September, I start stalking Target for these things. Sadly, for some reason, my Target was WAY behind on stocking their Halloween shelves, and that made this pumpkin spice kiss fanatic slightly crazy. So crazy, in fact, that when I finally saw these on shelves a couple of weeks ago, I bought FOUR bags. I’m sure the cashier thought I was stocking up for PMS or something, because my basket was full of the healthier stuff and then 4 bags of kisses. Ha! Priorities, y’all.

I figured since I bought four bags of these things, I probably shouldn’t eat all of them. I mean, I really could, but it’s so much more fun to make things with candy! When I saw it was “National Rice Krispies Treat Day” a while back, I got a huge craving for one of these things. Then, I thought…heck, why not just throw some of these in with the cereal? I thought some chopped Halloween Oreos would be fun too, because that would make these bars a lot more festive. 🙂

These treats are surprisingly really good. I had a few people tell me they were absolutely delicious, and they wanted to know what gave them the fall-ish flavors. Between the spices and the kisses, these little treats are just so darn good! I even found out someone in my office ate FIVE of them (for real)! I guess they were a winner, eh? 🙂

Pumpkin Spice Oreo Crispy Treats
Source: adapted from Kellogg’s

Ingredients:

  • 1/2 stick butter
  • 1 tsp. cinnamon
  • 1/2 tsp. nutmeg
  • pinch of ground cloves
  • 1 bag mini marshmallows
  • 6 cups Rice Krispies cereal
  • 30 pumpkin spice kisses, coarsely chopped
  • 15 Halloween Oreos, chopped in quarters

Directions:

  1. Spray a 9×13 inch baking pan with non-stick spray.
  2. In a large pot, melt the butter and the marshmallows on medium-low heat, stirring occasionally. Once the marshmallows are melted, remove the pot from heat, and add in the cereal, chopped kisses, and chopped oreos.
  3. Using more of a folding motion, mix everything together until the mixture is combined. Immediately spoon the mixture into the baking pan, spreading until the treats are fairly even in the pan. Allow the treats to cool and set in the pan for at least half an hour before serving.

Filed Under: Brownies/Bars, Chocolate

White Chocolate Brownies & A Giveaway

September 21, 2012 by Amy 40 Comments

White Chocolate Brownies

I love living in the South. Sure, the heat index is enough to make you want to just sit in an ice bath all day, but the food?! Oh, the food MORE than makes up for it.

Around here….

…your cooking is judged based on how good your gumbo is
…we embrace stale bread for bread pudding
…we have a love (the drink)/hate (the storm) relationship with hurricanes
…we don’t mind getting our hands dirty to dig out tiny pieces of seafood over newspaper
…a biggie–you know the difference between creole and cajun food

I know a lot of people frown upon Louisiana since there are some stigmas about living here, but I really am blessed to say that this is my home. I just love the little things that make Louisiana home, and even if I don’t live here the rest of my life, I know that Louisiana will always be a part of me. Cheesy, but seriously true.

When I was contacted about reviewing a cookbook called “The Southern Foodie“, I just couldn’t resist. The book, written by food/drink/travel writer Chris Chamberlain, features recipes from favorite restaurants in the South and it’s organized by state. Of course, when I got the cookbook, I frantically flipped through the pages and bookmarked numerous recipes.

I was very happy to see Louisiana well-represented in the book, too. There are some great staples in there, like red beans and rice, pralines and bread pudding, to name a few. Besides the classics, I found that there are some fun, out of the box recipes, like barbequed oysters and sweet potato-andouille soup. This book is great for someone trying to get a feel for Southern food, and even for Southerners, it’s impressive how many different recipes the author has in here that I’ve never heard of.

One of the hardest things for me when I find a good cookbook is to choose a first recipe. I actually have quite a few that I want to try, but I was really in the mood to bake, so I decided to make these white chocolate brownies. I love that brownies bake up so quickly and you don’t have to fork out the mixer to make them. It’s sort of dangerous how easy brownies are to throw together and these were no exception. 🙂 This brownie is a white chocolate brownie base with white and bittersweet chocolate mixed in. Often times, I find white chocolate desserts to be a little too sweet, but I really think the bittersweet chocolate helped to balance things out a good bit. I ended up halving the recipe, since the original recipe makes two 13×9 inch pans worth of brownies (the halved recipe is below). I sent these to work with my husband, and found out that some people enjoyed 2-3 brownies on their own, so this recipe is definitely a winner. Based on this recipe, I can’t wait to give some others a try!

Now, you know I wouldn’t just dangle this cookbook in front of y’all without having a giveaway. 🙂 The publisher sent me extra books to giveaway to two lucky readers!

Cookbook Giveaway

…

Read More »

Filed Under: Brownies/Bars, Chocolate, Giveaways/Reviews, Review

Red Velvet Swirl Brownies

May 9, 2012 by Amy 11 Comments

redvelvetswirlbrownies

Is it just me or is it a blogger baby boom lately!? Happy times in the bloggy world, and I can’t get enough of it! I just love when someone announces that their family is growing, and the nosy person in me especially enjoys reading all about their pregnancy journey. It’s just completely cool to me. While I’m no momma (except to a crazy fur ball), I just love babies. I especially love that I can hold them and go crazy over their cuteness until they finally decide that I really suck with holding them, and then I can just hand them back off to their mom/dad. 😉

Today, we’re holding a shower for Erin of Erin’s Food Files. I’ve “known” Erin a couple of years, since she used to post on a cooking board that we both frequented at some point. While I’ve never met her in person (I’ve only met a handful of bloggers in person, actually), I totally smiled like crazy when she made her baby announcement. I’m a dork like that, y’all. The lovely hostess, Jessica (aka The Novice Chef), coordinated this virtual shower with a fun Southern theme. So, when it came time to decide on something to contribute, I usually let my sweet tooth guide me. So southern desserts…first thing that popped in my head was red velvet (duh)! I thought about making cupcakes, but I wanted to give these brownies a try, since I’ve seen this brownie combination on quite a few blogs lately.

I ended up eating three of these.

And I’m on a diet. Oops.

Actually, I could have easily eaten the whole pan, y’all. I just couldn’t help myself. Red velvet is my weakness. The red velvet swirled with the cream cheese…in a brownie. It’s perfect for a shower (or any party), since you can just grab a square (or three). Maybe that’s not such a good thing…but eh, shower food isn’t necessarily diet friendly anyway, right? 🙂

Congratulations Erin! I know you’re gonna make one awesome momma!

To see what other bloggers are contributing to Erin’s virtual baby shower, check out this post!

Red Velvet Swirl Brownies
Source: Sunny Anderson (Food Network)

Ingredients:

For the brownie layer:

  • 1 stick & 1 tbsp. unsalted butter (separated)
  • 1 cup sugar
  • 1 teaspoon vanilla extract
  • 1/4 cup cocoa powder
  • Pinch salt
  • 1 tablespoon red food coloring
  • 1 teaspoon vinegar
  • 2 eggs
  • 3/4 cup all purpose flour

For the cream cheese layer:

  • 8 ounces cream cheese, softened
  • 1/4 cup sugar
  • 1 egg
  • 1/8 teaspoon vanilla extract

Directions:

  1. Preheat the oven to 350 degrees and grease an 8×8 inch baking pan using the 1 tbsp of butter.
  2. To make the brownie layer, melt the butter in a microwave and allow it to cool slightly. Add the butter to a large bowl, and stir in the sugar, vanilla, cocoa powder, salt, red food coloring and vinegar (in that order), stirring well after each addition. Separately whisk the eggs in a small bowl and add it to the brownie mixture. Add the flour to the mixture and fold it in until the batter is just combined.
  3. Pour all but 1/4 cup of the batter in the 8×8 pan and spread evenly with a spatula.
  4. To make the cream cheese layer, mix the cream cheese, sugar, egg and vanilla in a medium bowl until all of the ingredients are well blended. Using a spatula, spread the cream cheese layer on top of the brownie batter that is already in the pan. In large spoonfuls, add the remaining brownie batter over the cream cheese layer. Using a toothpick, skewer or tip of a butter knife, drag it through the mixture in the pan to make the swirl pattern.
  5. Bake in the oven for 30-35 minutes, until the center is set (no longer jiggly). Remove the pan to a cooling rack and allow the brownies to completely cool before cutting and serving.


Filed Under: Brownies/Bars, Entertaining/Parties

Thin Mint Blondies

April 3, 2012 by Amy 7 Comments

Thin Mint Blondies

Somehow these cookies have survived in our house for well over a month. I guess I was afraid to open these or something. I mean, these cookies only come once a year, and I’m known for eating these a sleeve at a time. I can behave when it comes to Tagalongs, but Thin Mints? Oh no. I had to ignore them…had to.

Then, this past Saturday, I opened my freezer and stared the Thin Mints down. Then, in my cheat day rage, I ran to Pinterest and looked over recipes using thin mints and stumbled upon these blondies. Of course I had to find a way to make thin mints less diet friendly. 😛

The wonderful thing about bars or brownies is they whip up so quickly. It’s kind of dangerous, but it’s also a good thing when you want to bake something for your coworkers after getting home from work, but also before you have to start cooking supper. 🙂 I had a small taste of these when I was cutting into them, and whoa. If I wasn’t counting my darn calories, I’d save half of the pan for myself.

If you happen to be one of the few with a box of thin mints stashed away, definitely give these a shot. You, or whomever you give these amazing bars to, will thank you a million times over. Just to note: The original recipe calls for Andes chips, but since I couldn’t find these in the store, I made them with a mixture of milk and white chocolate chips.

Thin Mint Blondies
Source: Culinary Concoctions by Peabody

Ingredients:

  • 8 oz. unsalted butter (2 sticks), at room temperature
  • 1 1/3 cup brown sugar, loosely packed
  • 2/3 cup granulated sugar
  • 2 large eggs
  • 1 teaspoon vanilla
  • Pinch salt
  • 2 cups all-purpose flour
  • 1 box Thin Mint Cookies, cut or broken in half
  • 1/2 cup milk chocolate chips
  • 1/2 cup white chocolate chips

Directions:

  1. Preheat the oven to 350 degrees. Butter and flour a 9×13 inch pan and set it aside.
  2. In a stand mixer, fitted with the paddle attachment, cream the butter for 2 minutes until light and fluffy. Then, add in the white and brown sugars and whip the butter and sugars together for 2-3 minutes until everything looks light. Scrape the bowl down
  3. Add in the eggs one at a time, as well as the vanilla and beat the mixture on low speed for about 30 seconds, scraping down the bowl after adding each egg.
  4. Mix the salt and flour with a whisk separately in a small bowl. Then, add your flour mixture to your wet mixture with the mixture on low. Mix everything together until everything is just fully incorporated.
  5. Turn off the mixer, and using a spatula, fold in the milk chocolate chips as well as half of the box (one sleeve) of the Thin Mints.
  6. Spread the batter into your 9×13 pan. If it’s too thick to use your spatula, dip your fingers in warm water and spread the batter using your fingers.
  7. Bake the blondies for 20-25 minutes, until they are set in the middle.
  8. Once you take them out of the oven, working quickly, sprinkle the white chocolate chips evenly on top of the blondies. Allow them to sit for a minute, and then gently press the other half of the Thin Mints into the top of the blondies.
  9. Allow the pan to fully cool on a rack before serving.


Filed Under: Brownies/Bars, Chocolate, Cookies

Favorite Party Recipes

February 2, 2012 by Amy 2 Comments

Part of me cannot believe that the Superbowl is Sunday. I mean, that’s the end of football season until next Fall. I have to wait at least six months to watch another game after this. Sad.  (If you know me, you know I’m being dead serious about how sad this is to me. Crazy football fan here!) A perk of Superbowl Sunday? Watching Millie run up to the TV when I randomly switch over to the Puppy Bowl.

To mourn celebrate the end of another football season, here’s some great recipes that will definitely disappear if you serve them at your Superbowl parties.

Queso Blanco
Restaurant Style Queso Blanco

Restaurant Style Salsa


Crawfish Pies


Crawfish Cheesecake

Jambalaya
Pork and Sausage Jambalaya

Berry Mash Bruschetta

Sugar Cookie Bars
Sugar Cookie Bars

Peanut Butter Cheesecake Brownies

IMG_4426
Oreo Cupcakes

Oh, and if you have an occasional puppy bowl break, I’m pretty sure the dogs at your party would love you for these!

Peanut Butter and Pumpkin Dog Treats

Pumpkin PB Treats

Filed Under: Appetizers, Brownies/Bars, Cakes/Cupcakes, Chocolate, Dog Treats, Entertaining/Parties, Fruit, Louisiana Cuisine, Mexican, Pork/Ham/Bacon, Pumpkin, Sauces/Dips, Seafood

Meyer Lemon Bars

December 8, 2011 by Amy 1 Comment

Lemon Bars

One of the last things you think about in December is citrus. To me, citrus screams bright colors and summery flavors, but in Louisiana, the end of the Fall/beginning of Winter is our citrus season. Satsumas and Louisiana Navels and Meyer Lemons…oh my! I’m crazy about the local citrus, for sure!

A couple of years ago, my husband bought a Meyer Lemon tree for our little backyard, and I couldn’t have been more thrilled! Meyer Lemons are a special lemon…they are a lot sweeter and way juicier than your average lemon. They just scream, “Make me into a dessert, woman!” When our tree made 10 lemons this year, I was more than happy to make these into a dessert!

When I think about lemon desserts, I think about lemon bars. Since I’m personally not a fan of lemon desserts (I know, I’m a weirdo!), I made a batch of these for my husband and his coworkers. My husband told me that his coworkers absolutely loved them, and I need to send desserts more often! (In case they’re reading this, that’s definitely not the last of the desserts that I’m sending him with!)

Meyer Lemon Bars
Source: Ina Garten

Ingredients:

For the crust:

  • 2 sticks unsalted butter, at room temperature
  • 1/2 cup granulated sugar
  • 2 cups flour
  • 1/8 teaspoon kosher salt

For the lemon filling:

  • 6 large eggs, at room temperature
  • 3 cups granulated sugar
  • 2 tablespoons grated meyer lemon zest
  • 1 cup freshly squeezed meyer lemon juice
  • 1 cup flour
  • Confectioners’ sugar, for dusting

Directions:

  1. Preheat the oven to 350 degrees F.

  2. To make the crust: Cream the butter and sugar in your mixer for about 2 minutes, until fluffy. In another bowl, whisk together the flour and salt. Turn the mixer to low and slowly add the flour mixture to the butter mixture until the crust is just mixed. Take the dough out of the mixer and roll into a ball on a well-floured surface. Pat some flour on your hands and flatten the dough. Then, press it into a 9×13 cake pan and make sure there’s about a 1/2 inch edge of crust along the edges of the pan. Chill the dough in the fridge for about 30 minutes.

  3. Bake the crust in the oven for 15-20 minutes, until it just starts to brown. Allow the pan to cool on a wire rack, and keep the oven preheated.

  4. To make the filling: whisk the eggs, sugar, lemon zest/juice and flour in a bowl until well combined. Pour the mixture over the crust once it has cooled, and bake for 30-35 minutes, until the filling has set. Place the cake pan on a wire rack and allow to cool. Before serving, lightly dust the bars with confectioners’ sugar.

Filed Under: Brownies/Bars, Fruit

Sugar Cookie Bars

November 9, 2011 by Amy 1 Comment

Sugar Cookie Bars

As much as I love baking, sometimes it’s good to find a recipe that’s quick and convenient. I didn’t have time on my side this past weekend since we were hosting our housewarming party, so I wanted to bake something that was quick, but would also feed a crowd. This definitely fit the bill.

As you can see, I dyed them a nice LSU gold color and sprinkled purple Halloween sprinkles on top (gotta love Halloween clearance). Geaux Tigers! (Sorry, can’t help it!)

Back to the bars. I decided to add almond extract to the recipe, because I usually use a combination of almond and lemon for decorated sugar cookies. It’s just the perfect combination for sugar cookies, in my opinion. 🙂 I have to say that the texture of these cookies is slightly cookie-cakey, which made for the perfect soft, chewy bar and the icing was pretty classic. I highly recommend trying these bars out if you love sugar cookies, but want something that is as quick as possible. 🙂

Sugar Cookie Bars
Source: mildly adapted from Annie’s Eats (originally from The Repressed Pastry Chef)

Ingredients:

For the bars:

  • 1 cup (2 sticks) unsalted butter, at room temperature
  • 2 cups sugar
  • 4 large eggs
  • 1 tsp. vanilla extract
  • 1/2 tsp. almond extract
  • 1 tsp. lemon zest
  • 5 cups all-purpose flour
  • 1 tsp. salt
  • ½ tsp. baking soda

For the frosting:

  • 1 cup (2 sticks) unsalted butter, at room temperature
  • 1 tsp. vanilla extract
  • Pinch of salt
  • 4 cups confectioners’ sugar, sifted
  • 5 tbsp. milk
  • Food coloring (optional)

Directions:

  1. To make the bars, preheat the oven to 350˚ F.   Grease and/or parchment paper line a 13 x 18″ rimmed baking sheet. Combine the butter and sugar in the bowl of an electric mixer.  Beat on medium-high speed until the mixture is fluffy and smooth, about 2 minutes.  Mix in the eggs one at a time, beating well after each addition, making sure to scrape down the bowl as needed. Blend in the vanilla, almond extract, and lemon zest.  In a separate bowl, combine the flour, salt and baking soda.  Whisk to blend the mixture.  Add the dry ingredients to the mixer bowl and beat on low speed just until incorporated.
  2. Transfer the cookie dough to the prepared baking sheet and press into an even layer. Keep a bowl of water near you so you can dip your fingers in and prevent dough from sticking to your fingers  Bake 10-15 minutes, until light golden brown and a toothpick inserted in the center comes out clean.  Transfer the pan to a wire rack and let cool completely before frosting.
  3. To make the frosting, place the butter in the bowl of an electric mixer.  Beat on medium-high speed until smooth, about 1 minute.  Blend in the vanilla, salt, and confectioners’ sugar until smooth, 1-2 minutes.  Mix in the milk a tbsp. at a time.  Tint as desired with food coloring.  Spread over the cookie bars in the pan, cut into bars and serve.


Filed Under: Brownies/Bars, Cookies

  • « Go to Previous Page
  • Go to page 1
  • Go to page 2
  • Go to page 3
  • Go to Next Page »

Primary Sidebar

Hey Y’all!

Image Credit: Leslie Pendleton Photography


Hey y’all!

Thanks so much for reading! I’m Amy, and I live in south Louisiana with my husband and our rescue dog. I enjoy sharing my love for cooking, baking, crafts & more! Follow my daily adventures on social media!

Follow my Daily Adventures

  • Email
  • Facebook
  • Instagram
  • Pinterest
  • Twitter

Footer

  • Email
  • Facebook
  • Instagram
  • Pinterest
  • Twitter

Archives

Copyright © 2025 · Foodie Pro Theme by Shay Bocks · Built on the Genesis Framework · Powered by WordPress