• Skip to primary navigation
  • Skip to main content
  • Skip to primary sidebar
  • Skip to footer

The Nifty Foodie

  • Home
  • About
  • Recipes
    • Appetizers
    • Beverages
    • Breads/Muffins
    • Breakfast
    • Canning
    • Desserts
    • Dog Treats
    • Entertaining/Parties
    • Fruit
    • Holiday Recipes
    • Louisiana Cuisine
    • Main Dishes
    • Mexican
    • Nifty Foodie Original
    • Nifty Tricks
    • Project Food Blog
    • Pumpkin
    • Salads
    • Sauces/Dips
    • Side Dishes
    • Skinny
    • Slow Cooker
    • Spices
    • Stews/Soups
    • The Disasters
  • My Weight Loss Journey
    • Races
    • Running
    • Weight Loss Milestones
  • Crafts
  • Contact Me

Amy

A Bunch of Randoms

June 21, 2013 by Amy Leave a Comment

This week kind of flew by for me, which is rare. I just hope that doesn’t mean the weekend will go by even faster. Sadly, I have to do some major garden maintenance, which means I either wake up early and do it at 7am or wait until 7pm and swat mosquitos at the same time. Ahh….summer.

Randoms

Randoms

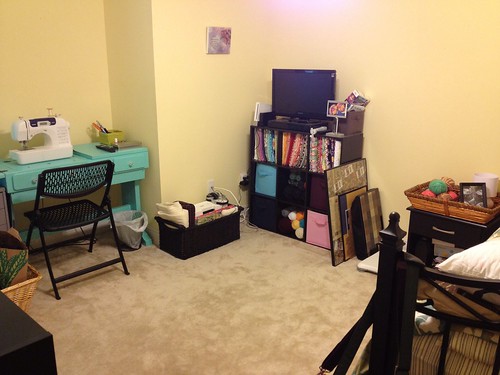
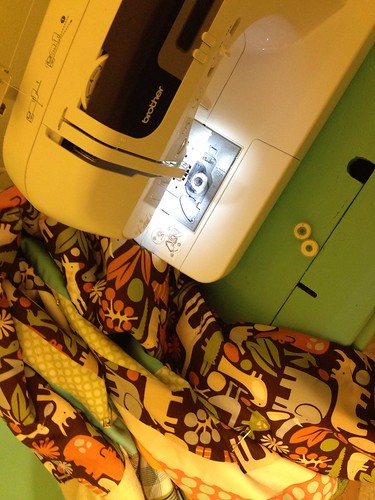
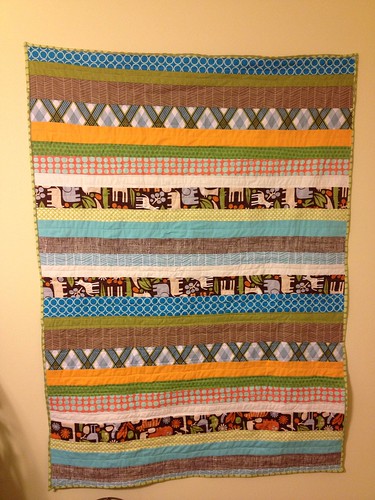
1. I took a good portion of the last weekend to clean up the disaster that is my craft room/guest room. Oh man…it feels good to have those shelves clean and organized! I have to admit, I haven’t gone on a fabric spree in a long time, and it just blows my mind how much fabric I still have. I guess I should get to sewing. The yarn shelves…eh…went a little crazy at KnitPicks at the end of last year. 😛

Randoms

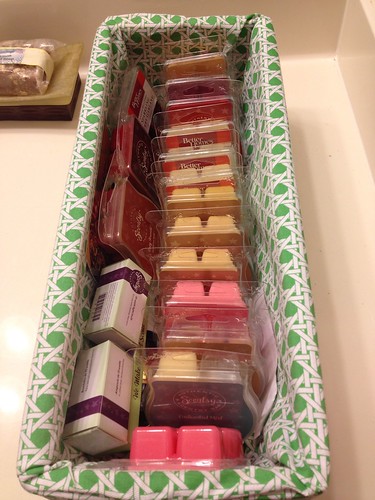
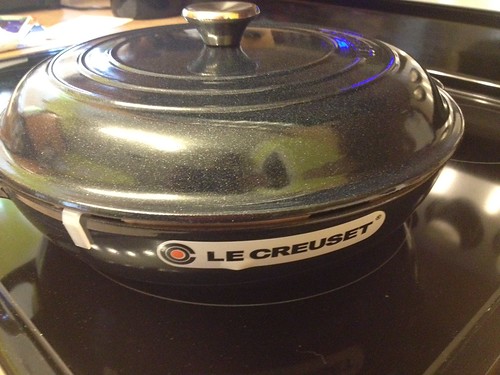
2. I have an unsafe obsession with all things scented wax related. I love our little wax burner so much that I purchased one for my Mom & Memaw for Christmas last year. It’s nice to know that I can leave these on, and not worry as much about it being a fire hazard (that is, unless the light bulb causes a fire or something…but yeah, the risk is WAY less)!

Randoms

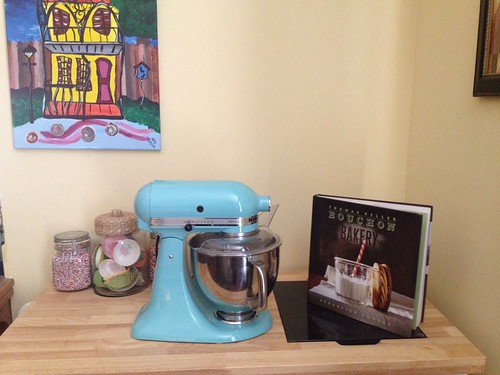
3. I have a slight sprinkles and cupcake liners problem. Earlier this year, we purchased a kitchen cart for a few of the larger kitchen tools that we have, and I just felt that I HAD to add some fun kitchen-y decor to it. I purchased some large jars at TJMaxx, and filled them with 1 lb. bags of non-pareils and jimmies. It’s SO much cheaper to buy them in these bulk bags, and I feel like I go through these regular rainbow ones so quickly…especially when I’m on a funfetti kick! I also purchased a larger jar and put my cupcake liner collection in it. It’s just so pretty & functional. Love it!

Randoms

4. Liz of The Lemon Bowl recently posted a 30 Day Plank Challenge. I decided to join in on this one to see how strong I could get. I would be 110% surprised if I can do 5 minutes of planking by the time this is over. I’m on Day 3 right now and just plugging along, while my arms violently shake and my stomach screams.

Randoms

5. Here’s a cute picture of Millie just for kicks. 🙂

Hope y’all have a good weekend!


Filed Under: Random

Grilled Pork Tenderloin

June 21, 2013 by Amy Leave a Comment

Grilled Pork Tenderloin

Happy first day of summer! It feels like it’s been the summer here for quite a few weeks already…the humidity is crazy, it didn’t rain for about two weeks, and bugs are everywhere. Yay Louisiana summer!

One of the great things about summer is that it’s grilling season. Man, I love grilled foods…the flavor…the pretty grill marks on food…the fact that I don’t do the grilling. 😛 Yeah…grilling outside is my husband’s thing. He’s great at it, and I don’t like dealing with fire.

We had a pork tenderloin in our fridge that I had other recipe plans for, but ultimately decided on grilling it, because it seemed quick/easy. This recipe is from Alton Brown, who has never steered me in the wrong direction. The marinade for the pork is flavorful and very simple to throw together. I was a bit worried with the addition of the chipotle pepper, but it just gave the pork a little bit of smokey flavor and heat. It was nothing over-bearing. I especially love that you just marinate the meat the day before, and the next day, just grill it. It’s perfect for a weeknight dinner!

The only thing we did differently is that once the grilling was done, we let it finish in the oven until it reached an internal temperature of 155 degrees. I know that 140 degrees is OK for pork (which is what Alton’s recipe is written for), but my preference is for the pork to be well-done.

Grilled Pork Tenderloin
Source: Alton Brown

Ingredients:

  • 1 whole pork tenderloin, appx. 1 pound
  • 1 lime, zest finely grated
  • 1/2 cup freshly squeezed lime juice
  • 1/4 cup honey
  • 1 1/2 tsp. kosher salt
  • 1/2 tsp. garlic powder
  • 1 chipotle chile pepper in adobo sauce, chopped
  • 1 tsp. vegetable oil
  • 1 tbsp. chopped fresh cilantro

Directions:

  1.  Trim the fat and skin off of the pork tenderloin, and place it in a gallon ziploc bag. In a jar with a lid, add the lime juice, lime zest, honey, salt and garlic powder, and shake everything to combine. Add half of the marinade to the ziploc bag with the pork, as well as the chopped chipotle pepper, and seal the bag, making sure to remove as much air as possible. Place the bag in a container to catch any leaks, and allow the pork to marinate in the fridge for 24 hours (rotating the bag halfway through to make sure the marinade gets in on both sides). Place the rest of the marinade in the fridge for later use.
  2. Remove the tenderloin from the fridge, and allow it to sit at room temperature while the grill preheats. Also, remove the jar of marinade from the fridge. Preheat the grill to medium heat.
  3. Brush the grill area that you’ll be cooking on with the vegetable oil once it’s preheated. Remove the tenderloin from the bag, and place the pork in the center of the grill. You can discard the ziploc bag with the used marinade at this time. Cover and cook the pork for 12-15 minutes, turning every 2 minutes, until the pork reaches an internal temperature of 140 degrees. Move the tenderloin from the grill, and place it on a large piece of heavy-duty foil. Fold in the edges of the foil on the sides to create a packet, and pour in the reserved marinade. Wrap the top of the packet well.
  4. If you’d prefer the pork to be cooked more, place the foil packet in a preheated at 350 degrees oven, and let it finish cooking until it reaches 155 degrees (this took 7-10 minutes for us). Then, take it out of the oven, and allow it to rest for 10 minutes before serving. If you prefer the pork as it is, just allow it to rest in the foil packet for 10 minutes before serving.
  5. To serve, take the pork out of the foil, and garnish with cilantro. Then, slice the pork and enjoy!


Filed Under: Pork/Ham/Bacon

Baked Za’atar Eggplant Fries

June 13, 2013 by Amy 16 Comments

Za'atar Eggplant Fries

A while back, I decided to go to a new local spice store, called Red Stick Spice Company. I remember seeing them on Groupon, and thought…oh gosh…this could be a very good thing. Every time my husband and I go to Houston, we usually drive to Penzey’s, because the quality of spices and blends there are just amazing. I’m like a kid in a candy store there, so I was hoping this new place would be similar.

It turns out that this little spice store was one of the most GENIUS ideas for home cooks. A spice store where you can buy as little or as much as you want (sold by weight), instead of buying things by the bottle. I mean…how many times do you need a tsp. of a certain spice, and you never use it again? Genius, I tell you!

I was sold. The last time I went was around the holidays, so I bought some blends for gifts, a TON of cinnamon & nutmeg and a few random spices that caught my eye. A few months later, I peeked into the disaster that was my spice cabinet, and saw a bag of Za’atar. Um….yeah. Could not remember what recipe I bought that for, so I googled recipes and stumbled upon this recipe for eggplant fries. (I STILL don’t remember what I bought this spice for…it’s really bothering me lol!)

Now, I don’t eat eggplant very much, because I always seem to forget about this veggie. I love eggplant, however, my husband does not. So, the week he went out of town, I decided to make these fries happen with my sous chef (the dog) standing below, waiting hopelessly for me to drop something. 🙂

These fries were flavorful, crispy and very simple to throw together. I forgot how much I love baked eggplant, and they were perfection when dipped in hummus.

Just to note: Red Stick Spice Company or Penzey’s didn’t compensate me to write this post. They probably have no idea I exist. 🙂

Baked Za’atar Eggplant Fries
Source: The Kitch’n

Ingredients:

  • 1 large eggplant
  • 1/2 cup all-purpose flour
  • 3/4 cup panko breadcrumbs
  • 3 tbsp. grated Parmesan
  • 1/4 cup za’atar spice blend
  • 1 teaspoon kosher salt
  • Pinch cayenne pepper
  • 2 large eggs
  • flaky salt, to finish
  • hummus, for dipping

Directions:

  1. Preheat the oven to 425 degrees F. Place a wire cooling rack on top of a rimmed cookie sheet (to ensure that all sides of the fries get crispy) and set aside.
  2. Slice the eggplant into 1/2″ thick rounds, and then slice each round piece into 1/2″ thick “fries”. Set aside.
  3. Take out three bowls for the batter process. Fill one with the flour, another with the eggs (well beaten), and the third, combine the panko bread crumbs, parmesan cheese, za’atar, salt and cayenne.
  4. Using one hand, dip the eggplant fries in the flour and make sure they’re evenly coated in flour. Then with another hand, grab the fries and dunk them in the egg, making sure that all sides are coated in egg, and place in the third bowl. With the hand that dipped the eggplant fries in the flour, roll the eggplant fries in the panko mixture. This ensures that you don’t end up with a clumpy egg-y panko mix all over your hands…use one hand for dry…one hand for the wet.
  5. Lay each eggplant fry close to one another on the prepared cookie sheet. Bake the fries until they are golden brown and crispy, about 15 minutes. Sprinkle the fries with flaky salt right as they come out of the oven, and enjoy with hummus!

Filed Under: Side Dishes

Whipped Chocolate Pudding Frosting

June 11, 2013 by Amy 12 Comments

puddingfrosting

When I was a kid, my Mom used to make the infamous Wilton cakes. I’d watch in awe as she made gorgeous roses out of something as simple as Crisco and sugar, meticulously turning a simple cake into a work of art. For our birthdays, she’d spend hours working on the infamous bear cake (or other character pans), and after all of that work, within 20 minutes, the cake was gone. My siblings and I used to stand by the mixer and wait for the batter bowl. It was the best! Or even better…when Mom would level her cakes, she’d give us the extra cake pieces. Such a treat! To me, the cake was the best part. 🙂

However, when it came to the icing…blech. That nasty decorative icing…I was never a fan of it. However, in Louisiana…you kind of need the Crisco if you want things to remain in their decorated state. 😛 This made birthday cake eating a task for me…I always ate around the icing. ALWAYS. To this day, decorative buttercream is disgusting to me. I really don’t like it. To note: I can deal with buttercream (made with real butter), but I can’t eat a lot of it…I usually find it too sweet. Swiss Meringue Buttercream is my jam.

Anyway…

I remember one year in high school, my Mom purchased a whipped icing cake for me for my birthday. I was eating around the icing as usual, but Mom told me to give this icing a try…it’s supposed to be lighter and fluffier. I was hooked! I’m sure what they use in the grocery store bakery is full of chemicals, so I just figured I could never replicate this icing…until now.

A while back, my coworker (who LOVES Pinterest just as much as me) found a frosting recipe featuring pudding mix. I didn’t know what this would do to the icing, but I was willing to give it a try. This was it. It had that light, fluffy texture…the not-too-sweet flavor…it was perfect! I got the recipe from her, and decided to try it with chocolate pudding mix. Yup…still perfect. I could eat this stuff out of the bowl…it’s that good! (I usually pour dish soap on the bowl and super hot water to avoid the temptation…I seriously could make a happy bowl ha!)

Note: If you make this, PLEASE pay close attention to mixing times. The pudding mix is sort of grainy, and you need to mix it adequately for everything to dissolve together. Also, just wanted to note that this buttercream is very butter-y in flavor.

Whipped Chocolate Pudding Frosting
Source: adapted from Cooking with Carrie

Ingredients:

  • 3 sticks unsalted butter, room temperature
  • 1/2 tsp. salt
  • 1 small package instant chocolate pudding mix
  • 1/2 cup heavy cream
  • 1 tsp. vanilla extract
  • 1/2 – 3/4 cup confectioners sugar

Directions:

  1. In the bowl of a stand mixer, beat the butter on medium-high speed for 3-5 minutes, until light and fluffy.
  2. Turn the speed on low, and add in the pudding mix and salt. Once it’s all mixed, add the cream slowly. Once those ingredients are fully incorporated, turn the speed on high and beat the frosting for 5-7 minutes.
  3. Turn the speed on low, and add 1/2 cup of the confectioners sugar. Once it’s mixed, give it a taste…if it’s not sweet enough (it was for me), add the extra 1/4 cup. Beat for another 5 minutes on high speed. Scrape down the bowl, and add the vanilla extract. Beat the frosting on low for a minute for the extract to be well-mixed in the frosting. Enjoy!


Filed Under: Cakes/Cupcakes, Chocolate

Let’s Be Real Here

June 10, 2013 by Amy 7 Comments

It’s been a rough couple of months.

Last time I recorded a loss was in Week 67, which was 8 weeks ago.

I’m gonna be real honest here.

Week 67: 225.0
Week 75: 234.4

Weight Gained: 9.4 lbs.

Yeah. I know. I know.

I want to be honest with you guys. Last week was my first run in a long time. Probably since The Color Run. I really can’t remember. I have gotten way off track, and I’m disappointed. I have been so scared to admit it on here, since you all keep me accountable. You guys have been rooting me on for well over a year, and this happens. While I did slip a little, I didn’t completely fall off the mountain. I’m still over 60 lbs. down, and over halfway done with my journey.

What happened? Well, sadly haven’t logged my food for a while, and I simply quit working out. My wake-up call was when I was at Old Navy last week (shopping for work-out clothes for summer). I realized that while I’m excited to be in regular clothes, I’m one of the largest sizes in regular clothing. Now for perspective, I was the largest size in plus-size clothes, so this is certainly an accomplishment. However, I’m not done. I still have a bit more weight to lose. I can do this. I did it before…I can do it again.

I am back.

  1. I went for my first run last week, and even though it was only a mile, it was a mile more than sitting on the couch.
  2. I’m calorie counting again, and truly trying to stick to my allotted amount.
  3. I’m wearing my BodyMedia band again, so I can watch those numbers again & get constantly re-motivated.
  4. My first half marathon is in 7 short months. I will be ready for that race.
  5. My goal back in May was to reach Onederland before football season started. Now, my goal is to reach Onederland by Halloween. Who knows? Maybe I’ll wear a costume this year?

Anyway, for those of you who emailed or tweeted me in the past few weeks–don’t worry….I’ll be back to bothering y’all with obnoxious work-out Instagram updates in no time! 🙂 And thank you. Thanks to every single one of you for your support. You have no idea what it means to me.


Filed Under: Health/Weight Loss

A Bunch of Randoms

June 7, 2013 by Amy Leave a Comment

Another work week bites the dust, y’all! 🙂 It’s kind of awesome to be home all weekend. After Food Blog Forum, our mini-anniversary trip and an impromptu drive down to New Orleans, it’s strange to have a calm, quiet weekend.


As you may know, I’m an introvert. Food Blog Forum drained me (I’m totally OK with it, though!):-P. While I had a blast meeting people, I definitely appreciated the little me time I had in the evenings before I fell asleep. If you feel the same way, this is gonna make you nod your head until you feel like a bobble head. Especially 8, 17 & 19. Definitely me.

Randoms

In our veggie garden adventures, I have learned something interesting about pumpkins. Usually, veggies flower and make fruit. It’s easy.

Nope! Not always!

With pumpkins, there are male flowers and female flowers. So, you may have a pumpkin vine full of happy flowers, but if they’re all male flowers, you get no pumpkins. This was something I learned last year, and I thought it was because I’m a rotten gardener. After some googling, I learned that if you don’t have bees doing the pollinating for you, you have to do it yourself. Maybe my mind is in the gutter, but man…that’s…um…awkward. Hand pollination = flower sexy time essentially. So yeah…we’ll see how that works out. I just want some darn Jack O’ Lanterns for our front yard decor in October. If I have to do the pollination myself, then I guess that’s what I’ll have to do. Will some Marvin Gaye help in this situation LOL? (Sorry…I’m not sorry.)


Ransoms


This treat is gonna be my best friend this summer. I just know it. Holy humidity….we get used to this stuff every year? Yuck.


I miss The Office. I thought the finale was perfection. The writers wrapped it up beautifully…I’m just so bummed to see it go.

“I wish there was a way to know you’re in the good old days before you’ve actually left them.” ::tears::


A while back, I joined a BzzAgent campaign for CoverGirl Outlast 3 in 1 Foundation. I was skeptical, because I’ve never had luck with CoverGirl’s shades. I’m pale as heck, and their palest color was still too dark (this was back in college). I joined the campaign though, because I’ve heard wonderful things about this foundation. I picked up “Classic Ivory”…”Ivory” is too pink for my skin), and applied it. I set my foundation with silica powder spheres (as recommended in this seriously AMAZING make-up tutorial by Mrs. Rainbow, who now blogs here). That was it. No primer…no added moisturizer…I tested it as a true 3 in 1 foundation. I think I’m in love with this stuff….it’s less than $15/bottle (which is CHEAP considering I pay $40 for my normal foundation) and lasted pretty well throughout the day. Here’s the comparison from 6am to 4pm on an average work day….while it all didn’t stay put, I’m surprised by how much did!

CoverGirl Bzz

Disclaimer: I was sent a coupon for a bottle of the CoverGirl foundation for free through BzzAgent for a fair and honest review. I received no further compensation.

Have a great weekend everyone!


Filed Under: Random

Peanut Butter Cup Cookies

June 6, 2013 by Amy 2 Comments

reesescookies

My husband and I are huge fans of warehouse club shopping. The only one out here is Sam’s Club, but we’re getting a Costco soon, and I couldn’t be more excited to check that place out!

Even though there’s just two of us in the house, we buy a lot of staples there. To name a few, we like to buy cheap spices, baking ingredients, frozen fruits, meat (we use our FoodSaver religiously), dog treats and a lot of times, even clothes!

Clothes are a new thing, for sure. Before my weight loss journey began, I barely fit in the shirts they would sell there. It’s very odd to now go to Sam’s, and purchase jeans/shirts/cardigans from there. It all fits now! It’s awesome, because it’s dirt cheap and most of the time, they offer fairly classic pieces.

The nemesis of warehouse club shopping, however, are the impulse buys. Whew…can’t tell you how many times random things just hop in our cart! In fact, just recently, there was a bulk box of Reese’s mini cups (the already unwrapped kind) that somehow found its way in our cart. 😛

Since I had a plethora of Reese’s cups to now use up, I decided that cookies would be an awesome idea. I searched the Internet, and found these giant cookies. I was immediately smitten. These were so good…they have the classic chewy peanut butter cookie flavor with Reese’s all throughout. Can’t go wrong here, folks!

Peanut Butter Cup Cookies
Source: Real Mom Kitchen

Ingredients:

  • 3/4 cup butter, softened
  • 1 cup sugar
  • 1 cup brown sugar
  • 1 cup peanut butter
  • 2 large eggs
  • 2 tsp. vanilla
  • 1 tsp. baking soda
  • 1/2 tsp. salt
  • 2 1/2 cups flour
  • 1 1/2 cup milk chocolate chips
  • 32 mini Reese’s peanut butter cups, quartered

Directions:

    1. Preheat the oven to 350 degrees. Add the butter and sugar to the bowl of an electric mixer, and mix on medium-high until light and fluffy (about 3 minutes). Scrape down the bowl, and add the peanut butter, eggs and vanilla. Mix until well-combined
    2. With the mixer on low, add in the baking soda, salt and flour. Mix until just combined. Fold in the chocolate chips and Reese’s cups using a spatula.
    3. Using a large cookie scoop, scoop the dough onto a parchment or silicone mat lined cookie sheet. For me, 6 cookies fit on each sheet. Slightly flatten each scoop with your hand, and then bake the cookies for 12-15 minutes.
    4. Allow the cookies to cool for 2 minutes, then place them on a cooling rack to finish cooling.


Filed Under: Candy, Chocolate, Cookies, Peanut Butter

Another baby quilt

June 5, 2013 by Amy 2 Comments

One of the main reasons I don’t think that I could ever craft for an income is that my desire to make things comes in random spurts. One month, I’m all gung-ho about it, constantly thinking “MUST MAKE ALL THE THINGS!!” Then, the next…eh.

I will admit that the itch to craft always hits around the holidays. ALWAYS. I must make cute Christmas-y things and gifts! Afterwards, I’m so pooped from the holidays in general, my craft room becomes a lonely place for a while. Then, the weather warms up, and I put the yarn away. I’m in no mood to knit when it warms up. I tend to grab for the fabrics this time of the year, and it’s perfect timing, since our neighbors just had a baby boy!

I’m not a very good quilter. I’m in awe of quilting blogs, because I just don’t have the skills to make elaborate quilts. I tend to stick to simpler patterns. Lately, strip quilts are where it’s at. 😛

I ended up going through my fabric stash, and found myself going super bold for this quilt. Most of my fabrics feature simple shapes, so I knew I had to buy some fabric to be the feature theme for the quilt. Without asking my neighbors for a theme, I took a stab in the dark, matched up most of the fabric colors I had in mind for this quilt, and bought 2D Zoo (in chocolate). SO SO cute!

Another baby quilt

It took me a good week to finish this quilt, since I prefer machine binding over hand binding, and I couldn’t be happier with the results. I placed strips of 2D Zoo throughout the front with the other fabrics, and made the back completely 2D Zoo.

Another baby quilt

Another baby quilt

I didn’t even know it, but the baby’s nursery is a jungle/safari theme anyway, so it worked out perfectly!! 🙂

It was good to dust off the machine and sew again. I don’t really do it often enough, and I know I should.

I’m sure I’ll be fairly crafty in the near future, since I know about 3 more babies coming into the world soon. It’s a nice little baby boom, that’s for sure.

Filed Under: Crafts

French Baguettes

June 4, 2013 by Amy 2 Comments

French Baguettes

My husband and I really love bread. Before our weight loss journeys began, we could easily put away a loaf of bread between us, especially if it was warm right out of the oven. Oh man.

We’ve avoided that bread for a while now, until crawfish season was in its prime a few weeks ago. See, my husband likes the bread b/c the crawfish boiled garlic cloves are just perfection on it. While I love the garlic myself, I mainly use the bread to tone down the spices. I’ll hold a piece of bread in my mouth for a minute or so to give my taste buds a break LOL!. I’m such a wuss…

Since we were having friends over for crawfish, I decided to take the opportunity to face my fear of yeast. Yeast and I aren’t the best of pals. I usually add water that’s too warm, and I kill it. Our relationship isn’t healthy…I’m a yeast killer. 🙁

This time, I was super careful about my water temps….since this bread takes a LONG time to be oven-ready, I wanted to make sure that water temps weren’t the culprit. It worked out beautifully. The bread is VERY crusty (I sprayed water like crazy on it before placing it in the oven), with a nice soft interior. It’s not like the french bread out here (which is usually for po’boys), but it’s a wonderful bread nonetheless. While it takes a while to come together, the actual work time on this couldn’t be quicker. It’s very simple to throw together the dough (especially if you have a stand mixer)…you just need some patience for the rising times.

French Baguettes
Source: King Arthur Flour

Ingredients:

For the starter:

  • 1/2 cup cool water
  • 1 cup unbleached all-purpose flour

For the dough:

  • All of the starter
  • 3 1/2 cups unbleached all-purpose flour
  • 1 cup lukewarm water
  • 1 1/2 tsp. salt
  • 1/4 tsp. instant yeast

Directions:

  1. Mix the ingredients for the starter, until everything is well mixed and smooth. Cover the starter with a kitchen towel, and allow the starter to rest at room temperature overnight.
  2. The next day, mix the starter with the remaining dough ingredients, and knead the dough (by hand or using a mixer), until the dough is springy but not completely smooth. Transfer the dough to a lightly oiled/greased bowl, cover with a kitchen towel, and allow it to rise for 3 hours. After the first hour of rising, gently deflate it and turn the dough over, and then do the same thing again the next hour.
  3. Divide the dough in half, and shape the halves into a rough oval. Allow it to rest for 15 minutes, then fold each oval lengthwise (carefully sealing the edges) and using cupped fingers to gently roll each piece into a 17″ log. Transfer the loaves onto a lightly greased or parchment/silicone lined pan. Cover the loaves once again, and let them rise until they’re puffy, but not yet doubled (this will take 2-2.5 hours).
  4. In the last 15 minutes of rising time, preheat the oven to 425 degrees F. Gently make three diagonal 1/3″ deep slashes in each loaf of bread, using a sharp knife or razor blade. After the rise is done, mist the loaves liberally with warm water. Bake the baguettes for 22-28 minutes, until the tops are golden brown. Turn the oven off, crack the door open a couple of inches and allow the baguettes to completely cool in the oven.

Filed Under: Breads/Muffins

A Bunch of Randoms

May 31, 2013 by Amy 6 Comments

It’s been a rough past few weeks, diet-wise. Between Food Blog Forum, an anniversary mini-vacation to Houston and well, just not working out at all….I’ve gained some weight. I’m back on track, though. After a lot of thinking, I decided to get back into the DietBet swing of things.

Would any of you like to join me? It ends just before the 4th of July festivities should be happening!

This made me laugh today.

Randoms

On another weight loss note, I have to thank Sara, of Fit for a Bride blog, for interviewing me on her blog last week. Beyond flattered!
Randoms

When given the choice between a Le Creuset braiser and a Kate Spade purse, I’m pretty sure I’m one of the few gals who would go for the braiser. The cool thing is it was almost 50% off, and the only reason for that is that the color (midnight blue) was a limited edition. I really don’t care what color my cookware is, but it kind of worked out in my favor, because this piece is very cool since it has a sparkly finish. I’m in love with it!
Randoms

As I mentioned, my husband and I took a mini-vacation to Houston this past weekend. We aren’t picky when it comes to hotels, so we usually use hotel points for trips like this and we don’t really expect much out of it. However, this time, we stayed at Hotel Indigo near the Galleria. We were blown away. The rooms were gorgeous (seriously want to steal that duvet cover), and the staff there were super friendly. You may notice the cookie bouquet in the picture, which I bought to surprise my husband. They made sure it was delivered to our hotel room before check-in, which was a sweet touch. I thought they’d just hand it to us at check-in or something. It was the first time (EVER) that I surprised my husband. SUCCESS!
Randoms

I can’t believe that it’s been 4 years since my husband and I got married. A lot has happened since then, but I think the biggest accomplishment has been our weight loss journey. Between the both of us, we’ve lost 185 lbs., and our journeys aren’t even over yet. I know I have at least 50-60 lbs. left to go. 185 lbs. is a person…18.5 sacks of potatoes…37 bags of flour…3 Millies…I could go on and on. I’m pretty proud of us, darnit!

I love this article so much….while my siblings can get on my nerves from time to time (What? Don’t act like it’s just me!), they truly are great. I’m a pretty lucky gal.

Back in the college days, I majored in Geography. As a geography geek, this game is perfection. Even if you aren’t a geography geek, I have a feeling you’ll get hooked on this game, too!

Hope y’all have a great weekend!

Filed Under: Random

  • « Go to Previous Page
  • Go to page 1
  • Interim pages omitted …
  • Go to page 20
  • Go to page 21
  • Go to page 22
  • Go to page 23
  • Go to page 24
  • Interim pages omitted …
  • Go to page 85
  • Go to Next Page »

Primary Sidebar

Hey Y’all!

Image Credit: Leslie Pendleton Photography


Hey y’all!

Thanks so much for reading! I’m Amy, and I live in south Louisiana with my husband and our rescue dog. I enjoy sharing my love for cooking, baking, crafts & more! Follow my daily adventures on social media!

Follow my Daily Adventures

  • Email
  • Facebook
  • Instagram
  • Pinterest
  • Twitter

Footer

  • Email
  • Facebook
  • Instagram
  • Pinterest
  • Twitter

Archives

Copyright © 2026 · Foodie Pro Theme by Shay Bocks · Built on the Genesis Framework · Powered by WordPress