• Skip to primary navigation
  • Skip to main content
  • Skip to primary sidebar
  • Skip to footer

The Nifty Foodie

  • Home
  • About
  • Recipes
    • Appetizers
    • Beverages
    • Breads/Muffins
    • Breakfast
    • Canning
    • Desserts
    • Dog Treats
    • Entertaining/Parties
    • Fruit
    • Holiday Recipes
    • Louisiana Cuisine
    • Main Dishes
    • Mexican
    • Nifty Foodie Original
    • Nifty Tricks
    • Project Food Blog
    • Pumpkin
    • Salads
    • Sauces/Dips
    • Side Dishes
    • Skinny
    • Slow Cooker
    • Spices
    • Stews/Soups
    • The Disasters
  • My Weight Loss Journey
    • Races
    • Running
    • Weight Loss Milestones
  • Crafts
  • Contact Me

Amy

Back to Weight Loss

June 2, 2012 by Amy 3 Comments

Well, I’m back to calorie counting again. I didn’t gain much since I stopped in March, which I’m appreciative of. Now that it’s the summer, I find myself a bit bummed that C25K is going to be ridiculously difficult to do in this heat/humidity. I’ll probably have to workout at 7:30 at night or something so I don’t pass out, but I’m determined to get back to it. I’d love to be able to get into running a 5k (or two) come Fall, so I have the whole summer (man, I’ll need it, I’m sure) ahead of me to get through the C25K. ๐Ÿ™‚

This blogger’s post called Hey, Fat Girl totally struck a chord with me. As a fat gal who wogs (my word for the weird walk/jog combination that I do), this post was so refreshing to read. I always wonder what people think when they see me jogging. I know I’m not a legit runner at all. I do know that when most people see me run in the neighborhood, they probably hear me breathing heavily and struggling to make those last 10 seconds happen during the running parts of the C25K program. :- It’s not pretty, folks.

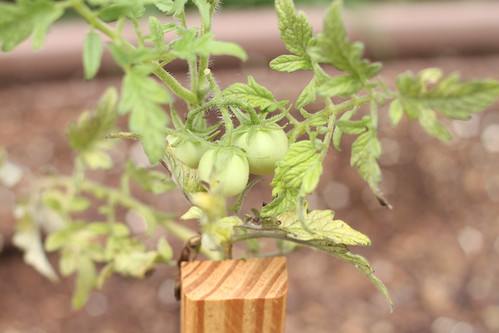
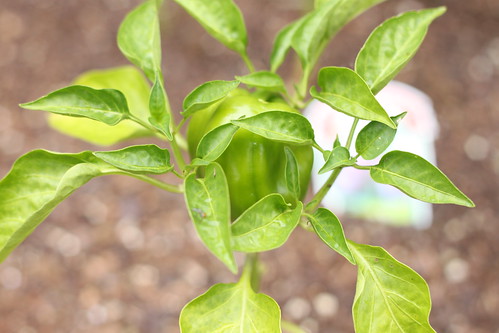
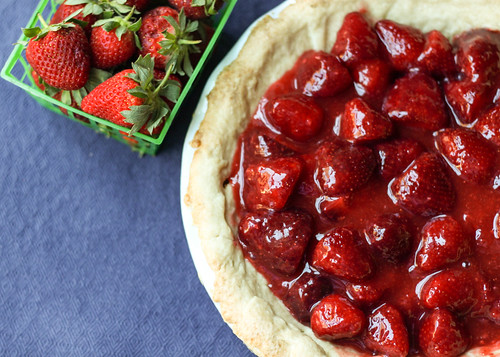
Now, as much as I’m dreading the summer for my work-outs, I can’t help but LOVE the summer, food-wise. Creole tomatoes are my favorite variety of tomatoes, and my plants are flowering like crazy. These tomatoes are so flavorful…all you need is a little salt and pepper. It’s also the season for berries, watermelon, corn (OMG grilled corn), cucumbers and peppers. All of those things will definitely help me make better decisions, calorie-wise.

Are any of y’all calorie counting, too? If you’d like to friend me on MyFitnessPal, here’s my profile. I love having friends on there to keep me accountable. ๐Ÿ™‚


Filed Under: Health/Weight Loss

Pesto

May 29, 2012 by Amy 2 Comments

pesto

When we moved to a new house this year, one of the main things that I wanted was a raised bed for our vegetable and herb garden. I haven’t had much success in the past, so this year I was optimistic. We put in three basil plants, and they just blew up! The thing with herbs is that if you want them to grow more, you need to pick them. So, I picked most of the leaves off of the plants, and realized that I had more than enough to make some pesto happen.

Pesto is something that I’m fairly new to. I really didn’t know what pesto was until I started reading food blogs. Once I learned, I thought that pesto couldn’t be an everyday meal. It just looked and sounded SO fancy. I was REALLY missing out here, y’all. All you need to do is throw your ingredients in a food processor, and let it go. It’s just really easy, and adds such wonderful flavor to whatever you add it to. Heck, you don’t need to add it to anything…eat it by the spoonful. ๐Ÿ™‚

A trick that I learned from a few Twitter friends that pesto doesn’t NEED pine nuts (who knew those things were so dang pricey?!). Walnuts were the perfect substitution to pine nuts, and I totally couldn’t tell the difference!

Pesto
Source: Ina Garten

Ingredients:

  • 1/4 cup walnuts
  • 1.5 tbsp. fresh chopped garlic (about 5 cloves)
  • 2 1/2 cups of fresh, packed basil leaves
  • 1/2 tsp. kosher salt
  • 1/2 tsp. freshly ground black pepper
  • 3/4 cup extra virgin olive oil
  • 1/2 cup grated parmesan cheese

Directions:

  1. Place the walnuts and garlic in a food processor and pulse the ingredients for about 15 seconds. Add the basil, salt and pepper to the food processor, and turn on the food processor. While everything is chopping, slowly add the olive oil in through the top of the food processor until everything is well pureed. Add in the parmesan cheese, and pulse for about another minute to make sure it’s well incorporated.
  2. Serve immediately or place in a container with a small amount of olive oil on top to prevent the pesto from browning.


Filed Under: Sauces/Dips

Crawfish Fettuccine

May 22, 2012 by Amy 3 Comments

Crawfish Fettuccine

My husband is not a big pasta person. He could eat rice for days, but pasta? He has to be in the mood for it. I’m the opposite. If you told me I had to eat pasta every day for the rest of my life, I would think I died and went to heaven. I LOVE pasta. I’m all about it. So, when crawfish went on sale on weekend, instead of making the usual etouffee, I hoped that my husband would be in a pasta-loving mood that day, because crawfish fettuccine was on my mind. ๐Ÿ™‚

Well, as you can see, we had crawfish fettuccine that evening. ๐Ÿ˜› And it was every bit as delicious as I had hoped. We ended up halving the recipe, since the original recipe would make way too much food for just my husband and I.

I do want to note that this recipe does contain Velveeta. If you aren’t OK with using processed foods, you may be able to substitute freshly grated cheese, since this recipe’s directions reminded me a lot of making a bechamel sauce. However, I personally didn’t try that to tell you if it works out the same way.

Crawfish Fettuccine
Source: adapted from Holly Clegg

Ingredients:

  • 1/2 lb. fettuccine
  • 2 tbsp. butter
  • 1 small onion, finely chopped
  • 1 green bell pepper, seeded and chopped
  • 2 cloves garlic
  • 2 tbsp. all-purpose flour
  • 3/4 cup skim milk
  • 1 lb. light Velveeta, cut into small cubes
  • 1 lb. crawfish tails (make sure they are cleaned)
  • 1 tbsp. chopped parsley
  • 1/4 cup green onions, chopped
  • 1 1/2 tsp. worcestershire sauce
  • pinch cayenne pepper

Directions:

  1. Cook the fettuccine in boiling water until al dente. Do not add oil or salt to the pot. Drain the pasta, wash in cool water to make sure the pasta doesn’t stick together as it sits, and set aside.
  2. In a large pot, melt the butter and saute the onions, green bell peppers, and garlic until translucent and tender. Add the flour and stir well until everything is mixed.
  3. Gradually add the milk, stirring at the same time, until the mixture is smooth. Add the cheese cubes, stirring the sauce until all of the cheese has melted.
  4. Add in the crawfish tails, parsley, green onions, worcestershire sauce and cayenne pepper and mix everything together gently.
  5. Add in the pasta, and using tongs, toss everything together until well-combined. Heat the fettuccine well and serve.

Filed Under: Louisiana Cuisine, Pasta/Rice, Seafood

A planner that works for me!

May 21, 2012 by Amy 3 Comments

Since I was in middle school, I have had a planner of some sort. In middle school, my Mom actually had some sort of Mommy calendar on the kitchen wall where there was a column for each kid’s activities (there were four of us, so I’m sure this calendar kept her sane). When I got to middle school, I remember my Mom just asked me to put after school or weekend activities on the wall calendar, since at that point I was involved in cheerleading, 4-H, band and Beta club. I was a busy kid, and having that calendar definitely helped things stay organized. In high school, I bought my very own planner in addition to writing activities on my Mom’s calendar, and that’s when I got hooked. HOOKED!

I haven’t been able to get into electronic calendars, since my love for the paper planner is still evident. I write everything in my paper planner. EVERYTHING. To-do lists, meetings, blog post ideas, appointments, etc. And the prettier the planner is, the better. I LOVE colors.

Lately, I have been hearing about Erin Condren life planners from other blogger friends, and I was super excited to order one, but the price tag scared me. $50? Ouch…that’s a little steep. Then, about a month ago, the planners went on sale for $30 since it was almost May. To add more temptation, I saw on Plum District (referral link) that you could buy a $50ย Erin Condren gift card for $25. I figured at that price point, I should give this planner a chance.

Y’all…I’m in LOVE with this planner. I didn’t think it was really possible to love a planner, but it has everything I need/want in a planner AND it’s bright/full of colors.

I ordered a planner where you can customize it to include things you enjoy (which repeats along the cover of the planner), as well as your name.

Planner Cover

Isn’t that just adorable? I just love how personal the cover is!

Just to note, I’m showing (mostly) blank pages of the weekly/monthly planner, since some of the things in my planner are personal information. I swear, this week’s page is pretty darn full. ๐Ÿ™‚

Weekly View

A tip I learned from another blogger. Write your upcoming posts on post-its. That way, if you want to change your schedule around, you aren’t scratching out things all over your planner. Just pull off and re-stick!

For the planner, I like how the day is broken up into morning/day/night parts (which is kind of hard to see in the picture…sorry). You have plenty of room to write down appointments and things you plan to get done that day! I also like the weekly goals and to-do list.

Here’s what the month looks like:

Monthly View

It’s pretty standard. Apparently next year’s planners are going to have the month spanning over two pages! ๐Ÿ™‚ Another feature you can see in this photo is that every month has a tab.

Ok, and these are just fun little features (which I’m an absolute sucker for) that they have for this particular planner. Stickers!

Stickers

There’s anotherย five pages of stickers, withย four of those pages being completely blank stickers.

And last but not least of the cool features, there’s a small zipper pouch in the planner. When I got my planner, there were already some labels and personalized cards in there (as a bonus). I carry blank deposit slips (not the ones with my account information on there, but the freebies from the bank counter) in there, as well as stamps. You just never know…

Zipper pouch

You can kind of see in front of the zipper pouch that there’s also a small folder for papers. ๐Ÿ™‚

Now, I know that $50 is crazy for a planner, but if you want to save money, you can often find Erin Condren gift cards on Plum District and One Kings Lane (both are referral links), which makes the planner a good bit cheaper! You just have to keep your eyes peeled…there’s a way to get deals on this site! Also, the planners for 2012-2013 aren’t for sale yet, but they will be next month.

Disclaimer: I got ZERO compensation or freebies for writing this post. Just wanted to share something awesome with y’all!

Filed Under: About Us, Organization

A bunch of randoms

May 16, 2012 by Amy 1 Comment

I feel like I have a ton of things to post about. This year is just flying by…wasn’t I just drinking a bottle of wine out of a plastic cup (so fancy)ย to welcome the new year?!

  • It’s snowball season, y’all. A snowball is basically super finely shaved ice coated with flavored syrups. My favorite flavors are nectar (tastes like cream soda) and wedding cake. A new place opened near our house, and oh man, I’ve been visiting that stand way too much! It’s just so dang tasty. If you’re ever in New Orleans during the Spring/Summer, I highly encourage you to try one of these babies.

  • Before Easter, I crossed off a major craft to-do. Two years ago, I bought a bunch of Spring colored felt to make into a gorgeous ruffle wreath. They were pretty popular around the bloggy world back then, and I finally found time to make one. It’s on our mantel now, and I absolutely love it! It was a bit time consuming to cut out all of those felt circles, though. I actually think this will go on the craft room door once Spring is over. I just can’t put it away!

  • These border collie magnets just kill me. They basically describe Millie perfectly. I’d buy them, but I can’t justify spending $20 on four magnets.


  • This mixer makes me want to open a bakery or feed a crowd with nothing but cookies and cakes. While I really only need a mixer that big for the holidays (hello bake-palooza), I think if I magicallyย came acrossย $550, I’d run to Williams-Sonoma and snatch it up.


  • I’m pretty sure I’m about to give up caffeine again. I really hate that my body is SO dependent on it, so I’m going to go off of it cold turkey. I love you, Advil.


  • I’m really sad that strawberry season is over out here. See ya next year, strawberries!


  • I STILL haven’t gotten my 5% lost pedicure. There’s just not enough time in a weekend, y’all. ๐Ÿ™ As far as weight loss is concerned, things have stalled a bit for me. What? I’m human…it happens. I’m still 19 lbs. down, soย it’s not like I completely messed things up.ย I’m going to get back on track next week, and this time, myย diet is going to be a good bit more strict. I’m pretty stoked about it, actually. I love seeing results!


  • H and I are about to celebrate our 3rd anniversary. Huh? Didn’t we just get married last month? I can’t believe it’s been 3 years already!

  • I got accepted into a campaign for Essie nail polish on Klout. I feel like I sort of sneaked in on that perk…I’m SO not a beauty blogger. I actually have a make-up post in the works, but I feel like make-up/fashion is a subject I just can’t write well about…I just stink at it. In fact, I always criticize the way I do my make-up, and wish I had half the talent some of those YouTube gurus have. ๐Ÿ˜›


  • Also, thank you Kate Spade. Your sample sale didn’t tempt me this time around. ๐Ÿ™‚

Filed Under: About Us, Random

Flour Tortillas

May 16, 2012 by Amy 3 Comments

Homemade Flour Tortillas

My husband went out of town recently, and I decided to surprise him with a homecoming dinner when he came back. It wasn’t anything like filet mignon, but that’s not something that would necessarily thrill him. You’re probably thinking, what man doesn’t like filet mignon? While my husband likes him some steak, it’s really Tex-Mex food that makes him a happy man. Oh, and the spicier it is, the better. So, I made him some crazy spicy carnitas (recipe coming soon) with homemade flour tortillas.

When I mentioned to him that I was making homemade tortillas, I think he had his doubts. Heck, I had my doubts. When I started making these, I thought…surely, they couldn’t be that easy. I must have done something wrong, but y’all..they were seriously *that* easy and they really don’t take that much time at all to come together. They’re also way cheaper than buying a bag of tortillas at the store. I always hate paying $2-$4 for a dozen tortillas (yeah, y’all know I’m cheap), so from now on, unless I’m in a time crunch, it’s gonna be homemade all the way for us! By the way, if you’d like to make these whole wheat, just sub half of the all-purpose flour for whole wheat. ๐Ÿ™‚

I came across this recipe on Homesick Texan, and for those of you who would prefer not to have lard in the house (which traditional tortillas call for), this recipe doesn’t call for it. The only problem that happened with these is that my first tortillas were kind of thick. You really need to roll these tortillas THIN. Get that arm work-out in! ๐Ÿ™‚

Flour Tortillas
Source: Homesick Texan

Ingredients:

  • 2 cups of all-purpose flour
  • 1 1/2 tsp. of baking powder
  • 1 tsp. of salt
  • 2 tsp. of vegetable oil
  • 3/4 cup of warm milk

Directions:

  1. In a large bowl, mix together the flour, baking powder, salt and vegetable oil. Slowly add the warm milk and stir until the ingredients are mixed and a loose, sticky ball of dough has formed. Remove the dough from the ball and knead on a well-floured surface for two minutes, until the dough has formed into a soft, but firm ball.
  2. Place the dough back in the bowl, cover with plastic wrap and allow it to rest for 20 minutes.
  3. Break the dough into 8 equal pieces, and form them into balls. Place the dough balls on a plate (where they aren’t touching), cover with plastic wrap and allow the dough to rest for 10 more minutes.
  4. After the dough has rested, you’ll roll them into tortillas one at a time. First, flatten the dough into a circle with your hands until it’s 4 inches wide. Then, using a rolling pin, roll the dough until it’s 8 inches wide. The tortillas should be very thin at this point. Be careful not to over-work the dough, to prevent the tortillas from becoming stiff. Once the tortillas are rolled out, cover them until you are ready to cook them.
  5. To cook the tortillas, heat a skillet on high heat, and cook each tortilla one at a time, for 30 seconds on each side. You’ll be able to tell that it’s finished cooking when the tortilla starts to puff in the skillet. Once the tortillas are cooked, cover them with a napkin until you’re ready to serve.

Filed Under: Mexican

Square Foot Garden Update

May 10, 2012 by Amy Leave a Comment

It’s been a little over a month since we planted our square foot gardens. It’s not growing as quickly as I would have thought, but at least things aren’t dying. ๐Ÿ™‚ The biggest surprise is the green bean plants (top right). Those were the only plants from seed and they seem to be thriving and flowering like crazy!

Square Foot Garden Progress

Now, the soil blend for a square foot garden is really lightweight. I noticed a while back that I really can’t climb in the garden to pick weeds (we’ve only had two weeds this whole month, by the way) or my whole foot will pretty much sink in the dirt. :- Well, Millie just realized that lizards are loving the veggie garden, and when there are lizards, Millie goes nuts. 4 perfect dents in my garden (from her paws), because of a dang lizard. Ugh…dog. At least she hasn’t killed anything.

Puppy Damage

Now, it’s taken a month, but I’m super happy to see ‘mater babies. Grow ‘maters grow!

Baby Tomatoes

I’m also seeing quite a few peppers growing. This is the largest bell pepper I have so far, and it’s eventually supposed to turn yellow. ๐Ÿ™‚

Baby Bell Pepper

So far, I’m loving the square foot garden idea. Barely any weeds, no bugs and it’s SO much easier to water. I can’t wait to see what comes out of this garden this Summer!

Filed Under: Gardening

Red Velvet Swirl Brownies

May 9, 2012 by Amy 11 Comments

redvelvetswirlbrownies

Is it just me or is it a blogger baby boom lately!? Happy times in the bloggy world, and I can’t get enough of it! I just love when someone announces that their family is growing, and the nosy person in me especially enjoys reading all about their pregnancy journey. It’s just completely cool to me. While I’m no momma (except to a crazy fur ball), I just love babies. I especially love that I can hold them and go crazy over their cuteness until they finally decide that I really suck with holding them, and then I can just hand them back off to their mom/dad. ๐Ÿ˜‰

Today, we’re holding a shower for Erin of Erin’s Food Files. I’ve “known” Erin a couple of years, since she used to post on a cooking board that we both frequented at some point. While I’ve never met her in person (I’ve only met a handful of bloggers in person, actually), I totally smiled like crazy when she made her baby announcement. I’m a dork like that, y’all. The lovely hostess, Jessica (aka The Novice Chef), coordinated this virtual shower with a fun Southern theme. So, when it came time to decide on something to contribute, I usually let my sweet tooth guide me. So southern desserts…first thing that popped in my head was red velvet (duh)! I thought about making cupcakes, but I wanted to give these brownies a try, since I’ve seen this brownie combination on quite a few blogs lately.

I ended up eating three of these.

And I’m on a diet. Oops.

Actually, I could have easily eaten the whole pan, y’all. I just couldn’t help myself. Red velvet is my weakness. The red velvet swirled with the cream cheese…in a brownie. It’s perfect for a shower (or any party), since you can just grab a square (or three). Maybe that’s not such a good thing…but eh, shower food isn’t necessarily diet friendly anyway, right? ๐Ÿ™‚

Congratulations Erin! I know you’re gonna make one awesome momma!

To see what other bloggers are contributing to Erin’s virtual baby shower, check out this post!

Red Velvet Swirl Brownies
Source: Sunny Anderson (Food Network)

Ingredients:

For the brownie layer:

  • 1 stick & 1 tbsp. unsalted butter (separated)
  • 1 cup sugar
  • 1 teaspoon vanilla extract
  • 1/4 cup cocoa powder
  • Pinch salt
  • 1 tablespoon red food coloring
  • 1 teaspoon vinegar
  • 2 eggs
  • 3/4 cup all purpose flour

For the cream cheese layer:

  • 8 ounces cream cheese, softened
  • 1/4 cup sugar
  • 1 egg
  • 1/8 teaspoon vanilla extract

Directions:

  1. Preheat the oven to 350 degrees and grease an 8×8 inch baking pan using the 1 tbsp of butter.
  2. To make the brownie layer, melt the butter in a microwave and allow it to cool slightly. Add the butter to a large bowl, and stir in the sugar, vanilla, cocoa powder, salt, red food coloring and vinegar (in that order), stirring well after each addition. Separately whisk the eggs in a small bowl and add it to the brownie mixture. Add the flour to the mixture and fold it in until the batter is just combined.
  3. Pour all but 1/4 cup of the batter in the 8×8 pan and spread evenly with a spatula.
  4. To make the cream cheese layer, mix the cream cheese, sugar, egg and vanilla in a medium bowl until all of the ingredients are well blended. Using a spatula, spread the cream cheese layer on top of the brownie batter that is already in the pan. In large spoonfuls, add the remaining brownie batter over the cream cheese layer. Using a toothpick, skewer or tip of a butter knife, drag it through the mixture in the pan to make the swirl pattern.
  5. Bake in the oven for 30-35 minutes, until the center is set (no longer jiggly). Remove the pan to a cooling rack and allow the brownies to completely cool before cutting and serving.


Filed Under: Brownies/Bars, Entertaining/Parties

Fresh Strawberry Pie

May 1, 2012 by Amy 10 Comments

Fresh Strawberry Pie

Happy May Day! I can’t believe it’s already May, y’all! Wasn’t it just December? I swear I’m still humming “Let It Snow” around the house…wishful thinking, I guess. Although, I’m currently getting a real kick out of this Justin Timberlake meme, which makes bringing in the month that much more awesome. ๐Ÿ˜› Hello fellow *NSYNC fans…I know you’re out there laughing and singing along with me!!

Now, let’s talk about this pie, y’all. When it comes to baking, pie is one of those things I just don’t make that much. For some reason, pie always seems like a ton of work. I used to buy crusts in the freezer section, and when I first attempted homemade pie years ago, it just ended up taking a while for it to come together. After all of that work, the crust was a crumbly mess. UGH. I just sort of mentally blocked the idea of making pie, unless there was a pre-made crust involved.

Sometimes I forget that I have a stand mixer that happily does all of the work for me…..

I had a flat of strawberries in the house, and since I promised to bring a dessert for a lunch we were going to, I decided that I had to bring something involving strawberries. I didn’t want to bring the typical shortcake, so I went to Pinterest to help me brain storm. (Don’t you just love Pinterest?!) That’s when I saw this fresh strawberry pie. I clicked on the post, and thought about pie crust. Ugh. Then I saw that the directions involved the stand mixer. Oh heck yes! My pastry cutter can stay in the drawer? SA-WEET!

So, I made this pie. With the sweet, ripe local strawberries and the light, buttery crust, this pie was just a wonderful, refreshing dessert. It wasn’t too heavy, which really allowed the strawberries to shine.ย  It was a real winner at lunch. I didn’t end up bringing any of this home!

Fresh Strawberry Pie
Source: Annie’s Eats (originally from Williams-Sonoma and Cooks Illustrated)

Ingredients:

For the crust:

  • 1 1/4 cups all-purpose flour
  • 1 tbsp. sugar
  • 1/4 tsp. salt
  • 8 tbsp. cold, unsalted butter, cut into small pieces
  • 3 tbsp. very cold water

For the filling:

  • 4 pints (about 3 lbs.) fresh strawberries, gently rinsed and dried, hulled
  • 3/4 cup sugar
  • 2 tbsp. cornstarch
  • 1 1/2 tsp. Sure-Jell for low-sugar recipes (don’t use the regular Sure-Jell)
  • Generous pinch table salt
  • 1 tbsp. freshly squeezed lemon juice

Directions:

  1. To make the crust, add the flour, sugar, and salt in the bowl of a stand mixer. Using the paddle attachment, mix everything together just to blend it. Add the butter pieces and mix together on medium-low speed to cut the butter into the flour until the butter pieces are no bigger than peas and the rest of the mixture resembles a coarse sand. Turn the mixer on low and add the cold water. Mix until the dough just comes together.
  2. Mold the dough into a ball, wrap the dough in plastic wrap and allow to chill in the refrigerator for at least 30 minutes.
  3. Roll out your dough on a lightly floured surface into a 12 inch circle. Then transfer the crust to a 9 inch pie pan and crimp the edges. Cover the pie pan with saran wrap and freeze for 30 minutes. In the meantime, preheat your oven to 375 degrees and adjust an oven shelf to the lower middle slot. Take the pie pan out of the freezer and line the top of the pie crust with foil. Add pie weights on top or balled up foil pieces to prevent the dough from bubbling up and rising. Bake the pie crust for 20-25 minutes, until the dough no longer appears wet. Remove the pie weights/balled up foil and other foil. Then, bake the pie crust for 10-12 minutes more until golden brown. Place the pie pan on a wire rack and allow to cool fully.
  4. To make the filling, weigh out 6 oz. of weird shaped, under-ripe or unattractive berries, halving those that are large. In the end, you should have about 1 1/2 cups of berries. Using a food processor or blender, blend the berries to a puree for about 30 seconds. Measure out the puree; you should have 3/4 cup.
  5. Using a medium sized saucepan, add the sugar, cornstarch, Sure-Jell and salt and whisk the mixture to combine. Stir in the berry puree and cook the mixture over medium-high heat, stirring constantly. Bring the mixture to a full boil and boil for two minutes, ensuring that the bottom and sides of the pan are constantly scraped with a silicone spatula or spoon. Transfer the mixture to a large bowl and stir in the lemon juice; allow the mixture to cool to room temperature.
  6. Look through the remaining berries and weigh out 2 pounds of the most attractive berries. If the berries are very large, halve them. Add the berries to the bowl with the glaze, and fold the mixture gently with a spatula or spoon until the berries are well coated with the mixture. Add the berry mixture on the pie crust, piling the berries into a mound. If you’d like, turn down the berries that are cut side up for a prettier presentation. Chill the pie for about two hours and serve immediately (at the most, within 5 hours of making the pie since berries are extremely moist and will make your pie soggy). Optional: serve with fresh whipped cream.


Filed Under: Fruit, Pies

The craft bug strikes…

April 30, 2012 by Amy 1 Comment

As you can tell from this blog, my crafting happens in spurts. I’m not a consistent crafter/sew-er (I hate typing sewer…makes me think of Mutant Ninja Turtles or something lol), but when the craft bug strikes, it strikes hard! I don’t like to force myself to get behind the sewing machine or to grab a pair of needles, so when inspiration strikes, I just go in the craft room and simply make things. I once tried make a business out of my love for crafting/sewing, but I found that I started to see that as a job, rather than a hobby. ๐Ÿ™ So, whenever people ask me why I don’t sell the things that I make, this is exactly why. I just don’t need extra stress in my life, especially for something I consider a stress relief!

It all started with my dining table. I thought it needed a cute vase to have as a good centerpiece, and well, I remembered this yarn wrapped wine bottle that I saw on Pinterest. I’ve had an empty wine bottle sitting for a while in our kitchen, and I used some leftover yarn from making these scarves. It took me about 30 minutes to wrap/glue the yarn, and I just stuck a fake hydrangea in it. It couldn’t have been easier (I swear), and it was FREE! I love using craft leftovers!

Then, my husband’s coworker became a grandfather, so of course, I had to sew a quick taggie for him to give to his granddaughter. These are always a quick, but very cute project for me to make. Although I always shake my fists at the minky fabric a few times, (because it just stretches like crazy on me) in the end, it’s worth it to gift something as cute as this!

And most recently, I took on the challenge of making my first purse. I’ve always been intimidated by lining, interfacing, darts, pleats, etc., and now that I made the purse, I really have no idea why! All of these things were no big deal, but then again, I used a very thorough pattern made by Beki of Artsy Crafty Babe. By the way, if you love craft blogs and you aren’t following Beki’s blog, definitely give it a read. She uses the most amazing fabric combinations in her sewing, and I kind of want to have her craft studio. ๐Ÿ˜›

Back to the bag–Currently, this pattern isn’t in her Etsy shop yet (I was SUPER lucky to be chosen as a pattern tester for this bag!), but keep your eyes peeled; I’m sure it will be on there fairly soon! If you’re a beginner at bags (like me), you should definitely check out her patterns. They’re nothing like the patterns that you buy at a craft store (don’t you just HATE how poorly those patterns are written??!) They’re actually written to where you can completely understand how to make the bag step-by-step. She has a few free ones on her blog, too. ๐Ÿ™‚ Y’all know how I feel about free stuff!

Purse Exterior

And, here’s how the bag looks on the inside. Don’t you just love these colors?

Purse Interior

I decided to make this bag with my favorite print…I should totally buy a bolt of this, because the color combination and print is just so awesome! I combined it with this print for the lining and this print for the accents.

I didn’t waste any time at all to switch purses, by the way. I didn’t even want to iron out the wrinkles…I just wanted to carry this bag around! ๐Ÿ™‚ It’s such a fun bag!

I don’t see the craft bug bites going away anytime soon either. I have so much inspiration in my head right now, and I’m pretty sure I’m going to have a good chunk of free time to work on things in the next few months, too. So excited!


Filed Under: Crafts

  • « Go to Previous Page
  • Go to page 1
  • Interim pages omitted …
  • Go to page 31
  • Go to page 32
  • Go to page 33
  • Go to page 34
  • Go to page 35
  • Interim pages omitted …
  • Go to page 85
  • Go to Next Page »

Primary Sidebar

Hey Y’all!

Image Credit: Leslie Pendleton Photography


Hey y’all!

Thanks so much for reading! I’m Amy, and I live in south Louisiana with my husband and our rescue dog. I enjoy sharing my love for cooking, baking, crafts & more! Follow my daily adventures on social media!

Follow my Daily Adventures

  • Email
  • Facebook
  • Instagram
  • Pinterest
  • Twitter

Footer

  • Email
  • Facebook
  • Instagram
  • Pinterest
  • Twitter

Archives

Copyright © 2026 · Foodie Pro Theme by Shay Bocks · Built on the Genesis Framework · Powered by WordPress