• Skip to primary navigation
  • Skip to main content
  • Skip to primary sidebar
  • Skip to footer

The Nifty Foodie

  • Home
  • About
  • Recipes
    • Appetizers
    • Beverages
    • Breads/Muffins
    • Breakfast
    • Canning
    • Desserts
    • Dog Treats
    • Entertaining/Parties
    • Fruit
    • Holiday Recipes
    • Louisiana Cuisine
    • Main Dishes
    • Mexican
    • Nifty Foodie Original
    • Nifty Tricks
    • Project Food Blog
    • Pumpkin
    • Salads
    • Sauces/Dips
    • Side Dishes
    • Skinny
    • Slow Cooker
    • Spices
    • Stews/Soups
    • The Disasters
  • My Weight Loss Journey
    • Races
    • Running
    • Weight Loss Milestones
  • Crafts
  • Contact Me

Amy

Grilled Corn Grits

June 29, 2011 by Amy 17 Comments

Corn Grits

I love grits. Usually in the winter, grits are a big part of my breakfast, because they just seem to warm the soul. I know that sounds cheesy, but really, there is NOTHING like a good, warm bowl of grits.

I remember the first time we went to a restaurant called Zea Rotisserie in Metairie (right outside of New Orleans). They have amazing food, such as this pesto trout that makes your taste buds sing, but the real goodness is in their side items. Taking up a small part of the menu, there it is…the corn grits. Really, I think Zea’s needs to fix their menus and put a huge arrow next to the corn grits with a caption saying “MUST TRY THESE NOW!”, because it’s just so plainly listed on the menu and these grits, to me, are the epitome of grits awesomeness.

I never really thought of making them myself, because in my head, there was no way Zea’s would share this awesome recipe with the world. Why should they? But, oh…yes, somehow they did. On Food Network’s website of all places. The whole world can make these corn grits, and I absolutely believe they should.

Now, these grits are not for the health conscious. What do you think makes them so dang AMAZING? 2 sticks of butter and a pint of heavy cream. Yup…Paula Deen, eat your heart out!
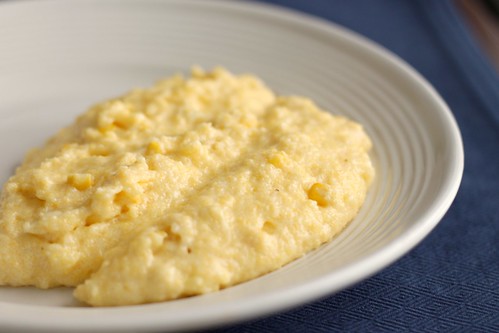
Grilled Corn Grits
Source: Zea Rotisserie (via Food Network)

Ingredients:

  • 2 cups water
  • 2 cups heavy cream
  • 1 cup yellow grits
  • 1/2 pound butter
  • 1 tablespoon salt
  • 1 ear grilled corn, kernels removed

Directions:

  1. Bring the water and heavy cream to a boil in a large pot.
  2. Stir in the grits and keep stirring until the grits are well incorporated.
  3. Cut the butter into tbsp sized pieces and add them to the grits, as well as the salt. Stir well.
  4. Once everything is stirred in, add your corn at the end and enjoy!

Filed Under: Side Dishes

Giveaway Winner!

June 26, 2011 by Amy 1 Comment

I’m pretty bummed that the original winner didn’t claim her prize. However, that gives y’all a second chance to win the $100 credit to Joss & Main.

::drumroll:

The winner is:

Holly (commenter #54), who said:

I love this site, I’m already a member. Today I like the Cube Chair in Canary Moss Style. Thanks for an awesome giveaway!

CONGRATS Holly! Please contact me at niftyfoodie@gmail.com within 48 hours to get your prize!


Filed Under: Other

Foodbuzz 24×24: A Culinary Journey Down the Muddy Mississippi

June 26, 2011 by Amy 5 Comments

When I was a little kid, I had such trouble spelling “Mississippi”. Was it too many “s”s or the double “p” that threw me for a loop? I just couldn’t get it. My house was less than a tenth of a mile away from the river, and I just couldn’t spell it. That bothered me. My parents taught us a little fun way to spell it eventually, and now I can’t ever spell Mississippi wrong. When in doubt, I tell myself “M-i-s-s… I-s-s…i.P.P.i”. There was an emphasis on the cap letters, so it became a bit of a rhythm to say it in my head that way before spelling it out.

Since I grew up living so close to the Mississippi, I’ve seen the river have its ups and downs. Literally. When the river gets high in the Spring, boats appear like they are floating on the levee. And of course, when it gets low, you’ll barely see the tops of the boats. It’s crazy how much it varies, and this year was no exception. For the first time in almost 40 years, the river was so high that the Corps of Engineers had to open a spillway north of Baton Rouge in order to save New Orleans and Baton Rouge from catastrophic flooding. Sadly, this spillway isn’t just land. People actually built their homes and farms in the spillway, so they had to evacuate. While I’m glad that nothing catastrophic happened to our big cities, it still hurts to know that some people suffered from this.

While I was watching a news segment about the river one night, I couldn’t help but think about the massive journey that the water takes. All the way north from Minnesota to the Gulf of Mexico. There are so many different cities that the river just flows by, and my husband had the greatest idea. A culinary journey down the river–from Minneapolis all the way to New Orleans. Our party idea featured foods that are notorious in the major cities along the river: Minneapolis, St. Louis, Memphis and New Orleans. I was so stoked when Foodbuzz let me know that our party proposal had been accepted for this month’s 24×24, so I called up our families and had them over for this awesome party!

For Minneapolis, we grilled up the famous Juicy Lucy burger! You can’t go wrong with a cheese stuffed burger, and this burger was one of the favorites of the meal!

Jucy Lucy

For St. Louis, we baked a gooey butter cake. We served it with ice cream and various summer fruit sorbets. The cake is a yeast based batter on the bottom and of course, a gooey butter base layer on top. Many of us (myself included) have never had a gooey butter cake, but it was a great hit! I think next time, this would go perfectly with some fresh fruit.

Gooey Butter Cake

For Memphis, we made some fabulous BBQ Baby Back ribs. This was my first time ever working with ribs, and it really wasn’t that bad. These were very flavorful ribs and super tender, since they were in an oven for a good part of the morning before finishing off on the grill!

BBQ Baby Back Ribs

And of course, for New Orleans, we made some grilled corn grits. Grits are a favorite around here, and in one of our favorite restaurants, this is how they make the grits. It’s fabulously rich and flavorful! You probably don’t want to know how much heavy cream and butter are in these grits, but I’ll tell you anyway later when I post the recipe! 🙂

Corn Grits

Oh, and since we’re all from Louisiana, we had to add in a little lagniappe for NOLA: Hurricanes. I mean, how could you NOT? For a hot, summer day, these are always a hit!

Hurricane

*all recipes will be shared on the blog at a later date*

It was so wonderful to spend time with our families, and I’m so glad everyone enjoyed the food. You know it was a good party when people ask for the leftovers and recipes as they’re leaving! 🙂

Dessert Time

Family

Thanks so much to Foodbuzz for making this party happen! We really enjoyed the different foods from cities along the river, and also had a blast spending time together!


Filed Under: Beef, Beverages, Cakes/Cupcakes, Entertaining/Parties, Louisiana Cuisine, Pork/Ham/Bacon, Side Dishes

Mango Bread

June 23, 2011 by Amy 1 Comment

Mango Bread

A few weeks ago, I saw that my grocery store was offering a case of mangoes for $3.99! I love mangoes, but I wasn’t exactly sure how I’d eat a whole case before it got overly ripe. So, of course I looked for some recipes to help me use up the case. I thought I remembered seeing a mango bread around the food blog world, so I referred to Google and discovered that Dorie Greenspan actually has one in her book, Baking: From My Home to Yours. I grabbed my copy of the book as quickly as I could and got started on the bread!

Stupid.

No matter how excited you are to make a recipe, always read through the recipe a few times. ALWAYS…or you’ll skim over the cup of granulated sugar that the recipe calls for and you’ll end up with a mango door stopper.

So, the next night, I was determined to make this bread happen. I even put the cup of sugar near the mixing bowls to ensure that I wouldn’t forget it again. Luckily, no ingredients were forgotten this time (with the exception of raisins…those were kept out because I was too lazy to go to the store to get some), and I got to taste this wonderfully spicy mango bread. This bread reminded me a little bit of pumpkin bread, since it has cinnamon and ginger flavors running throughout the bread, yet the mango definitely made it the perfect summer recipe.

Mango Bread
Source: Dorie Greenspan’s Baking: From My Home to Yours

Ingredients:

  • 3 large eggs
  • 3/4 cup flavorless oil, such as canola or safflower oil
  • 2 1/2 cups all-purpose flour
  • 1 cup sugar
  • 1 teaspoon baking powder
  • 1 teaspoon baking soda
  • 1 1/2 teaspoons ground ginger
  • 1 teaspoon ground cinnamon
  • 1/4 teaspoon salt
  • 1/2 cup (packed) light brown sugar
  • 2 cups diced mango (from 1 large peeled and pitted mango)
  • 3/4 cup moist, plump golden raisins (omitted)
  • Grated zest of 1/2 a lime

Directions:

  1. Preheat the oven to 350 degrees and place a rack in the center notch. Also, butter and flour a standard bread loaf pan and place the loaf pan on a cookie sheet. Since the bread will be baking for a long time, the cookie sheet will act as an insulator to prevent the bottom of the bread from burning.
  2. Whisk the eggs and oil together in a mixing bowl. In another bowl, mix the flour, sugar, baking soda, baking powder, salt and spices. Rub the brown sugar between your hands to ensure there are no lumps and add to the dry mixture.
  3. Pour the wet mixture into the dry, and using a sturdy spoon or spatula, mix the dough. Just to note, this dough will seem very thick, so you just have to keep mixing and it will get a little more manageable to work with.
  4. Stir in the mango, raisins and zest until just incorporated and spoon the dough into your loaf pan. Spread the dough evenly.
  5. Bake the bread for 1 1/2 hours. Check the bread ever so often to make sure the top isn’t getting too brown. If it is, just place some foil over the bread for the remaining part of the baking.
  6. When finished baking, allow to cool in the pan for 5 minutes and then take the bread out of the loaf pan and allow to cool on a cooling rack.


Oh yeah…I’m sure you are skimming quickly through this post to find the winner of the $100 credit to Joss & Main…

The winner is commenter #33 — Stephanie, who said:

The armless chair in gerber sunflower! I have wanted one for our bedroom forever!!!!!!!!! Love the site

CONGRATS Stephanie! Please email me at niftyfoodie@gmail.com within 48 hours in order to receive your prize!

Sorry, you snooze…you lose. 🙁 A new winner has been posted.

Filed Under: Breads/Muffins, Fruit

Sprite “Icee”

June 20, 2011 by Amy 1 Comment

Sprite Icee

My husband and I are on an Icee kick lately. I know those drinks are full of sugar and not the most diet friendly, but man, they are SO refreshing! When I saw Bridget of Bake at 350 post about this easy idea to make your own Icee with an ice cream machine, I couldn’t wait to try it!

Of course, the texture really isn’t an Icee. Icees are much lighter to me, so I would actually call this more of a slush. It’s still pretty darn yummy, though and VERY easy!

Sprite “Icee”
Source: Bake at 350, originally from Cuisinart

Ingredients:

  • 5 cups of cold soda (any regular soda..this won’t work on diet)

Directions:

  1. Pour the cold soda in an ice cream maker.
  2. Let the soda freeze in the maker for about 30 minutes.
  3. Enjoy!

Filed Under: Beverages

Banana Nutella “Ice Cream”

June 1, 2011 by Amy 15 Comments

Banana Nutella "Ice Cream"

About a year ago, I bookmarked the popular one ingredient banana ice cream recipe. I usually don’t let bananas get super ripe in my house, because we go through them fairly quickly, but a couple of weeks ago, we forgot that I purchased a bunch to eat, and they were far too ripe to just eat on their own. I was about to make banana bread when I remembered this idea.

If you’re on a diet and you miss ice cream, I can tell you the texture is spot-on. It’s soft, creamy, frozen and very sweet, since the bananas are ripe. Since I’m a dieting rebel, though, I added a few tbsp. of nutella to the soft serve mixture. It was like eating marbled ice cream…very yummy and not too too bad for you!

If you have ripe bananas and a few extra minutes on your hands, definitely try this banana “ice cream”. It’s just too easy not to!

Banana Nutella “Ice Cream”
Source: adapted from The Kitchn

Ingredients:

  • 4-6 very ripe bananas
  • 3 tbsp. nutella

Directions:

  1. Slice bananas into small bites and place on a parchment lined baking sheet.
  2. Freeze the bananas for 2-3 hours or overnight.
  3. Place the banana slices in a food processor and pulse until smooth.
  4. Place the “ice cream” in a bowl and swirl in the nutella.
  5. Freeze for a couple of hours until set, if you’d prefer a scoop-able ice cream. Eat immediately if you prefer soft serve.

Filed Under: Chocolate, Frozen Desserts, Fruit

Black and White Cookies

May 26, 2011 by Amy 6 Comments

Black and White Cookies

I remember the first time I tried a black and white cookie. It was at Starbucks, and I really had no idea what this cookie would taste like, but I knew it had chocolate and I was craving chocolate at the time! It was a pretty decent cookie, for a Starbucks snack. I really never had a desire to eat one again, and I had no idea where this cookie idea came from. I really thought it was a Starbucks idea. Whoops!

Fast forward a few years. I noticed my food blogger/Weddingbee buddy Serena of Big Apple Nosh would tweet a lot about these cookies and she’s in NYC. So, I got to googling and found out that these cookies are VERY popular in NYC. (Shame on me…never been to NYC.) So, when Serena offered to bring me an authentic black and white cookie when she came to NOLA, how could I say “no”?

I ended up bringing the cookie home to my parents’ house, and of course, I offered my family to try a piece. This is all that was left for me to try after they had their “piece”. Ugh…

The piece that was left tasted MUCH better than the OK cookie that I had at Starbucks a few years ago, and from what I was told, the cookie that Serena brought wasn’t even the BEST cookie in NYC (that bakery was sold out). Crazy..I thought that cookie was yummy!

Since I didn’t get an adequate amount of cookie, I decided I wanted to bake some up! So, being the baking addict that I am, I started searching for a recipe to make these myself. I came across this one on Epicurious, and I went to town.

This recipe only makes 8 cookies, but black and white cookies are HUGE cookies. They came together pretty quickly, and while they puffed up more than the cookie that I tried, they tasted really good! I think I need to make them again, actually. 🙂

Black and White Cookies
Source: Gourmet

Ingredients:

For cookies

  • 1 1/4 cups all-purpose flour
  • 1/2 teaspoon baking soda
  • 1/2 teaspoon salt
  • 1/3 cup well-shaken buttermilk
  • 1/2 teaspoon vanilla
  • 1/3 cup (5 1/3 tablespoons) unsalted butter, softened
  • 1/2 cup granulated sugar
  • 1 large egg

For icings

  • 1 1/2 cups confectioners sugar
  • 1 tablespoon light corn syrup
  • 2 teaspoons fresh lemon juice
  • 1/4 teaspoon vanilla
  • 1 to 2 tablespoons water
  • 1/4 cup unsweetened Dutch-process cocoa powder

Directions:

  1. Preheat oven to 350°F. Whisk together flour, baking soda, and salt in a bowl. Stir together buttermilk and vanilla in a measuring cup.
  2. Beat together butter and sugar in a large bowl with an electric mixer until pale and fluffy, about 3 minutes, then add egg, beating until combined well. Mix in the flour mixture and buttermilk mixture alternately in batches at low speed (scraping down side of bowl occasionally), beginning and ending with flour mixture. Mix until smooth.
  3. Spoon 1/4 cups of batter about 2 inches apart onto a buttered large baking sheet. Bake in middle of oven until tops are puffed and pale golden, and cookies spring back when touched, 15 to 17 minutes. Transfer with a metal spatula to a rack and cool, about 5 minutes.
  4. Make the icing while the cookies cool. Stir together confectioners sugar, corn syrup, lemon juice, vanilla, and 1 tablespoon water in a small bowl until smooth. Transfer half of icing to another bowl and stir in cocoa, adding more water, 1/2 teaspoon at a time, to thin to same consistency as white icing.
  5. To ice the cookies, turn them flat sides up, then spread white icing over half of each and chocolate over other half. Allow the cookies to set for a few hours until the icing is completely dry.

Filed Under: Chocolate, Cookies

56 out of 101

May 20, 2011 by Amy 5 Comments

In 2008, I joined the bandwagon of bloggers who drafted a list of 101 goals to complete in 1001 days. Thinking back, I remember how far away 5/6/2011 would be, and how EASILY I could complete all of the goals on my sheet. I did over half of them, in the end…56 out of 101 of them to be exact. It’s a fantastic feeling knowing that I completed over half of my goals, but part of me wishes I tackled more. However, it’s time again to focus on the future…1001 more days.

2/10/2014

That’s the day that my next set of 101 goals will (hopefully) be met. I learned this time around that I need to have a much better mix of easily feasible goals with only a few harder-to-reach ones. Last time, some of them were a little too ambitious for me, and I sort of felt overwhelmed and just gave up towards the end.

So, without further ado…here’s the new 101 goals (where the progress will be updated here):

Family and Friends:
1. send Christmas cards to all family and friends for 2011, 2012 and 2013
2. make a part of every Christmas gift for family and friends one year
3. send package of goodies to a friend or family member just because
4. host a holiday meal
5. host a party just because
6. give my parents a wedding picture to hang in their house
7. donate blood 6 times (0/6)
8. make a wedding album for ourselves with the Groupon I have
9. be a tourist in my hometown (NOLA)
10. take boudoir pictures (post weight loss)
11. use nothing but reusable grocery bags for 20 grocery trips (0/20)
12. no internet for a weekend
13. drive the speed limit for 5 days
14. take the plunge and buy something designer
15. attend a sporting event
16. attend a concert

Charity:
17. donate 100 items I no longer need to Goodwill
18. volunteer for an animal adoption agency
19. volunteer at a kitchen on a holiday

Husband:
20. surprise him
21. go on a vacation with him that isn’t within driving distance
22. start a workout regime together
23. make him his favorite dinner and dessert by request 5 times (0/5)
24. get him a gift, just because
25. give him a week off of house responsibilities (I do the chores

Blog:
26. update one of my blogs 20 times in a month
27. get at least 15k hits in a month on one of my blogs
28. attend a blogger conference
29. do project 365 one year
30. guest blog for another blogger
31. vlog 3 times (0/3)

Professional:
32. learn a programming language
33. earn a certification
34. take 5 training courses in my job field (0/5)
35. attend an out of state professional conference

Arts and Crafts:
36. make wedding card scrapbook
37. make wedding shadowbox
38. make scrapbook of senior year at LSU
39. cross stitch baby sampler for a friend
40. knit a pair of socks
41. learn how to crochet
42. don’t buy any craft items for 6 months (0/6)
43. crockpot die some yarn
44. make t-shirt quilt from old college shirts
45. get my fabric stash down to 20 yards of fabric total
46. get my yarn stash down to 5 skeins of yarn total
47. get rid of all of my scrapbooking supplies after my current projects are done…not a fan
48. get a craft idea of mine published in another blog or a magazine

Health and Fitness:
49. reach 270s
50. reach 260s
51. reach 250s
52. reach 240s
53. reach 230s
54. reach 220s
55. reach 210s
56. reach 200s
57. reach 190s
58. reach 180s
59. reach goal weight
60. be able to lift 50 lb. weights in a shoulder press
61. take vitamins everyday for 20 weeks (0/20)
62. exercise at least 4 times a week for 20 weeks in a row (0/20)
63. give up caffeine for a week
64. complete the couch to 5K program
65. do Jillian’s 30 day shred for 30 days STRAIGHT
66. not weigh myself for 30 days (rely on measurements)
67. attend a spinning class
68. drink nothing but water for a week for 5 weeks (0/5)
69. run a 5k (completely running/jogging)
70. run/walk a 10k
71. attend a yoga class
72. donate ALL of my plus sized clothing once I no longer fit in them

Cooking/Baking
73. successfully bake a loaf of crawfish bread
74. learn to make Memaw’s spaghetti and meatballs
75. make fresh pasta
76. come up with a fun flavor of peanut butter
77. make pickles
78. update food blog 20 times in one month
79. make fruit roll-ups
80. make crepes
82. make a cookie bouquet
83. smoke/BBQ a piece of meat
84. win a recipe contest
85. create an original baking recipe
86. fry something without burning or undercooking
87. try a recipe with something sweet in a savory dish

Finances:
88. start saving for a baby fund!
89. own a share in stock
90. save 1/2 of my fun money for the month–4 times (0/4)
91. make a budget and stick to it for 6 months (0/6)
92. have an online shopping freeze for a month
93. actively coupon for 8 weeks (0/8)
94. bring your lunch to work all week for 8 weeks (0/8)

Home:
95. print a picture I took on a canvas and proudly hang it in our home
96. print pictures for all of the frames we own and hang them or find a place for them
97. recycle diligently for 4 weeks (0/4)
98. make cleaning a habit…do one 15 minutes cleaning task/day for a full week–5 times (0/5)

Spiritual:
99. attend church every Sunday for 30 weeks consecutively to develop a habit (0/30)
100. go to reconciliation 5 times (0/5)
101. pray every day for a month

Do you have a 101 goals page? How are you doing with it?

Filed Under: Goals

Fluffy Yellow Cupcakes

May 18, 2011 by Amy 5 Comments

Birthday Cupcakes

So, my husband turned 29 last week. The big 2-9. I always joke around with him that he robbed the cradle (I’m 27), and now I can joke with him that he’s turning 30 next year bwahaha! 😛 (No offense to those of you over the age of 30…I really don’t think 30 is old!)

Every year, I offer to make him a cake, but usually, we meet up with his parents and they get him a cake from his favorite bakery. Double the cake just isn’t necessary. However, this year, we won’t be celebrating his birthday for a couple of weeks with his parents, so the opportunity opened for this baking addict to make him some birthday cake! I asked him what he would like, and my husband is very simple…he wanted a yellow cake with either lemon or pineapple filling.

So, the search for a good yellow cake was on. Of course, I had to refer to The Way the Cookie Crumbles first. Bridget posts these awesome recipe comparisons that take all of the guess work out of wondering which recipe would be the best, and thankfully, she already did the work of comparing yellow cake recipes!

I ended up making the recipe from Cooks Illustrated. I have to say, this cake came out great! It had a great, buttery flavor and were, as the recipe claims, very fluffy. It was also fairly easy to make, and I really think the whipped egg whites lend to the light texture that the cupcakes had. After they cooled, I filled them with lemon curd using the cone method and frosted them with easy vanilla buttercream.

Oh, and pardon the cupcake pictures. I made these cupcakes late at night, and the foil I wrapped them lightly in (or so I thought) ended up messing up the tops. Oh well..still yummy!

Fluffy Yellow Cupcakes
Source: Cooks Illustrated, found on The Way the Cookie Crumbles

Ingredients:

  • 2½ cups (10 ounces) cake flour, plus extra for dusting pans
  • 1¼ teaspoon baking powder
  • ¼ teaspoon baking soda
  • ¾ teaspoon table salt
  • 1¾ cups (12.25 ounces) sugar
  • 10 tablespoons unsalted butter, melted and cooled slightly
  • 1 cup buttermilk, at room temperature
  • 3 tablespoons vegetable oil
  • 2 teaspoons vanilla extract
  • 6 large egg yolks plus 3 large egg whites, at room temperature

Directions:

  1. Adjust an oven rack to the middle position and heat the oven to 350 degrees. Place cupcake papers in the cupcake pan.
  2. Whisk the flour, baking powder, baking soda, salt and 1½ cups (10.5 ounces) sugar together in a large bowl. In a 4-cup liquid measuring cup or medium bowl, whisk together the melted butter, buttermilk, oil, vanilla, and yolks.
  3. In the clean bowl of a stand mixer fitted with the whisk attachment, beat the egg whites at medium-high speed until foamy, about 30 seconds. With the machine running, gradually add the remaining ¼ cup (1.75 ounces) sugar; continue to beat until stiff peaks just form, 30 to 60 seconds (whites should hold peak but mixture should appear moist). Transfer to another bowl and set aside.
  4. Add the flour mixture to the now-empty mixing bowl fitted with the whisk attachment. With the mixer running at low speed, gradually pour in the butter mixture and mix until almost incorporated (a few streaks of dry flour will remain), about 15 seconds. Stop mixer and scrape the whisk and sides of the bowl. Return the mixer to medium-low speed and beat until smooth and fully incorporated, 10 to 15 seconds.
  5. Using rubber spatula, stir ⅓ of the whites into the batter to lighten, then add the remaining whites and gently fold into the batter until no white streaks remain. Divide the batter evenly between the prepared cake pans. Lightly tap the pans against the counter 2 or 3 times to dislodge any large air bubbles.
  6. Bake for about 15-18 minutes, until an inserted toothpick comes out cleanly.. Cool the cupcakes on a wire rack until cooled.

Filed Under: Cakes/Cupcakes

Lemon Curd

May 16, 2011 by Amy 4 Comments

Lemon Curd

Curd is such a weird word. It reminds me of curdle, which is rather unappetizing, and when I mentioned it on Twitter, some people said curd reminded them of turd. Haha! Wait, did I just say turd on a food blog? Why yes, yes I did.

However, curd tastes nothing like a turd. Not that I’ve ever tasted a turd. Ok…back to this curd.

I’ve always been curious about making a citrus curd, but I’m not a fan of desserts where lemon or lime is main component. However, my husband loves lemon. At our wedding, his groom’s cake was a tiered king cake, with the main tier having lemon filling. Blech…

So, for my husband’s birthday, I asked him what he’d like to have on his birthday. He requested yellow cake with pineapple or lemon filling. Well, I decided to make lemon filled cupcakes this time around, since I selfishly wanted to make a curd. 🙂 This was the perfect filling for the cupcakes that I made (which I’ll blog about soon). It was thick enough for a filling, and according to my husband and his coworkers, this tasted delicious!

Lemon Curd
Source: Williams-Sonoma

Ingredients:

  • 5 egg yolks
  • 1/2 cup sugar
  • 1/4 cup fresh lemon juice
  • Grated zest of 2 lemons
  • 6 tbsp. (3/4 stick) unsalted butter

Directions:

  1. In a heavy saucepan, combine the egg yolks and sugar and whisk for 1 minute.
  2. Add the lemon juice and zest and whisk for 1 minute more. Set the pan over low heat and cook gently, stirring constantly, until slightly thickened, 10 to 15 minutes.
  3. Remove the pan from the heat and stir in the butter. Let cool, stirring occasionally. Cover tightly and allow to refrigerate fully before serving. Makes about 1 cup.

Filed Under: Cakes/Cupcakes, Fruit

  • « Go to Previous Page
  • Go to page 1
  • Interim pages omitted …
  • Go to page 40
  • Go to page 41
  • Go to page 42
  • Go to page 43
  • Go to page 44
  • Interim pages omitted …
  • Go to page 85
  • Go to Next Page »

Primary Sidebar

Hey Y’all!

Image Credit: Leslie Pendleton Photography


Hey y’all!

Thanks so much for reading! I’m Amy, and I live in south Louisiana with my husband and our rescue dog. I enjoy sharing my love for cooking, baking, crafts & more! Follow my daily adventures on social media!

Follow my Daily Adventures

  • Email
  • Facebook
  • Instagram
  • Pinterest
  • Twitter

Footer

  • Email
  • Facebook
  • Instagram
  • Pinterest
  • Twitter

Archives

Copyright © 2026 · Foodie Pro Theme by Shay Bocks · Built on the Genesis Framework · Powered by WordPress