• Skip to primary navigation
  • Skip to main content
  • Skip to primary sidebar
  • Skip to footer

The Nifty Foodie

  • Home
  • About
  • Recipes
    • Appetizers
    • Beverages
    • Breads/Muffins
    • Breakfast
    • Canning
    • Desserts
    • Dog Treats
    • Entertaining/Parties
    • Fruit
    • Holiday Recipes
    • Louisiana Cuisine
    • Main Dishes
    • Mexican
    • Nifty Foodie Original
    • Nifty Tricks
    • Project Food Blog
    • Pumpkin
    • Salads
    • Sauces/Dips
    • Side Dishes
    • Skinny
    • Slow Cooker
    • Spices
    • Stews/Soups
    • The Disasters
  • My Weight Loss Journey
    • Races
    • Running
    • Weight Loss Milestones
  • Crafts
  • Contact Me

Cakes/Cupcakes

Top 10 Recipes of 2011

December 29, 2011 by Amy 6 Comments

Am I the only person who is shocked that Christmas just passed? I can’t believe it. Neighbors are taking down lights, and our tree looks SO empty without gifts under it. My favorite holiday is over, and crazy enough, it’s time for a new year. 2012.

Time to take the shrink wrap off of the new planner and get used to writing “2012” on papers/emails/etc. This is just crazy.

Also crazy…sometime in 2012, my 4 year blogiversary is happening and my 3 year wedding anniversary is happening too. WHAT?

It’s a lot to look forward to, but before everyone rings in the new year, I just wanted to share with y’all the top 10 posts of 2011. 🙂

Yellow Cupcakes w/ Strawberry Swiss Meringue Buttercream

10. Strawberry Swiss Meringue Buttercream – This was my first time making SMBC, and I swear, if you haven’t tried SMBC before, just do it. Please?

Pecan Pie Macarons

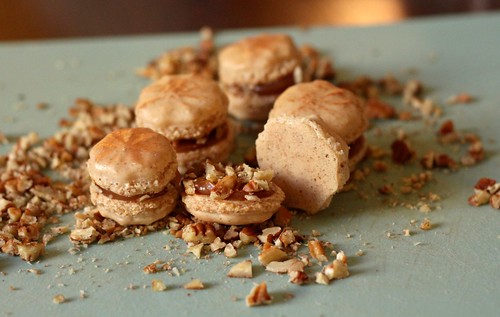
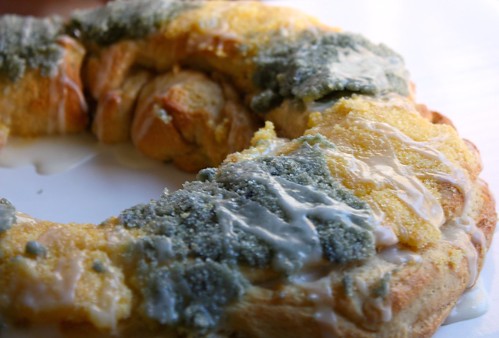
9. Pecan Pie Macarons – Gotta love macarons. These were really a huge favorite for Thanksgiving, and the star shape (which was a happy accident) made them super cute and festive!

Queso Blanco

8. Restaurant Style Queso Blanco – This is it. The ultimate queso blanco. If you’re as addicted to queso as me, you’d understand how wonderful it is to FINALLY have a recipe for this!

Strawberry Cream Cake

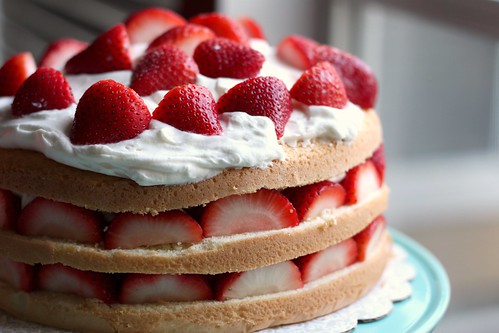
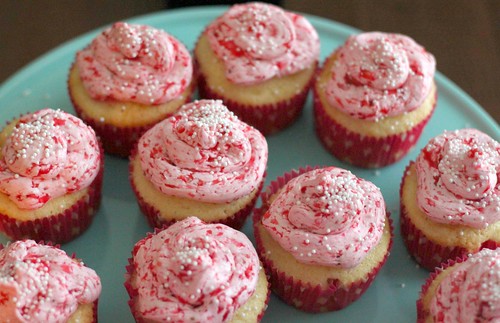
7. Strawberry Cream Cake – I’m actually glad I compiled this top 10, because I sort of forgot about this cake. Since it’s currently strawberry season in Louisiana, I think I MUST make this cake again. Yum!

Peppermint Bark Cheesecake Truffles

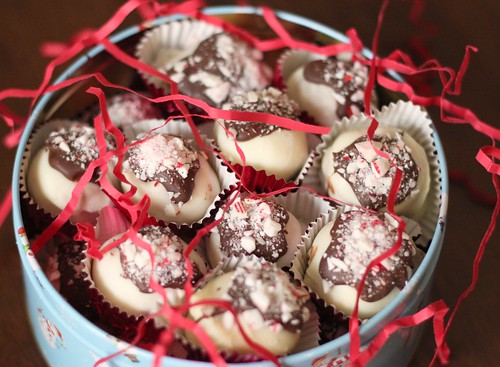
6. Peppermint Bark Cheesecake Truffles – This is the recipe that made my year, basically. I still can’t believe I won that recipe contest, and I’ve been told by a few friends who made this that these little truffles were a hit at their holiday parties! So happy to hear that!

Banana Nutella "Ice Cream"

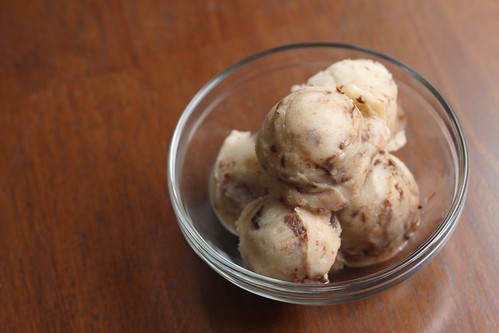
5. Banana Nutella “Ice Cream” – Two ingredient “ice cream”. It’s basically awesome and couldn’t be any easier. Your food processor does all the work!

Corn Grits

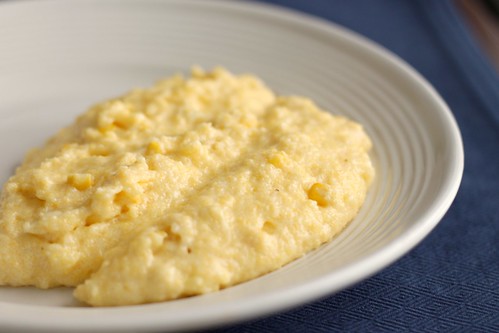
4. Grilled Corn Grits – I can’t be from the South, and not have a post about grits. I promise you if you make this, your hips may never be the same again, but your taste buds will tell you it’s completely worth it!

3. Easy Pasta Salad – My first (and so far, only) vlog. I might get the courage to make one again, since you guys seemed to like it so much!

Diet Cupcakes

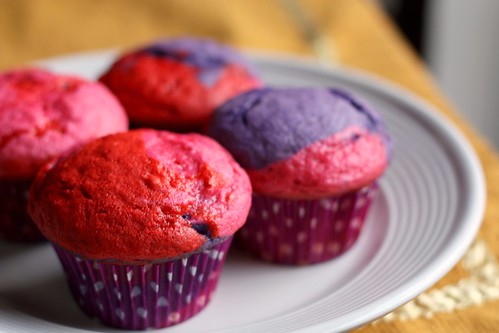
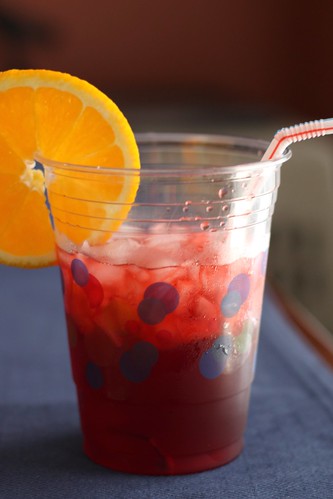
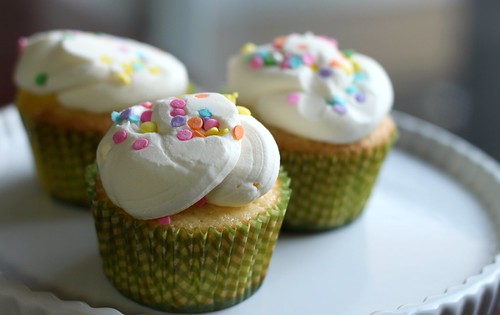
2. Cooking For Kids – The infamous post. Yup, who’da thought that a soda cupcake would get so much response from you guys (both good and bad)…yikes!

Homemade S'mores

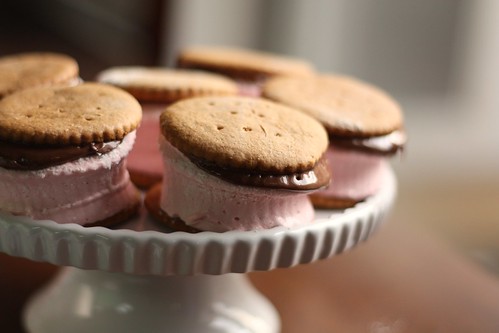
1. S’mores for a Shower – Nutella S’mores. I can see why you guys loved this one so much. I’m sort of craving s’mores right now, actually. 😛

I hope you have a wonderful New Year with your family and friends, and thank you so much for reading The Nifty Foodie! See y’all in 2012!

Filed Under: Cakes/Cupcakes, Candy, Chocolate, Cookies, Frozen Desserts, Fruit, Other, Pasta/Rice, Sauces/Dips, Side Dishes

Cupcakes with Strawberry Swiss Meringue Buttercream

November 15, 2011 by Amy 8 Comments

Yellow Cupcakes w/ Strawberry Swiss Meringue Buttercream

When I started my food blog almost 4 years ago, I never expected that I would make so many friends through this. While I’ve only met a handful of bloggers in real life, I consider so many of them to be dear friends of mine. When my friend, Amy of Sing For Your Supper announced that she was pregnant, I smiled and felt like I needed to run to Texas and give her a huge congratulatory hug. I know that sounds absolutely crazy, but I just feel like my friendships online are just as real as the ones I have face-to-face. I was absolutely flattered when Kelsey of Apple A Day asked me to contribute to Amy’s (all sweets) virtual baby shower! I knew that my contribution had to be pink, since Amy is expecting a little girl, so I decided to make cupcakes with a (super pink) strawberry swiss meringue buttercream!

I was actually slightly intimidated here, because this was my first official swiss meringue buttercream. I was armed with online pointers about what to do if everything goes wrong, since sadly, if something can go wrong with a recipe, it usually goes wrong for me.

Much to my surprise, though, the buttercream came together perfectly. I was waiting for the separation, the curdling, the “Oh dangit, I did it again!”, but no. It whipped up beautifully and tasted so so good! As in, I want to make all of my birthday cakes with swiss meringue buttercream from now on. Seriously. If you’ve never made a swiss meringue buttercream (also fondly known as SMBC) before, just try it. If you’re like me, and you’re scared of all of the things that can go wrong, read this awesome blog post by Confessions of a Foodie Bride to be a little more prepared.

As for the cake, this was actually a recipe I’ve made before, which is absolutely fabulous. I think it’s my favorite from-scratch cake recipe to date. The whipped egg whites just make the batter so light and perfect. It’s a good standard cake recipe to try.

If you want to check out what everyone else made for Amy’s baby shower, check out the round-up posts at Kelsey’s blog (the hostess for the baby shower) and Amy’s blog (go congratulate the momma-to-be)!

Strawberry Swiss Meringue Buttercream
Source: Martha Stewart

Ingredients:

  • 4 large egg whites
  • 1 1/4 cups sugar
  • 1 1/2 cups (3 sticks) unsalted butter, room temperature, cut into tablespoons
  • 1 teaspoon pure vanilla extract
  • 1 cup of fresh strawberries, pureed in a food processor (using part of the adaptation mentioned on Martha’s website)

Directions:

  1. In the heatproof bowl set over a saucepan of simmering water, combine the egg whites and sugar. Cook, whisking constantly, until sugar has dissolved and mixture is warm to the touch (about 160 degrees).
  2. Pour the mixture into your stand mixer bowl fitted with the whisk attachment. Beat the egg-white mixture on high speed until it holds stiff (but not dry) peaks. Once it reaches that point and the mixture isn’t cool yet (just feel the sides of the bowl to find out), continue beating on low until the mixture is fluffy and cooled, about 6 minutes.
  3. Switch to the paddle attachment. With mixer on medium-low speed, add butter several tablespoons at a time, beating a minute or so after each addition of butter. (If frosting appears to separate after all the butter has been added, beat on medium-high speed until smooth again, 3 to 5 minutes more.) Add in vanilla. Beat on lowest speed to eliminate any air bubbles, about 2 minutes. Stir in strawberry puree with a rubber spatula until frosting is smooth. If your frosting isn’t pink enough to your liking, add a touch of pink food coloring. 🙂


Filed Under: Cakes/Cupcakes, Fruit

Oreo Cupcakes

July 25, 2011 by Amy 6 Comments

IMG_4426

A couple of weeks ago, my husband told me his office was having a potluck and wanted to bring some baked goodies. It’s way easier to bring a tin full of baked goodies vs. a crockpot full of mini sausages with BBQ sauce, so baked goods it was. At first we were thinking brownies, but hey, if you don’t act fast on those potluck sign-ups, the easy goodies get taken (like brownies). So those were out. Cookies were taken, and cake was being brought.

So, I thought…why not bring cupcakes? Sure, cake would be provided but we could bring a fun flavor. 🙂 Then, oreo cupcakes popped in my head. This was yet another recipe that has been forever starred in my Google reader, and now I had an excuse to make them!

There’s many ways that people make oreo cupcakes…some crush them up…some leave them in chunks. I wanted to leave them in chunks so people knew exactly what these cupcakes were, and of course, provide for a fun surprise in the cupcakes. 🙂

Of course, I tried one for quality control. I absolutely loved it. The frosting went perfectly with the cupcake and the oreo/cake combination was just really great tasting together. The next day, my husband told me they were gone by the end of the day, and he got tons of compliments from his coworkers. Guess I should make these again! 🙂

Oreo Cupcakes
Source: Beantown Baker

Ingredients:

For the cake:

  • 1 stick unsalted butter, at room temperature
  • 1 cup milk
  • 2 tsp vanilla extract
  • 2 1/4 cups flour, plus 2 Tbsp for the Oreo chunks
  • 1 tsp baking powder
  • 1/2 tsp salt
  • 1 2/3 cup sugar
  • 3 large egg whites, at room temperature
  • 1 pkg Oreo Cookies (~45 cookies)

For the frosting:

  • 8 oz cream cheese at room temp
  • 1 stick butter at room temp
  • 1 Tbsp vanilla extract
  • 3-4 cups powdered sugar

Directions:

  1. Preheat oven to 350F. Insert liners into a medium cupcake pan.
  2. Twist apart 24 Oreos. Place the wafer with filling on it, filling side up, in the bottom of each paper liner. Cut other wafers in half. Save 24 halves to place in the frosting. Crush the other wafer halves, also for garnishing.
  3. Cut the remaining Oreo cookies into quarters with a sharp knife. Toss with 2 Tbsp flour and set aside.
  4. In a large bowl cream the butter and sugar until fluffy, about 3-5 minutes. Add the milk and vanilla and mix to combine.
  5. In a separate bowl mix together the flour, baking powder, and salt.
  6. Add the dry ingredients to butter mixture. Mix until integrated. With an electric mixer on low speed, beat for 30 seconds. Turn the mixer up to medium speed and beat for 2 minutes. Add the egg whites. Beat for 2 more minutes. Stir in the quartered cookies.
  7. Fill the cupcake lines three-quarters full. Bake for about 20 minutes or until a toothpick inserted in the center of cupcakes comes out clean. Cool cupcakes in the pan.
  8. For the icing, cream the butter and cream cheese until fluffy.
  9. Add vanilla extract. Slowly add powdered sugar until desired consistency is reached. Stir in some of the leftover cookie crumbs (make sure they are well crumbled to avoid a clogged piping tip). To assemble the cupcakes, frost cupcakes (once they are completely cooled) and sprinkle with crushed oreos.


Filed Under: Cakes/Cupcakes

Strawberry Cream Cake

July 18, 2011 by Amy 12 Comments

Strawberry Cream Cake

Strawberry shortcake is one of my favorite desserts. You can’t go wrong with pound cake, whipped cream and fresh, juicy berries. Sadly, this dessert has to be assembled right before serving, because the juices from the berries usually makes the cake soggy and the whipped cream deflates fairly quickly.

However, leave it to Cooks Illustrated to come up with a way to solve the common problems that strawberry shortcake presents. This whipped cream contains cream cheese, which keeps the whipped cream from deflating, and after macerating the berries, the recipe calls for you to reduce the juice to a syrup to avoid the standard soggy shortcake.

The results? This dessert ended up tasting fantastic. I brought it to a BBQ, and it wasn’t served until a few hours later, and it still tasted just like freshly assembled shortcake. Perfection. I wish I made this back when it was strawberry season out here. As you can see in the picture, the strawberries definitely were not local. 🙁

Strawberry Cream Cake
Source: Cooks Illustrated

Ingredients:

Cake:

  • 1 1/4 cups cake flour (5 ounces)
  • 1 1/2 tsp. baking powder
  • 1/4 tsp. salt
  • 1 cup sugar (7 ounces)
  • 5 large eggs (2 whole and 3 separated), room temperature
  • 6 tbsp. unsalted butter , melted and cooled slightly
  • 2 tbsp. water
  • 2 tsp. vanilla extract

Strawberry Filling:

  • 2 lbs. fresh strawberries (medium or large, about 2 quarts), washed, dried, and stemmed
  • 4 – 6 tbsp. sugar
  • 2 tbsp. Kirsch (Note: I didn’t use this ingredient and the cake came out fine)
  • pinch salt

Whipped Cream

  • 8 oz. cream cheese , room temperature
  • 1/2 cup sugar (3 1/2 ounces)
  • 1 tsp. vanilla extract
  • 1/8 tsp. salt
  • 2 cups heavy cream

Directions:

  1. For the cake, move the oven rack to lower-middle position and preheat oven to 325 degrees. Grease and flour a round 9 by 2-inch cake pan or a 9-inch springform pan and line with parchment paper.
  2. Whisk flour, baking powder, salt, and all but 3 tablespoons sugar in a mixing bowl. Whisk in 2 whole eggs and 3 yolks (reserving whites for later), butter, water, and vanilla; whisk until smooth.
  3. In clean bowl of stand mixer fitted with whisk attachment, beat remaining 3 egg whites at medium-low speed until frothy, 1 to 2 minutes. With machine running, gradually add remaining 3 tablespoons sugar, increase speed to medium-high, and beat until soft peaks form, 60 to 90 seconds. Stir one-third of whites into batter to lighten. Then, add remaining whites and gently fold into batter until no white streaks remain.
  4. Pour batter into prepared pan and bake until toothpick or wooden skewer inserted into center of cake comes out clean, 30 to 40 minutes. Cool in pan 10 minutes, then invert cake onto greased wire rack; peel off and discard parchment. Invert cake again; cool completely, about 2 hours.
  5. For the strawberry filling, halve 24 of best-looking berries and reserve for later. Quarter remaining berries; toss with 4 to 6 tablespoons sugar (depending on sweetness of berries) in medium bowl and let sit 1 hour, stirring occasionally.
  6. Strain juices from berries and reserve (you should have about 1/2 cup). In a food processor fitted with metal blade, give macerated berries five 1-second pulses (you should have about 1 1/2 cups). In small saucepan over medium-high heat, simmer reserved juices and Kirsch until syrupy and reduced to about 3 tablespoons, 3 to 5 minutes. Pour reduced syrup over macerated berries, add pinch of salt, and toss to combine. Set aside until cake is cooled.
  7. For the whipped cream, when the cake has fully cooled, place the cream cheese, sugar, vanilla, and salt in bowl of a stand mixer fitted with whisk attachment. Whisk the mixture at medium-high speed until light and fluffy, 1 to 2 minutes, scraping down bowl with rubber spatula as needed. Reduce speed to low and slowly add in the heavy cream. When almost fully combined, increase speed to medium-high and beat until mixture holds stiff peaks, 2 to 2 1/2 minutes more, scraping bowl as needed (you should have about 4 1/2 cups).
  8. To assemble the cake, using large serrated knife, carefully slice cake into three even layers.
  9. Place bottom layer of cake on a cardboard round or cake plate and arrange ring of 20 strawberry halves, cut sides down and stem ends facing out, around perimeter of cake layer. Pour one half of pureed berry mixture (about 3/4 cup) in center, then spread to cover any exposed cake. Gently spread about one-third of whipped cream (about 1 1/2 cups) over berry layer, leaving 1/2-inch border from edge. Place middle cake layer on top and press down gently (whipped cream layer should become flush with cake edge). Repeat with 20 additional strawberry halves, remaining berry mixture, and half of remaining whipped cream; gently press last cake layer on top. Spread remaining whipped cream over top; decorate with remaining cut strawberries. Serve, or chill for up to 4 hours.

Filed Under: Cakes/Cupcakes, Fruit

Gooey Butter Cake

July 5, 2011 by Amy 5 Comments

Gooey Butter Cake

When I was researching recipes that St. Louis was known for, I remember consistently seeing gooey butter cake. I thought, gooey and butter? This has to be on the menu! It sounded like it would be a fabulous dessert for the party we held!

I have to admit, I was a little thrown because part of the cake involves yeast. I’ve honestly never baked a cake with yeast before, so I was worried about how this cake would taste. Yeast just screamed bread to me, and bread isn’t really what I would consider to be dessert. However, this cake wasn’t bread-like at all in the end! The bottom yeasty layer was more like a cookie with a warm gooey layer of sweet goodness on top. It was especially fabulous with a scoop of ice cream, and I think this cake would even be more amazing with summer berries!

Gooey Butter Cake
Source: Smitten Kitchen, from The New York Times

Ingredients:

For the cake

  • 3 tablespoons milk at room temperature
  • 1 3/4 teaspoons active dry yeast
  • 6 tablespoons unsalted butter at room temperature
  • 3 tablespoons sugar
  • 1 teaspoon kosher salt
  • 1 large egg
  • 1 3/4 cups all-purpose flour

For the topping

  • 3 tablespoons plus 1 teaspoon light corn syrup
  • 2 1/2 teaspoons vanilla extract
  • 12 tablespoons (1 1/2 sticks) unsalted butter, at room temperature
  • 1 1/2 cups sugar
  • 1/2 teaspoon kosher salt
  • 1 large egg
  • 1 cup plus 3 tablespoons all-purpose flour
  • Confectioners’ sugar, for sprinkling.

Directions:

  1. In a small bowl, mix the milk with 2 tablespoons warm water. Add the yeast and stir gently until the mixture dissolves. The mixture should slightly foam while mixing.
  2. Cream the butter, sugar and salt in a mixer, and scrape down the sides of the bowl. Add in the egg. Once that is mixed in, alternate between adding the flour and the milk mixture, scraping down sides of bowl between each addition. Once everything is well mixed, switch to a dough hook on your mixer and knead the dough for an additional 7 to 10 minutes.
  3. Stretch and spread dough by hand into a buttered 9×13 glass dish. Lightly cover dish with plastic wrap or clean towel, put in a warm place, and allow to rise until doubled, which is about 2 1/2 to 3 hours.
  4. Preheat your oven to 350 degrees.
  5. To prepare the gooey butter topping, in a small bowl, whisk corn syrup with 2 tablespoons water and the vanilla. Cream butter, sugar and salt in a mixer until light and fluffy, 5 to 7 minutes, and scrape down the sides of the bowl. Add in the egg. Once the egg is mixed in, alternate between adding the flour and corn syrup mixture, scraping down sides of bowl between each addition.
  6. Using a spoon, add the topping in large dollops over the risen cake layer, and use an offset spatula to gently spread it in an even layer. Bake for 30 to 45 minutes, or until it has a golden brown top. The cake will still be liquid in the center when it is done baking. Once the cake is cool in the pan, sprinkle on confectioners’ sugar and enjoy!

Filed Under: Cakes/Cupcakes

Foodbuzz 24×24: A Culinary Journey Down the Muddy Mississippi

June 26, 2011 by Amy 5 Comments

When I was a little kid, I had such trouble spelling “Mississippi”. Was it too many “s”s or the double “p” that threw me for a loop? I just couldn’t get it. My house was less than a tenth of a mile away from the river, and I just couldn’t spell it. That bothered me. My parents taught us a little fun way to spell it eventually, and now I can’t ever spell Mississippi wrong. When in doubt, I tell myself “M-i-s-s… I-s-s…i.P.P.i”. There was an emphasis on the cap letters, so it became a bit of a rhythm to say it in my head that way before spelling it out.

Since I grew up living so close to the Mississippi, I’ve seen the river have its ups and downs. Literally. When the river gets high in the Spring, boats appear like they are floating on the levee. And of course, when it gets low, you’ll barely see the tops of the boats. It’s crazy how much it varies, and this year was no exception. For the first time in almost 40 years, the river was so high that the Corps of Engineers had to open a spillway north of Baton Rouge in order to save New Orleans and Baton Rouge from catastrophic flooding. Sadly, this spillway isn’t just land. People actually built their homes and farms in the spillway, so they had to evacuate. While I’m glad that nothing catastrophic happened to our big cities, it still hurts to know that some people suffered from this.

While I was watching a news segment about the river one night, I couldn’t help but think about the massive journey that the water takes. All the way north from Minnesota to the Gulf of Mexico. There are so many different cities that the river just flows by, and my husband had the greatest idea. A culinary journey down the river–from Minneapolis all the way to New Orleans. Our party idea featured foods that are notorious in the major cities along the river: Minneapolis, St. Louis, Memphis and New Orleans. I was so stoked when Foodbuzz let me know that our party proposal had been accepted for this month’s 24×24, so I called up our families and had them over for this awesome party!

For Minneapolis, we grilled up the famous Juicy Lucy burger! You can’t go wrong with a cheese stuffed burger, and this burger was one of the favorites of the meal!

Jucy Lucy

For St. Louis, we baked a gooey butter cake. We served it with ice cream and various summer fruit sorbets. The cake is a yeast based batter on the bottom and of course, a gooey butter base layer on top. Many of us (myself included) have never had a gooey butter cake, but it was a great hit! I think next time, this would go perfectly with some fresh fruit.

Gooey Butter Cake

For Memphis, we made some fabulous BBQ Baby Back ribs. This was my first time ever working with ribs, and it really wasn’t that bad. These were very flavorful ribs and super tender, since they were in an oven for a good part of the morning before finishing off on the grill!

BBQ Baby Back Ribs

And of course, for New Orleans, we made some grilled corn grits. Grits are a favorite around here, and in one of our favorite restaurants, this is how they make the grits. It’s fabulously rich and flavorful! You probably don’t want to know how much heavy cream and butter are in these grits, but I’ll tell you anyway later when I post the recipe! 🙂

Corn Grits

Oh, and since we’re all from Louisiana, we had to add in a little lagniappe for NOLA: Hurricanes. I mean, how could you NOT? For a hot, summer day, these are always a hit!

Hurricane

*all recipes will be shared on the blog at a later date*

It was so wonderful to spend time with our families, and I’m so glad everyone enjoyed the food. You know it was a good party when people ask for the leftovers and recipes as they’re leaving! 🙂

Dessert Time

Family

Thanks so much to Foodbuzz for making this party happen! We really enjoyed the different foods from cities along the river, and also had a blast spending time together!


Filed Under: Beef, Beverages, Cakes/Cupcakes, Entertaining/Parties, Louisiana Cuisine, Pork/Ham/Bacon, Side Dishes

Fluffy Yellow Cupcakes

May 18, 2011 by Amy 5 Comments

Birthday Cupcakes

So, my husband turned 29 last week. The big 2-9. I always joke around with him that he robbed the cradle (I’m 27), and now I can joke with him that he’s turning 30 next year bwahaha! 😛 (No offense to those of you over the age of 30…I really don’t think 30 is old!)

Every year, I offer to make him a cake, but usually, we meet up with his parents and they get him a cake from his favorite bakery. Double the cake just isn’t necessary. However, this year, we won’t be celebrating his birthday for a couple of weeks with his parents, so the opportunity opened for this baking addict to make him some birthday cake! I asked him what he would like, and my husband is very simple…he wanted a yellow cake with either lemon or pineapple filling.

So, the search for a good yellow cake was on. Of course, I had to refer to The Way the Cookie Crumbles first. Bridget posts these awesome recipe comparisons that take all of the guess work out of wondering which recipe would be the best, and thankfully, she already did the work of comparing yellow cake recipes!

I ended up making the recipe from Cooks Illustrated. I have to say, this cake came out great! It had a great, buttery flavor and were, as the recipe claims, very fluffy. It was also fairly easy to make, and I really think the whipped egg whites lend to the light texture that the cupcakes had. After they cooled, I filled them with lemon curd using the cone method and frosted them with easy vanilla buttercream.

Oh, and pardon the cupcake pictures. I made these cupcakes late at night, and the foil I wrapped them lightly in (or so I thought) ended up messing up the tops. Oh well..still yummy!

Fluffy Yellow Cupcakes
Source: Cooks Illustrated, found on The Way the Cookie Crumbles

Ingredients:

  • 2½ cups (10 ounces) cake flour, plus extra for dusting pans
  • 1¼ teaspoon baking powder
  • ¼ teaspoon baking soda
  • ¾ teaspoon table salt
  • 1¾ cups (12.25 ounces) sugar
  • 10 tablespoons unsalted butter, melted and cooled slightly
  • 1 cup buttermilk, at room temperature
  • 3 tablespoons vegetable oil
  • 2 teaspoons vanilla extract
  • 6 large egg yolks plus 3 large egg whites, at room temperature

Directions:

  1. Adjust an oven rack to the middle position and heat the oven to 350 degrees. Place cupcake papers in the cupcake pan.
  2. Whisk the flour, baking powder, baking soda, salt and 1½ cups (10.5 ounces) sugar together in a large bowl. In a 4-cup liquid measuring cup or medium bowl, whisk together the melted butter, buttermilk, oil, vanilla, and yolks.
  3. In the clean bowl of a stand mixer fitted with the whisk attachment, beat the egg whites at medium-high speed until foamy, about 30 seconds. With the machine running, gradually add the remaining ¼ cup (1.75 ounces) sugar; continue to beat until stiff peaks just form, 30 to 60 seconds (whites should hold peak but mixture should appear moist). Transfer to another bowl and set aside.
  4. Add the flour mixture to the now-empty mixing bowl fitted with the whisk attachment. With the mixer running at low speed, gradually pour in the butter mixture and mix until almost incorporated (a few streaks of dry flour will remain), about 15 seconds. Stop mixer and scrape the whisk and sides of the bowl. Return the mixer to medium-low speed and beat until smooth and fully incorporated, 10 to 15 seconds.
  5. Using rubber spatula, stir ⅓ of the whites into the batter to lighten, then add the remaining whites and gently fold into the batter until no white streaks remain. Divide the batter evenly between the prepared cake pans. Lightly tap the pans against the counter 2 or 3 times to dislodge any large air bubbles.
  6. Bake for about 15-18 minutes, until an inserted toothpick comes out cleanly.. Cool the cupcakes on a wire rack until cooled.

Filed Under: Cakes/Cupcakes

Lemon Curd

May 16, 2011 by Amy 4 Comments

Lemon Curd

Curd is such a weird word. It reminds me of curdle, which is rather unappetizing, and when I mentioned it on Twitter, some people said curd reminded them of turd. Haha! Wait, did I just say turd on a food blog? Why yes, yes I did.

However, curd tastes nothing like a turd. Not that I’ve ever tasted a turd. Ok…back to this curd.

I’ve always been curious about making a citrus curd, but I’m not a fan of desserts where lemon or lime is main component. However, my husband loves lemon. At our wedding, his groom’s cake was a tiered king cake, with the main tier having lemon filling. Blech…

So, for my husband’s birthday, I asked him what he’d like to have on his birthday. He requested yellow cake with pineapple or lemon filling. Well, I decided to make lemon filled cupcakes this time around, since I selfishly wanted to make a curd. 🙂 This was the perfect filling for the cupcakes that I made (which I’ll blog about soon). It was thick enough for a filling, and according to my husband and his coworkers, this tasted delicious!

Lemon Curd
Source: Williams-Sonoma

Ingredients:

  • 5 egg yolks
  • 1/2 cup sugar
  • 1/4 cup fresh lemon juice
  • Grated zest of 2 lemons
  • 6 tbsp. (3/4 stick) unsalted butter

Directions:

  1. In a heavy saucepan, combine the egg yolks and sugar and whisk for 1 minute.
  2. Add the lemon juice and zest and whisk for 1 minute more. Set the pan over low heat and cook gently, stirring constantly, until slightly thickened, 10 to 15 minutes.
  3. Remove the pan from the heat and stir in the butter. Let cool, stirring occasionally. Cover tightly and allow to refrigerate fully before serving. Makes about 1 cup.

Filed Under: Cakes/Cupcakes, Fruit

Cooking for Kids

January 31, 2011 by Amy 36 Comments

Diet Cupcakes

When I was a kid, I jumped at every chance to help my mom cook or bake. I found it so cool to be a part of making dinner or baking goodies, so I know one day when I have kids, they will get as many chances as I did to be a little sous chef.

Frigidaire has a website featuring a Kids’ Cooking Academy, which encourages families to come together in the kitchen and make the meal happen together. I think this is a great idea, since cooking can be such a blast for kids!

When I was an education major at one point in my indecisive college career, I realized how much kids LOVE color. They go crazy over colorful things. So, I wanted to share with you this  fun idea for rainbow cupcakes that will probably bring out the kid in you, and heck, if you have a kid, they would enjoy throwing these together with you, too!

I made mine in Valentine’s Day colors, but you can go all out with a full rainbow if you’d like.

I usually use this white cake recipe for cupcakes, but since I’m trying to lose weight, I used an old stand-by cupcake recipe that is pretty popular at Weight Watchers meetings. This also explains why my cupcakes are naked…buttercream isn’t very Weight Watchers friendly. 🙁

Diet Cupcakes
Source: not sure, but someone at Weight Watchers is a genius

Ingredients:

  • 1 box cake mix (any flavor)
  • 1 1/4 cup of diet soda (any flavor)

Directions:

  1. Mix cake mix and soda together. Place in cupcake tins and bake as directed.

Filed Under: Cakes/Cupcakes

King Cake

January 10, 2011 by Amy 6 Comments

King Cake

As of January 6th, it’s now the Carnival season! Of course, this means king cakes are back in stores. I absolutely love king cake. It’s a sweet, yeast bread with cinnamon and topped with icing and colored sugars (I made mine in black/gold for the Saints game on Saturday.). They make king cakes with so many fillings too, from cream cheese to apple to bavarian cream! This time, I made a plain king cake, since people are pretty particular about what fillings they like with king cake. 🙂

I’ve made king cake before, and it turned out tasting like bread. It was NOT king cake. This recipe, however, is MUCH better. This recipe actually comes from Haydel’s Bakery, which is where we had our wedding cake and groom’s cake (which was a tiered king cake) made. I found it fairly easy to make too, however, I think their recipe would be much better if you ice and sugar after baking, which is different than what their recipe suggested. When I made it their way (bake with sugar already sprinkled on), most of us just pulled the chunks of sugar off of the king cake while eating it.

King Cake
Source: adapted from WWLTV via Haydel’s Bakery

Ingredients:

  • 1/3 cup granulated sugar
  • 1 tsp salt
  • 1/2 cup all purpose shortening
  • 4 cups all purpose flour
  • 2 lg. eggs
  • 1 cup milk (room temperature)
  • 2 sm. packs active dry yeast
  • 1/4 tsp lemon zest
  • 1/4 tsp orange zest
  • 1/4 tsp vanilla extract
  • 1/4 tsp butter extract
  • 1/2 cup canola oil
  • 1/2 cup cinnamon sugar

For the icing:

  • 1 cup confectioners sugar
  • 1 tsp. vanilla extract
  • 1 tbsp. water

For the colored sugars:

  • 1/2 cup granulated sugar for each color that you want to make
  • assorted food coloring

Directions:

  1. In a mixer at first speed combine 1/3 cup granulated sugar, salt, and shortening until well creamed. Add eggs and continue to cream.
  2. Dissolve the yeast in the milk and add the flavors. Once dissolved add to creamed mixture and continue to mix.
  3. Add flour a cup at a time and mix until dough tightens.
  4. Remove from mixer and knead into a ball. At this point sprinkle some flour on top and cover with a clean kitchen towel. Allow the dough to rest for 1½ hours.
  5. While the dough is resting mix your colored sugars and icing. Mix the 1/2 cup of sugar with a few drops of food coloring until the color you reach is desired.
  6. For the icing, whisk the confectioners sugar with the water and vanilla.
  7. When dough has rested roll out into an oblong piece. Brush on canola oil covering the entire piece. Sprinkle the cinnamon sugar liberally over the whole piece.
  8. Once the dough is covered with the cinnamon sugar and oil, fold it in half lengthwise. Cut into 3 strips and braid the dough. Gently roll the dough by starting at one end and working all the way down to the other end. This will make the dough a nice long piece that can then be shaped into a circle. Once shaped place on a baking pan covered with piece of parchment.
  9. Allow the dough to rest again until it doubles in size. Bake at 370 degrees F for 12-15 minutes until dough is golden brown.
  10. Let the cake cool and spread the icing on top. Then, sprinkle with your colored sugars. Enjoy!

Filed Under: Breads/Muffins, Cakes/Cupcakes, Holiday Recipes, Louisiana Cuisine

  • « Go to Previous Page
  • Go to page 1
  • Go to page 2
  • Go to page 3
  • Go to page 4
  • Go to page 5
  • Go to page 6
  • Go to page 7
  • Go to Next Page »

Primary Sidebar

Hey Y’all!

Image Credit: Leslie Pendleton Photography


Hey y’all!

Thanks so much for reading! I’m Amy, and I live in south Louisiana with my husband and our rescue dog. I enjoy sharing my love for cooking, baking, crafts & more! Follow my daily adventures on social media!

Follow my Daily Adventures

  • Email
  • Facebook
  • Instagram
  • Pinterest
  • Twitter

Footer

  • Email
  • Facebook
  • Instagram
  • Pinterest
  • Twitter

Archives

Copyright © 2026 · Foodie Pro Theme by Shay Bocks · Built on the Genesis Framework · Powered by WordPress