• Skip to primary navigation
  • Skip to main content
  • Skip to primary sidebar
  • Skip to footer

The Nifty Foodie

  • Home
  • About
  • Recipes
    • Appetizers
    • Beverages
    • Breads/Muffins
    • Breakfast
    • Canning
    • Desserts
    • Dog Treats
    • Entertaining/Parties
    • Fruit
    • Holiday Recipes
    • Louisiana Cuisine
    • Main Dishes
    • Mexican
    • Nifty Foodie Original
    • Nifty Tricks
    • Project Food Blog
    • Pumpkin
    • Salads
    • Sauces/Dips
    • Side Dishes
    • Skinny
    • Slow Cooker
    • Spices
    • Stews/Soups
    • The Disasters
  • My Weight Loss Journey
    • Races
    • Running
    • Weight Loss Milestones
  • Crafts
  • Contact Me

Holiday Recipes

Homemade Holiday Gifts: Part 1

November 27, 2012 by Amy 6 Comments

I absolutely love baking during the holiday season. I’m always looking for excuses to bake, and during the holidays, I tend to find a ton of excuses. 🙂

One of our biggest traditions around the holidays is what I like to call the annual bake-palooza, which is the weekend before Christmas. Basically, we live in the kitchen for the majority of the weekend and bake, bake, bake for friends, coworkers, neighbors…you name it! It doesn’t sound fun to most, but to me, it’s a blast! Over the years, I’ve learned which recipes are great for gifting, and which recipes, while impressive, are just too much work to make for 15-20 gifts.

This year, I’m doing something different. While I’m still baking up a storm, I figured I could lighten the load a little by spreading out the majority of the work—the cookies.

Since we’re making a ton of goodies (husband likes to help), I had to do the math to see how many batches of each recipe I’d need to make for gifts. Most cookie recipes make 24 cookies (check your recipes first), so after doing the math, I decided 11 batches of cookies was a good number (2 of those being cookie dough gifts, which is a whole ‘nother gift idea). Of course, I doubt we’ll need all of those cookies, but I wanted to make sure I had extra dough, just in case…you can never have too much cookie dough, right?

One of the first things I always do for a big bake-palooza, is to stalk the grocery ads. I refuse to buy butter that’s over $2/pound box. I live in a fairly low to middle cost of living area, and from experience, I know $2 is rock bottom for the price of butter. It’s probably different in, say, New York or Los Angeles, but the idea is to buy butter when it’s the cheapest. Oh, and buy a LOT of it. I bought 12 boxes. Did you know that you can freeze butter? Just in case you don’t use it all..

Butter isn’t the only thing I shop for…I usually go through 3 bags of flour and sugar, multiple bags of chocolate chips, as well as 2-3 cartons of eggs. All of these go on sale this time of the year, and I know I sound like a cheap person for saying BUY EVERYTHING CHEAP, but seriously, when you’re baking multiple gifts, it all adds up! (and hey, saving money on ingredients means more money to buy pretty packaging, right?)

Once you have your ingredients, now of course you can make your dough. Since I’m usually doubling (or tripling) some recipes, I do that math in advance. Write those numbers on a post-it or something and stick it next to your recipe OR retype out your recipe with the correct amounts. I can’t tell you how many times I’ve doubled a recipe, only to realize I forgot to double one thing…like sugar. Yup. Not good. Just do the math in advance. 🙂

Side note: Just keep in mind your mixer size when you’re doubling or tripling recipes. My standard 5 qt. mixer can usually handle a double batch of cookie dough, but tripling really pushes the limits on the capacity of my bowl. I was able to triple recipes just fine in the 7 qt. mixer I have, though. 

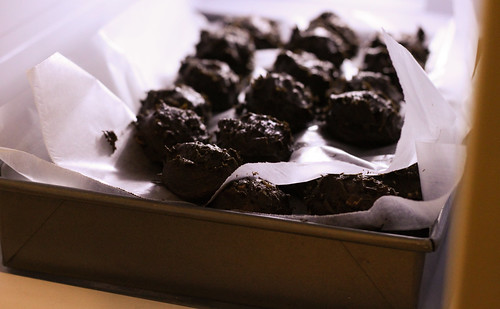
Once your dough is mixed, use a medium sized cookie scoop (or large, if recipe calls for it), and scoop dough balls out. My freezer is a side by side, and a 9×13 cake pan fits just fine in there. So, I scooped them out into a cake pan, making sure to leave a tiny bit of space between dough balls, to make sure they don’t freeze together.

Holiday Prep Pt 1 (1)

If you have more than one layer of cookie dough, just layer balls of dough between sheets of wax paper.

Holiday Prep Pt 1 (2)

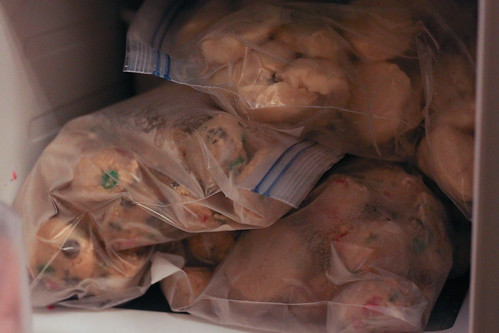
Once you have your cookie dough scooped out, place the pan into a freezer and allow the dough balls to freeze for 1-2 hours, until they are fairly set. Then, take them out of the pan and throw them into a freezer bag. Allow all of the excess air out of the bags, and seal until you’re ready to bake them.

Holiday Prep Pt 1 (3)

To bake the cookies, all you need to do is place the balls on a cookie sheet, allowing a couple of inches in between for spreading, and bake at the temperature specified for the recipe for just 1-2 minutes longer than called for.

Holiday Prep Pt 1 (4)

You can see that I burnt the cookie in the back, but that was because it was meant to be baked 25 degrees cooler than the others. Whoops! Glad I learned that lesson before the big baking weekend!

Stay tuned for the next posts in this mini-series: one about favorite recipes for gifting and another about packaging. 🙂

Filed Under: Cookies, Holiday Recipes

Thanksgiving Time

November 20, 2012 by Amy 1 Comment

In a couple of short days, most of us will be surrounded by family and/or friends to celebrate Thanksgiving. I’ll never forget the first time we hosted Thanksgiving three years ago. I thought that being a married gal automatically meant my husband and I could magically throw together the perfect Thanksgiving.

Ha.

My mother came to our house early to bring her dishes, and to make sure I was still breathing (she knows best, right?). She found me in my pajamas with a sink full of dishes, no more counter space for prep and well, I was two steps away from crying (Ok, I actually did cry…), drinking, calling a restaurant to tell them “YOU WIN”. I learned a lot about hosting a holiday meal that year, and I have my mom to thank for that. I was so stressed about how much more had to be done, that I couldn’t even tell my husband how he could help me. I was overwhelmed, but since most of the recipes I was working on were Mom’s recipes, it was easy for her to step in and help out. By the time guests arrived, the food was ready, my hair was brushed and there was counter space in our kitchen again.

Moms are awesome, aren’t they? (Actually, if it wasn’t for Mom AND my husband, I probably wouldn’t have hosted a meal again…)

I felt like last Christmas was our first big hosting success. I felt like my husband and I truly had everything under control. When my in-laws arrived and asked what was needed, I wasn’t flustered at all. In fact, we really didn’t need help…I was sort of proud of us. I immediately called my Mom as people were eating to tell her that I did it without crying. 🙂 It was a proud moment…for real.

Please tell me I’m not the only one who cried the first time they hosted a holiday meal?

Anyway, I wanted to share some of our family/friend’s favorite dishes with y’all. I may have made them at different times of the year, but they have all been hits, which I think would still be perfect for a Thanksgiving feast. If you are a last minute planner like me, feel free to squeeze one of these recipes in for the holiday!

Thanksgiving Time

Appetizers:

Crawfish Cheesecake
Mini Crawfish Pies
Cheese Fondue
Spicy Spinach Artichoke Dip

Side Dishes:

Spinach, Strawberry, Pecan and Feta Salad
Grilled Corn Grits
Mom’s Cornbread Dressing
Mom’s Sweet Potato Casserole

Desserts:

Pumpkin Cheesecake
Caramel Apple Pie
Pecan Pie Macarons
Turkey Cake Pops

What are your family/friend’s favorite dishes for Thanksgiving? Please share them!


Filed Under: Holiday Recipes

Red Velvet Bundt Cake with Cream Cheese Frosting

June 25, 2012 by Amy 8 Comments

Red Velvet Bundt Cake

“Thank you. What is it?”

“It’s a bundt.”

“Bunn-t?”

“Bundt.”

“Bonn—bonnk??”

Name that movie. 😛

I can’t help it. Anytime I bake or eat a bundt cake, that scene pops in my head. As I was mixing this cake, I had the scene playing on YouTube at the same time. I’m a weirdo. I know.

Bundt cakes, to me, are a bake and pray type of cake. I say pray, because you know that moment where you’re holding a plate against the bundt pan getting ready for the infamous flipping of the pan? Yeah, I totally pray that the sucker comes out in one piece. It’s a huge bummer when you’ve worked so hard to bake a cake and the darn thing just sticks to the bottom of the pan. Of course the solution is to make a trifle, but a perfect, pretty bundt cake is so much more of a baking ego boost. 😛

I wanted to make a fun patriotic cake, and instead of making the red, white and blue cupcakes that I made a couple of years ago, I decided that this would be the perfect time to make a red velvet cake. Red velvet is one of my favorites. I actually think it’s sort of a requirement to love a red velvet cake as a southern gal. 😛 This recipe was moist, had the perfect crumb and the icing was a perfect mix between a glaze and a frosting, which was great to just drizzle all over the cake to make the fun patriotic look happen.

Just a note: If you make any red velvet cake, I highly recommend Wilton’s No Taste Red. When making red velvet cake, you usually need a good bit of food coloring to make the cake red, and sometimes regular red dyes can add a bitter after taste to your cake if you add too much.

Red Velvet Bundt Cake with Cream Cheese Frosting
Source: Kiss My Bundt Bakery (via LA Times)

Ingredients:

For the cake:

  • 1 1/4 cups vegetable oil
  • 1 cup buttermilk
  • 2 eggs, room temperature
  • 2 tbsp. red food coloring
  • 1 tsp. white vinegar
  • 1 tsp. vanilla
  • 2 1/2 cups flour
  • 1 3/4 cups sugar
  • 1 tsp. baking soda
  • 3/4 tsp. fine salt
  • 1 tbsp. cocoa powder

For the frosting:

  • 8 ounces cream cheese, softened
  • 4 ounces unsalted butter, softened
  • 2 cups powdered sugar (sift after measuring)
  • 1/2 tsp. vanilla extract

Directions:

  1. Preheat the oven to 350 degrees.
  2. To make the cake, in the bowl of a stand mixer, add the oil, buttermilk, eggs, food coloring, vinegar and vanilla. Mix on medium speed using the paddle attachment for about a minute.
  3. In another large bowl, sift together the flour, sugar, baking soda, salt and cocoa powder.
  4. With the mixer on low, add the dry ingredients 1/2 cup at a time to the wet ingredients. Make sure to do this slowly so that the batter doesn’t develop clumps.
  5. Pour the batter into a 10-12 cup bundt cake pan that has been greased and floured (or you can use simple baking spray…just make sure it’s meant for baking, since those contain flour). Bake the cake for about 45 minutes, or until a toothpick inserted into the cake comes out clean.
  6. Allow the cake to cool in the pan for at least 15 minutes. Then, (say a small prayer ha!) invert the pan onto a plate. (If the cake doesn’t feel like it’s going to come out of the pan, just let it cool for an additional 15 minutes.) Allow the cake to cool completely (about an hour) before frosting.
  7. To decorate the cake, I ended up just placing the frosting (one color at a time) in a ziploc bag and cutting the tip off. Then, drizzle the frosting over the cake and add sprinkles. Enjoy!


Filed Under: Cakes/Cupcakes, Holiday Recipes

Merry Christmas!

December 25, 2011 by Amy 1 Comment

Cookies

I can’t believe it’s Christmas Day! This is my favorite holiday of the whole year, so of course, I had to make cookies for the occasion.

I know this is random, but I just wanted to share a local Christmas carol that just doesn’t feel like Christmas to me unless I watch this during the season. If you’ve been to NOLA (or, of course, lived in NOLA), you might have heard of a few of these things/places.

Hope you and your families have a wonderful holiday! Merry Christmas!

Filed Under: Cookies, Holiday Recipes

Elf’s Mix

December 19, 2011 by Amy 3 Comments

Elf's Mix

This past weekend was what I call my annual “bake-palooza”. When it comes to coworkers and neighbors, I just find it much easier to gift food. My idea is…when in doubt, give food. 🙂

Every year, I have so much fun coming up with the recipes for gifts. I have so many ideas written on paper, but I usually narrow things down to 5-6 recipes, just to remain sane. This was a new recipe for gifts, and it couldn’t have been easier. I based it off of bunny bait, which I bookmarked on my friend Amy’s blog. Of course, I changed the mix up to make it more Christmas-y and added holiday oreos for an even more fun Christmas colored addition.

The mixture of sweet and salty ingredients is what makes this mix so awesome, and just to let you know, it makes a LOT. I thought I’d have to make a double batch, but after making one batch, I realized I had more than enough for gifts.

Of course, I wasn’t going to call this bunny bait since, well, it’s not Easter. I had to call it something else. When I had it cooling on a silicone mat, I kept telling myself it looked like a Christmas elf barfed in my kitchen. Kinda gross, I know. Since I don’t have to guts to name a dessert “Elf’s Barf”, I decided to play it safe and call it “Elf’s Mix”. 😛

Elf’s Mix
inspired by Sing For Your Supper‘s “Bunny Bait”

Ingredients:

  • 1 bag of popped microwave popcorn
  • 6 oz. almond bark
  • 1 bag of mint M&Ms
  • 15 holiday oreos, chopped
  • 2 cups of pretzel sticks, broken into small pieces
  • Christmas sprinkles

Directions:

  1. Place the popped popcorn, pretzel sticks, M&Ms and oreos in a large bowl or pot. Place 4 oz. of almond bark in the microwave in 30 second increments, until well-melted.
  2. Add the melted almond bark to the popcorn mixture and stir the mixture thoroughly. Spread the mixture out on a large silicone mat or wax paper. Top with Christmas sprinkles.
  3. At this time, microwave the additional 2 oz. of almond bark in a disposable plastic piping back in 30 second increments until well-melted. Then, snip the end off of the bag and randomly pipe the almond bark over the popcorn mix. Allow the mixture to cool.
  4. To serve, break up the mix into pieces and place in a bowl. Enjoy!

Filed Under: Candy, Holiday Recipes

Peppermint Bark Cheesecake Truffles

December 15, 2011 by Amy 16 Comments

Peppermint Bark Cheesecake Truffles

I absolutely love making holiday treats. You know it’s the holiday season in our house when our fridge has at least 5 lbs. of butter, 8-10 packages of cream cheese at any given time and 2 extra bags of flour and sugar in the pantry to ensure that I don’t run out of the essentials. 🙂

The big bake-palooza (as I like to call it) is this weekend. There’s quite a few coworker and neighbor gifts to make this year, which has me super excited! This year’s packages are going to have some old favorites and new ones too, which I plan on sharing with y’all next week.

While this particular recipe won’t be with the gifts this year (since they need to be refrigerated), I wanted to share these truffles with y’all, since this is still a delicious recipe if you’re looking for something to include with your holiday parties. I came up with this recipe for a local recipe contest with the newspaper. I was actually torn between an eggnog inspired dessert and a peppermint bark inspired dessert. This recipe idea won out though, because after asking some friends, it seems like a peppermint bark inspired recipe would be more popular, since quite a few people hate eggnog. Fair enough.

The great thing about these truffles is that they come together pretty quickly. It’s definitely an easy dessert recipe to add to your holiday menu! Just keep in mind since the recipe involves cream cheese, these truffles can’t sit out for too long without needing to be refrigerated. They actually taste a lot better cold anyway.

So, I’m sure you’re wondering how these little truffles did in the recipe contest! I won first place! FIRST PLACE! I still can’t believe it. The prize was a big deal too… $1000 to a local furniture store! (I can’t wait to share with y’all what we used that generous prize on, but I’ll save that for another post once it’s delivered.)

I’m also supposed to be in the paper tomorrow. Crazy, right? I’m completely giddy about that! I’m sure I’ll buy multiple copies for family. 🙂

Peppermint Bark Cheesecake Truffles
Source: an original

Ingredients:

For the filling:

  • 1 pkg cream cheese, slightly softened
  • 5 candy canes
  • 1/4 cup confectioner’s sugar
  • 1 cup (appx. 6 large) ground graham crackers
  • 1/4 cup white chocolate chips, chopped

For the coating:

  • 2 cups of white chocolate chips or almond bark
  • 1/2 cup of semi-sweet or milk chocolate chips
  • 2 crushed candy canes

Directions:

  1. With a spatula, whip up the cream cheese to a stirrable consistency.
  2. Using a food processor, grind 3 of your candy canes to a powder. Stir the ground candy canes, powdered sugar and ground graham crackers into the cream cheese with a spatula until everything is well-incorporated.
  3. Place the last two candy canes in a quart sized plastic ziploc-type bag, and using a heavy bowl, crush up the candy canes into small pieces (not quite a powder, since you want these to add a bit of a crunch to your truffles). Add the candy canes, along with the chopped white chocolate to your cream cheese truffle mixture.
  4. Chill the mixture well, for four hours or overnight.
  5. When ready to assemble the truffles, divide the mixture into tbsp. sized balls and put the balls on a cookie sheet. By the time you’re done making the truffle balls, the mixture probably warmed up a bit, so place the cheesecake balls in the freezer for 5-10 minutes to firm up.
  6. In the meantime, melt your white chocolate for the coating (either in the microwave or with a double boiler).
  7. Take your cheesecake balls out of the freezer, and individually dip each ball in the white chocolate mixture. Place the finished dipped balls on a cookie sheet lined with wax paper for the chocolate to set.
  8. Once the white chocolate has set, melt your milk or semi-sweet chocolate chips and add a small amount on top of each truffle, along with some crushed candy canes for decoration.
  9. Enjoy these cheesecake truffles right out of the refrigerator and keep the truffles cold, since there is cream cheese in the recipe.

Filed Under: Candy, Chocolate, Holiday Recipes, Nifty Foodie Original

Pecan Pie Macarons

November 30, 2011 by Amy 12 Comments

Pecan Pie Macarons

It’s one of the hugest compliments when someone asks you to bring the same dish for a holiday, year after year. When it comes to my coworkers, they always just expect that I’m bringing a cheesecake again. Cheesecakes are easy, so I have no problem with making them for work potlucks.

However, with my family, I decided to take a leap last year and make eggnog macarons. Little did I know that these would be a hit. I was intimidated by these cookies, and there was a great reason. When you live in humid place like Louisiana, you can’t help but be intimidated by something that relies heavily on egg whites. So, fast forward to November. I asked my mom if my husband and I should bring something for Thanksgiving, and at first, she said that nothing was necessary. Then, three days before, she, along with my aunt, requested macarons. Guess they’re spoiled now!

I didn’t want to repeat eggnog macarons, since it’s Thanksgiving. So, I looked through a few sites until I decided on this idea: pecan pie macarons. Living in the South, pecan pies are a staple in the Thanksgiving feast, so this was going to be absolutely perfect!

So, the day I start to make the macarons, I go to look for my round piping tip. Uhhh…turns out it was another victim of the move since it’s gone. 🙁  So, I tried the star piping tip. I figured it would flatten out within the hour that the macarons had to sit out before baking, but they didn’t. I’m sort of happy they didn’t flatten out though…the star shaped macarons turned out pretty darn cute!

Instead of doing both the caramel sauce and pecan brittle for the filling, I ended up using the caramel sauce with chopped pecans in the filling. These were definitely a popular item on Thanksgiving Day, since by the time I was picking up leftovers, they were pretty much all gone. Yay!

I guess that means I should start thinking about what macarons to make for the next holiday get together with my family, eh? 🙂

Pecan Pie Macarons
Source: Tartelette

Ingredients:

Note: With macarons, it’s definitely important that your ingredients are weighed, so all measurements are in grams. 🙂

     For the macarons:

  • 3 egg whites (about 90 grams)
  • 40 grams granulated sugar
  • 200 grams powdered sugar
  • 55 grams almonds
  • 55 grams pecans

     For the filling:

  • chopped pecans
  • one recipe of salted butter caramel sauce, well chilled in the fridge

Directions:

  1. For the egg whites, 2-3 days before separate your eggs and store the whites in a covered container in the fridge.
  2. In a stand mixer with the whisk attachment, beat the egg whites until they foam, gradually adding granulated sugar until you reach a glossy meringue. Be careful not to overbeat, since the meringue can easily dry out.
  3. Place the almonds, pecans and powdered sugar in a food processor and pulse the mixture until the nuts are finely ground.
  4. Add the mixture to the meringue, give it a quick couple of folds to break down some of the air and then, slow down and fold the mass gently until the batter flows like magma or thick ribbon. The whole folding process shouldn’t take more than 50 strokes.
  5. Fill a pastry bag fitted with a round tip (or star one if you’re crazy like me) with the macaron batter and pipe small cookies (about 1.5 inches in diameter) onto a Silpat or parchment paper lined baking sheet.
  6. Let the macarons sit out for 30 minutes – 1 hour to allow the shells to harden a bit. In the meantime, preheat your oven to 300 degrees. Once the shells have hardened, bake the macarons for 15-20 minutes.
  7. Allow the macarons to cool a bit (until the pan is warm) before removing the macarons. If your macarons are stuck to the pan, pour a couple of drops of water under your Silpat or parchment. This should help the macarons lift off the pan more easily, due to the moisture. However, don’t let the macarons sit with the water for too long or you’ll risk the macarons becoming soggy.  
  8. Once the macarons are fully cooled, spread some of the caramel sauce on the bottom of each of your macarons, add chopped pecans on top of the caramel on one of the macarons and sandwich the two macarons together. If you want to be super fun, brush some pearl dust on the top of the macarons.

Just a small side note….Did you win the Butterball giveaway? You have to email me to claim your prize and you have until tonight! Neither of the winners have emailed me. 🙁 You want free turkeys, don’t you?


Filed Under: Cookies, Holiday Recipes

Thanksgiving is this week + a giveaway!

November 21, 2011 by Amy 35 Comments

EDITED:

Since the original winners never emailed me, I had to re-draw for the Turkey gift cards!

cara….who said:

I try to get as much done as I can the night before and we rent an extra fridge!

AND

Kayla…who said:

My tip is to make your SIL host so you can just show up with your pecan pie and call it a day. :P 

For the two of you who won, to redeem your prize, please email me within 48 hours at niftyfoodie@gmail.com! Congratulations!

—————————————————————————–

I absolutely cannot believe that Thanksgiving is this week. It feels like a few weeks ago, I was sweating like crazy any time I stepped outside. Oh wait…that weather is still going on here.

Maybe that’s why I can’t believe it. Ah, life in the South. Turkey Day in 80 degrees is the norm around here. To get myself in the mood, I usually start baking up a storm.

Turkey Cake Pops

I made these little guys two years ago to get myself in the mood for Thanksgiving. I’d love to make them again, but only two were eaten. Why? Well, because they were “too pretty to eat”. ::sigh::

…

Read More »

Filed Under: Entertaining/Parties, Giveaways/Reviews, Holiday Recipes

Candy Corn Cookies

October 27, 2011 by Amy 2 Comments

Candy Corn Cookies

Happy 4 days until Halloween!!

While Halloween isn’t my favorite holiday (I’m sure most of you can guess what my favorite holiday is. 😉 ), I feel like it’s fun to get in the spirit of it all. We decorated our house for Halloween, and I was thrilled to notice that in our new neighborhood, we aren’t the only ones who like to decorate. 🙂 I also noticed that our new neighborhood has LOTS of kids, so potential for Trick or Treaters? Wahoo! In the old neighborhood, we usually got a handful of kids, but some of them were way too old to Trick or Treat, in my opinion.

While we’re not dressing up for Halloween, I do have to admit that Millie has a costume haha! A yellow submarine. I was going to scour Goodwill for Ken dolls and paste them on the costume to have The Beatles and their Yellow Submarine, but alas, this whole moving thing has my energy devoted to unpacking and settling in the new house. 🙂 So, Millie will just be a submarine, and a very cute one at that.

Of course with Halloween being a few short days away, I had to take out my KA mixer for the first time since moving in the new house and whip up something festive. I found this idea on Kathie Cooks (via Pinterest) and it couldn’t be easier. It’s one of those ideas where you sit there and ask yourself, “Why didn’t I think of this?”

Since I used a recipe that I’ve already blogged (linked below), I’m just going to share how these are made.

  1. Whip up your favorite sugar cookie dough recipe (I used this one for rolled cookies so they hold their candy corn shape without spreading.), divide the dough in 3 equal portions, dye one portion yellow, one portion orange and leave the last one undyed.
  2. Take out a bread pan and line it with saran wrap. Roll out the undyed portion and place it in the bread pan, spreading the dough evenly throughout the whole pan. Then, roll out the orange portion, press it in the bread pan on top of the undyed dough, making sure to spread that evenly as well and then lastly, the yellow.
  3. Cover and chill the dough in the fridge for a few hours or overnight. Then invert the pan on a cutting board (releasing the dough), and slice across the block in 1/4″ pieces. Cut the dough into triangles and bake according to your recipe’s instructions.


Filed Under: Cookies, Holiday Recipes

King Cake

January 10, 2011 by Amy 6 Comments

King Cake

As of January 6th, it’s now the Carnival season! Of course, this means king cakes are back in stores. I absolutely love king cake. It’s a sweet, yeast bread with cinnamon and topped with icing and colored sugars (I made mine in black/gold for the Saints game on Saturday.). They make king cakes with so many fillings too, from cream cheese to apple to bavarian cream! This time, I made a plain king cake, since people are pretty particular about what fillings they like with king cake. 🙂

I’ve made king cake before, and it turned out tasting like bread. It was NOT king cake. This recipe, however, is MUCH better. This recipe actually comes from Haydel’s Bakery, which is where we had our wedding cake and groom’s cake (which was a tiered king cake) made. I found it fairly easy to make too, however, I think their recipe would be much better if you ice and sugar after baking, which is different than what their recipe suggested. When I made it their way (bake with sugar already sprinkled on), most of us just pulled the chunks of sugar off of the king cake while eating it.

King Cake
Source: adapted from WWLTV via Haydel’s Bakery

Ingredients:

  • 1/3 cup granulated sugar
  • 1 tsp salt
  • 1/2 cup all purpose shortening
  • 4 cups all purpose flour
  • 2 lg. eggs
  • 1 cup milk (room temperature)
  • 2 sm. packs active dry yeast
  • 1/4 tsp lemon zest
  • 1/4 tsp orange zest
  • 1/4 tsp vanilla extract
  • 1/4 tsp butter extract
  • 1/2 cup canola oil
  • 1/2 cup cinnamon sugar

For the icing:

  • 1 cup confectioners sugar
  • 1 tsp. vanilla extract
  • 1 tbsp. water

For the colored sugars:

  • 1/2 cup granulated sugar for each color that you want to make
  • assorted food coloring

Directions:

  1. In a mixer at first speed combine 1/3 cup granulated sugar, salt, and shortening until well creamed. Add eggs and continue to cream.
  2. Dissolve the yeast in the milk and add the flavors. Once dissolved add to creamed mixture and continue to mix.
  3. Add flour a cup at a time and mix until dough tightens.
  4. Remove from mixer and knead into a ball. At this point sprinkle some flour on top and cover with a clean kitchen towel. Allow the dough to rest for 1½ hours.
  5. While the dough is resting mix your colored sugars and icing. Mix the 1/2 cup of sugar with a few drops of food coloring until the color you reach is desired.
  6. For the icing, whisk the confectioners sugar with the water and vanilla.
  7. When dough has rested roll out into an oblong piece. Brush on canola oil covering the entire piece. Sprinkle the cinnamon sugar liberally over the whole piece.
  8. Once the dough is covered with the cinnamon sugar and oil, fold it in half lengthwise. Cut into 3 strips and braid the dough. Gently roll the dough by starting at one end and working all the way down to the other end. This will make the dough a nice long piece that can then be shaped into a circle. Once shaped place on a baking pan covered with piece of parchment.
  9. Allow the dough to rest again until it doubles in size. Bake at 370 degrees F for 12-15 minutes until dough is golden brown.
  10. Let the cake cool and spread the icing on top. Then, sprinkle with your colored sugars. Enjoy!

Filed Under: Breads/Muffins, Cakes/Cupcakes, Holiday Recipes, Louisiana Cuisine

  • « Go to Previous Page
  • Go to page 1
  • Go to page 2
  • Go to page 3
  • Go to page 4
  • Go to page 5
  • Go to Next Page »

Primary Sidebar

Hey Y’all!

Image Credit: Leslie Pendleton Photography


Hey y’all!

Thanks so much for reading! I’m Amy, and I live in south Louisiana with my husband and our rescue dog. I enjoy sharing my love for cooking, baking, crafts & more! Follow my daily adventures on social media!

Follow my Daily Adventures

  • Email
  • Facebook
  • Instagram
  • Pinterest
  • Twitter

Footer

  • Email
  • Facebook
  • Instagram
  • Pinterest
  • Twitter

Archives

Copyright © 2026 · Foodie Pro Theme by Shay Bocks · Built on the Genesis Framework · Powered by WordPress