• Skip to primary navigation
  • Skip to main content
  • Skip to primary sidebar
  • Skip to footer

The Nifty Foodie

  • Home
  • About
  • Recipes
    • Appetizers
    • Beverages
    • Breads/Muffins
    • Breakfast
    • Canning
    • Desserts
    • Dog Treats
    • Entertaining/Parties
    • Fruit
    • Holiday Recipes
    • Louisiana Cuisine
    • Main Dishes
    • Mexican
    • Nifty Foodie Original
    • Nifty Tricks
    • Project Food Blog
    • Pumpkin
    • Salads
    • Sauces/Dips
    • Side Dishes
    • Skinny
    • Slow Cooker
    • Spices
    • Stews/Soups
    • The Disasters
  • My Weight Loss Journey
    • Races
    • Running
    • Weight Loss Milestones
  • Crafts
  • Contact Me

Beef

Skillet Tamale Pie

January 12, 2017 by Amy 2 Comments

Skillet Tamale Pie

Louisiana’s winters are so crazy. One day, it’s in the 20s and two days later, it’s in the 70s. I can’t figure out a menu with all of these darn weather changes! One day, it’s perfect for comfort food and the next, I feel like I need to make kabobs on the grill haha!

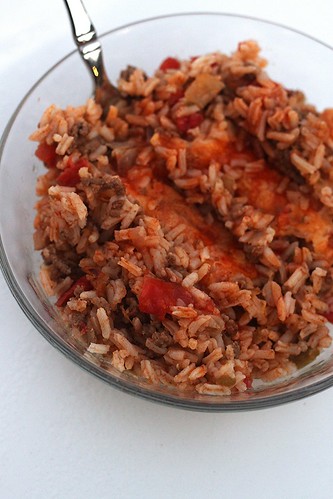
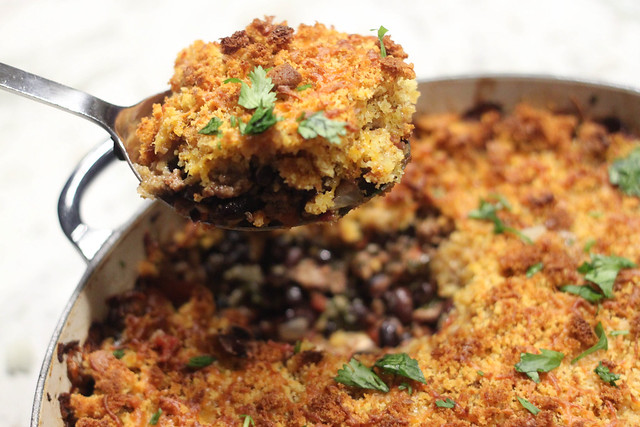
Of course, I love comfort food days. I bookmarked this recipe a couple of months ago when I got an email from America’s Test Kitchen. It was such a simple recipe to throw together. It’s basically beans and ground beef cooked together, topped with a cheesy cornbread crumbly topping. If you make the cornbread in advance or purchase some at the store, this is great for an easy weeknight dinner to throw together! This was a winner, and both my husband and the in-laws said I needed to make this one again! 🙂
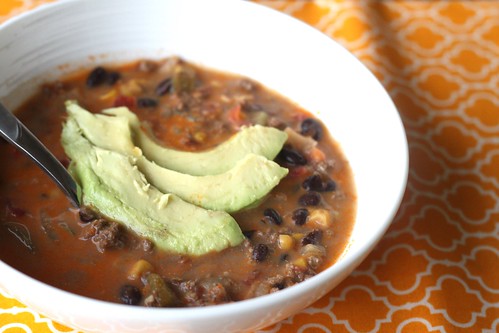
Skillet Tamale Pie
Source: Cook’s Country

Ingredients:
  • 10 oz. pre-made cornbread, crumbled (about 2 1/2 cups)
  • 3 cups shredded Mexican cheese blend
  • Salt and pepper
  • 1 tbsp. vegetable oil
  • 1 onion, finely chopped
  • 1 tsp. minced chipotle chiles in adobo sauce
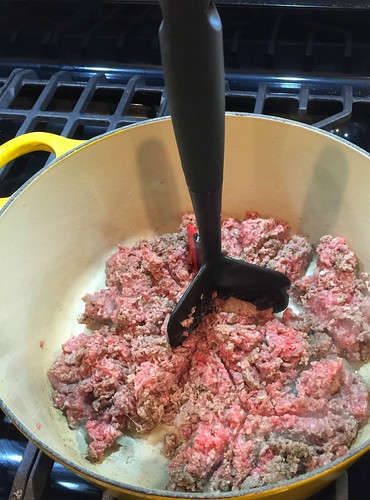
  • 1 1/2 lbs. 90-percent lean ground beef
  • 2 (15.5 oz. each) cans black beans, drained and rinsed
  • 2 (10 oz.) cans Ro-Tel tomatoes, drained, 1/3 cup juice reserved
  • 1/4 cup finely chopped fresh cilantro leaves
Directions:
  1. Place the oven rack in the middle position and preheat the oven to 450 degrees F.
  2. In a large bowl, combine the cornbread, 1 1/2 cups cheese, 1/4 tsp. salt and 1/2 tsp. pepper.
  3. Heat the oil in a 12-inch oven-safe skillet over medium heat, until simmering. Add chopped onion and chipotle pepper, and stir/cook the mixture until the onion has softened (about 5 minutes).
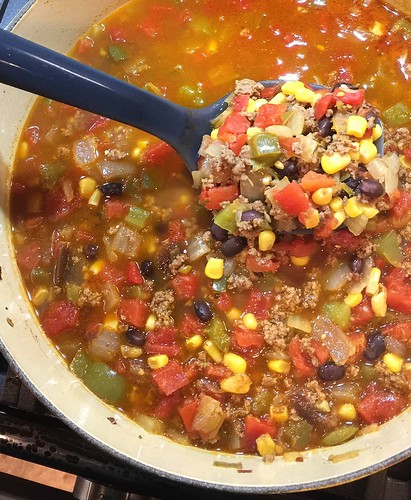
  4. Add in the ground beef, being sure to break up the ground meat well as it cooks. Cook the mixture for about 5 minutes, until the beef is no longer pink. Stir in the beans, Ro-Tel and reserved juice, and cook until thickened, about 5 minutes. Add in 2 tbsp. cilantro and the other 1 1/2 cups of cheese, and stir the mixture well. Season with salt and pepper, to taste.
  5. Sprinkle the cornbread mixture evenly over the meat/bean filling. Place the skillet in the oven, and bake until the cornbread mixture is golden brown (about 10-15 minutes). Garnish with the remaining cilantro. Enjoy!


Filed Under: Beef, Mexican

Butcher Box Review

December 21, 2016 by Amy Leave a Comment

Disclosure: Butcher Box provided me with products at no cost to me, in exchange for a fair and honest review. All opinions are 100% my own.

ButcherBox_2016

Steak night. There’s just something special about steak nights in our house. A few years ago, we went to our first steakhouse dinner, and we quickly realized what we were missing when it came to a perfectly cooked steak. Super thick cuts of meat, seared perfectly, resulting in a melt in your mouth-type of dinner. It was just outstanding, and because of that experience, our steak purchases were forever changed.

When we first got married, we used to buy whatever steaks were on sale at the grocery store. It didn’t matter the cut…as long as it was beef, we were game for it. I remember looking at the price of ribeye and filet, and thinking really? Is it worth it? It’s all cow. Ignorant ignorant ignorant. Y’all…yes, it’s worth it!

Now that my husband has a nice grill, I especially love steak nights. He can somehow grill a killer crust on a steak, and I’m a medium-rare/medium steak gal myself. He gets it perfectly every.single.time. Steakhouse at home? Yes, indeed!

The folks at Butcher Box reached out to me, and asked if I’d like to give one of their monthly deliveries a try. I had a choice between All Beef, Mixed (Beef/Chicken/Pork), Beef & Chicken or Beef & Pork. I just HAD to get the All Beef box….we cook chicken all the time in our house, so beef is a nice change. 🙂

I was so impressed with the care that they took in the shipment. The beef was still frozen solid (thanks to dry ice), and everything was vacuum packaged for us to throw into the freezer.

Butcher Box Review

Our package contained grass-fed beef strip steaks, top sirloins, tri-tip steaks, thinly sliced beef, ground beef and a package of bacon. That’s enough for several meals in our 2-person household. Our package also included recipe cards to use with their products! It’s just a well done (ha, I crack myself up!) package.

So far, all of the meat we have tried has been fantastic. I find that grass-fed beef is more flavorful, and the quality of the meat is great! All of the steaks are good, thick cuts of steak, too. Perfect for grilling!

I love what Butcher Box offers. First of all, you don’t have to source out your meat. They deliver 100% grass-fed beef, organic chicken, and all-natural pork straight to your door. I also appreciate that it’s pre-portioned out for easy freezing. Also, shipping is included in the cost, so you know exactly what you’re paying when you choose a subscription box.

Also, if you’re looking for a last-minute gift idea, Butcher Box offers gift subscriptions. I think that’s a really neat, out-of-the-box idea. I know of a few people in my life who would love something like this (think of the person who has it all…what a unique gift idea, right?).

Filed Under: Beef, Giveaways/Reviews

Spicy Chipotle Taco Soup

February 25, 2016 by Amy Leave a Comment

Disclosure: OXO sent me free products, in exchange for a fair and honest review. All opinions are 100% my own.

Spicy Chipotle Taco Soup

Since we moved to the new house, we have been using the kitchen quite a bit. Honestly, the kitchen is what made me fall for the floor plan, so of course, I was going to go a little crazy. After a couple of weeks, however, we were definitely missing our old vented kitchen. So, we had someone come out and take care of venting the kitchen for us.

I can’t even begin to explain how nice it is to have a venting kitchen again. A lot of Louisiana comfort food revolves around cooking with onions/bell peppers/celery to start out the dishes, and while it smells good when you’re cooking, I really don’t want to smell it the next morning haha! It’s so nice to no longer deal with that…in fact, when I was cooking this soup, H commented that he could barely smell it (and y’all know that tex-mex spices, like cumin, are strong)! So, I’m definitely in my happy place when I’m in our kitchen now. 🙂

OXO sent me some of their newest products to try out, and I couldn’t help but think about making a hearty soup with some of their tools. I was sent the Ground Meat Chopper and Turner, Silicone Ladle, and the
Vegetable Chopper with Easy-Pour Opening.

OXO

I decided to make a spicy chipotle taco soup the other night. After having a smoky tortilla soup at a local tex-mex place, I so wanted to replicate the broth as closely as I could. One thing I didn’t expect was for H to love it as much as he did. He’s usually adding more spices to whatever I make, and I’m pretty sure he didn’t add anything to this soup! I will mention that this soup is pretty darn spicy, so I added some avocado slices to my bowl to help with the heat from this soup. If you don’t want it to be very spicy, you can use less chipotle peppers (or remove the seeds) or use a milder Rotel in the recipe (I used original). I also wanted to mention that while it’s delicious the day you make it, it’s even MORE flavorful the next day. Look at how hearty this soup is!

OXO

I have to admit, this recipe is pretty darn quick to throw together. Prep was very easy, thanks to the OXO Vegetable chopper. Chopping the onion and bell pepper was a breeze!

OXO

Also, I was surprised at how helpful the OXO Ground Meat Chopper was. I’m used to chopping things up with a spatula, but this made the meat break up so easily and quickly.

OXO

I think this recipe is perfect for weeknight cooking. You don’t have to prep too much, and a good bit of the ingredients involve cans of vegetables to add into the recipe. So simple and super delicious!

Spicy Chipotle Taco Soup

Spicy Chipotle Taco Soup
Source: an original

Ingredients:

  • 1 lb. lean ground beef (at least 90% lean)
  • 1 medium yellow onion, chopped
  • 1 green bell pepper, chopped
  • 3/4 tsp. chili powder
  • 1 tsp. cumin
  • 1/2 tsp. smoked paprika
  • 1/2 tsp. salt
  • 3 cloves garlic, minced
  • 1 chipotle pepper (from a can of chipotle peppers in adobo sauce), finely chopped
  • 2 tbsp. adobo sauce
  • 2 10.5 oz. cans of Rotel, with juice (I used medium…if you want it not as spicy, use mild)
  • 1 15 oz. can of yellow corn, rinsed and drained
  • 1 15 oz. can of black beans, rinsed and drained
  • 32 oz. chicken stock
  • 1/4 cup heavy cream
  • Optional toppings: sliced avocado, cheese, broken-up tortilla chips

Directions:

  1. In a large, heavy stockpot (at least 5 quarts in size) over medium-high heat, brown the lean ground beef until it’s fully cooked.
  2. Add in the chopped onion and bell pepper, cooking until the onions are translucent. Reduce the heat to medium. Then, add in the cumin, smoked paprika, salt, garlic cloves, chipotle pepper and adobo sauce, and stir/cook for about another minute, until fragrant.
  3. Add in the Rotel, yellow corn, black beans and chicken stock. Stir and reduce the heat to a simmer. Once it reaches a simmer, place the lid on the pot, and allow the soup to simmer for 20-30 minutes. When the soup has finished simmering, slowly pour and mix in the heavy cream. Enjoy!


Filed Under: Beef, Mexican, Nifty Foodie Original, Review, Stews/Soups

Beef Enchilada Rice Bake

December 9, 2015 by Amy 4 Comments

Disclaimer: I received a copy of Dinner for Two, in exchange for a fair and honest review. All opinions are 100% my own.

Beef Enchilada Rice Bake

House stuff is really starting to get hectic for us. With Christmas just around the corner, and this big move about to happen, I honestly just want to go home after work and be lazy. I don’t want to pack boxes or worry about cooking dinner. I just want to chill…I really miss my afternoon naps, y’all. 😛 Adult problems.

Since we alternate cooking nights with family that we live with, I’m always looking for something quick and easy to make after work. (It also has to taste good, of course.) I have quite a few go-to recipes, but I’m always looking for something different to add to my usual recipes. When I was offered to review Julie Wampler’s (of Table for Two) new book, Dinner for Two, I had to jump at the chance to give this book a try. Dinner for Two has 70 quick and easy dinner for two recipes (50 of which are dinner entrees and 20 are breakfast for dinner entrees). Quick and easy recipes…you had my attention, Julie. 🙂

Dinner for Two

I met Julie at Food Blog Forum in 2013, and ever since then, I’ve been a fan of her blog. She has gorgeous food photography, and she features a little bit of everything in her blog. One of the first recipes I tried from her blog was her Slow-Cooker Chicken Tikka Masala (which was delicious….I never blogged about it, but if y’all love chicken tikka masala, you have to try that recipe!).

Once I received her book in the mail, I immediately put post-it flags all over this book…there’s so many great dinner ideas! The first recipe we tried was this Beef Enchilada Rice Bake, and y’all…this recipe was so easy to throw together. Since it calls for cooked rice, I had the rice cooking while I was prepping and cooking through the first couple of steps. The timing worked out perfectly for me, since our rice cooker has rice ready in about 15 minutes.

As far as taste goes, this dish was super flavorful, and since I used a medium heat Ro*Tel, it had a good kick to it, too. My husband is pretty particular about recipes too, and he told me to add this to the (recipe) list. That’s when you know the recipe is a winner! 🙂

After flipping through Dinner for Two a few times, this book would make a wonderful gift this holiday season (it’s under $20 on Amazon right now). It’s perfect for anyone looking for quick and easy dinner ideas. I love that this book revolves around portions for two people…it’s just my husband and I, and we don’t need a ridiculous amount of leftovers we end up with after making some of my go-tos.

If you want more of a sneak peek of the book and to check out the recipes other bloggers are making out of Dinner for Two, check out Julie’s Virtual Date Night-In!

Beef Enchilada Rice Bake
Source: Dinner for Two cookbook

Ingredients:
  • 2 tsp. vegetable oil
  • 1 medium onion, diced (about 3/4 cup)
  • 1 green bell pepper, diced (about 3/4 cup)
  • 1 garlic clove, finely minced
  • 1 tsp. ground cumin
  • 1 tsp. kosher salt
  • 1/2 tsp. ground black pepper
  • 1/2 lb. 80/20 ground beef
  • 1 (10 oz.) can diced tomatoes and green chiles (Ro*Tel), drained well
  • 2 cups cooked white rice
  • 1/2 cup red enchilada sauce, plus more for drizzling
  • 1 1/2 cups shredded mexican cheese
Directions:
  1. Preheat the oven to 375°F.
  2. In a large skillet, over medium-high heat, add the vegetable oil. Once the oil is heated, add the onion, green bell pepper and garlic. Saute the mixture for 5 minutes, stirring often. Stir in the cumin, salt and black pepper.
  3. Place the beef into the skillet and thoroughly cook the beef, breaking it up into pieces with a wooden spoon or spatula.
  4. Stir in the tomatoes/green chiles, and remove the skillet from heat. Add in the rice to the skillet, and stir everything together until everything is evenly distributed. Stir in the enchilada sauce, until just incorporated.
  5. Place the mixture into a 2.5 quart oven-safe casserole dish. Sprinkle the cheese evenly over the rice.
  6. Bake the casserole in the oven on the middle rack, uncovered, for 20 minutes.
  7. Carefully remove the casserole from the oven and drizzle on more enchilada sauce, if desired. Enjoy!

The generous publishers of Julie’s book want to offer one lucky reader of The Nifty Foodie a copy of Dinner for Two!

To enter for a chance to win a copy, use the Rafflecopter widget below:

a Rafflecopter giveaway

Note: This giveaway is supplied by the publisher and is open to readers in the continental US only. Entries will be accepted until December 16th, 2015 at 11:59pm (central standard time). Winner will be emailed (make sure you leave an email address in the form), and will have 48 hours to respond or another winner will be chosen.  

Filed Under: Beef, Mexican, Pasta/Rice, Review

20 Minute (Pressure Cooker) Beef Stew

April 7, 2013 by Amy 3 Comments

20 Minute Beef Stew

This past Christmas, my Mom and Dad generously gifted us with an electric pressure cooker. I opened it, and quickly imagined a pressure cooker explosion in my kitchen. I’ve always heard that pressure cooking can be dangerous, so I was pretty worried about using this. However, I did a little research, and they make pressure cookers a lot safer nowadays. Thankfully.

It took me a while to finally break this bad boy in, but after the St. Patrick’s Day parade, we found our fridge FULL of vegetables that we caught that afternoon (What? They don’t throw vegetables at your St. Paddy’s Day parade?!). With all of these root veggies, I just had to make beef stew, and I figured why not try the pressure cooker for this? I did a quick search for pressure cooker beef stew, and this Williams Sonoma recipe caught my eye. 20 minute beef stew? HOW?!

My husband and I were skeptical. In fact, we had our Le Creuset at the ready in case the meat was too tough/not cooked. I just didn’t think this would work, y’all. However, after 20 minutes of pressurized cooking (I say pressurized, because you have to wait for the appliance to reach the right pressure before the timer counts down, which took about 15 extra minutes), we had the most tender, flavorful beef stew. I’m a believer. We definitely need to use this appliance more often!

20 Minute (Pressure Cooker) Beef Stew
Source: Williams-Sonoma

Ingredients:

  • 3 lb. boneless stewing beef, cut into 1-inch cubes
  • 1/3 cup all-purpose flour
  • Salt and freshly ground pepper, to taste
  • 3 tbsp. olive oil
  • 1 1/2 cups red wine
  • 1 large yellow onion, finely chopped
  • 2 garlic cloves, crushed
  • 2 carrots, peeled and cut into 1/2-inch pieces
  • 2 celery stalks, cut into 1/2-inch pieces
  • 1/2 lb. new potatoes, cut into 1/2-inch pieces
  • 1 tbsp. tomato paste
  • 1 1/2 cups beef stock
  • 3 fresh thyme sprigs

Directions:

  1. In a large bowl, add the beef and toss it with the flour, salt and pepper to coat the beef evenly. Put your electric pressure cooker on the “brown” setting, and add the olive oil as the cooker is warming up. Add the beef in batches and brown the beef pieces on all sides, for about 3-4 minutes. Transfer the browned beef to a bowl, and repeat until all of the beef is browned.
  2. Change the setting on the pressure cooker to “simmer” and add the red wine, stirring to scrape up the browned bits of meat. Once your finished, add the beef back in, along with the chopped onion, garlic, carrots, celery, potatoes, tomato paste, stock and thyme. Stir everything together to combine. Cover the pressure cooker (and seal), change the setting to “high pressure”and set the timer to 20 minutes on the cooker (do not use a kitchen timer…it’s crucial to use the timer on your appliance since the timer starts when it reaches the desired pressure to cook).
  3. Release the pressure naturally (which takes another 10-20 minutes, depending on your appliance), and then uncover. If you would like the liquid to be thicker, you can transfer the beef and vegetables to another bowl, set the pressure cooker to the “brown” setting and cook the liquid down until it’s reduced to the consistency that you want. Add the beef and vegetables back in, and serve immediately. Enjoy!


Filed Under: Beef, Stews/Soups

Taco “Cupcakes”

October 11, 2012 by Amy Leave a Comment


Taco Cupcakes

As you may know, I’m a big fan of tex-mex cuisine. I haven’t really enjoyed much of it, though, because I can’t really trust myself in a restaurant where I can just get a margarita within 2 minutes or mindlessly eat chips and queso (I swear, my stomach is a bottomless pit when it comes to chips and queso). It’s kind of sad how much I miss it, because really, it’s just food right? At least I try to tell myself that when I’m reaching for a Ben & Jerry’s pint at the grocery store.

I first heard about these “cupcakes” when I met Emily of Emily Bites at IFBC last year in New Orleans. Emily’s blog features healthier recipes, which I can really appreciate, so when I heard about them, I swore I’d make them ASAP. Well, I sort of forgot about this recipe, like I always seem to do, until my coworker mentioned them recently. (Random thought of the day: For some reason, I find it SO weird when I find out people I know are reading food blogs. I know blogs are usually very popular, but where I live, a lot of people are really unfamiliar with the concept of a blog.) Anyway, when she brought up how much she LOVED these things, I had to make them ASAP. Unfortunately, wonton wrappers were out of stock for about 2 weeks, which really stunk. I contemplated cutting egg roll wrappers, but eventually, I found a pack in the store. SCORE!

The night I made these, my husband kept asking what I was cooking. When I said taco cupcakes, I’m sure the poor guy was pretty darn confused. 🙂 When they came out of the oven, I quickly threw a few on a plate and scarfed them down. These are delicious! The crunchy wonton wrappers make it seem like you’re enjoying a crunchy taco, minus getting neck aches from leaning over to eat a taco. 😛 My husband was pretty darn surprised about the taste too, so these will definitely be a part of our regular recipe rotation in our house. Besides being tasty, while these cupcakes don’t seem that large, they are pretty darn filling too! Just a small note, though…the main thing that I changed was that I used corn instead of black beans (since I am not a fan of beans, personally). I’m sure they’re wonderful with beans too, and I imagine with beans, they’re even more filling!

Taco “Cupcakes”
Source: mildly adapted from Emily Bites

Ingredients:

  • cooking spray
  • 1 1/2 tsp. canola oil
  • 1/2 lb. 90% lean ground beef
  • 1 tbsp. taco seasoning
  • 3/4 cup canned corn, drained
  • 16 wonton wrappers (found in the produce section)
  • 5 tbsp. + 1 tsp. of queso (plus more for drizzling)
  • 1 cup chunky salsa
  • 1 cup reduced fat shredded Mexican cheese

Directions:

  1. Preheat your oven to 375 degrees. Prep your muffin tin by misting 8 of the cups in a muffin tin.
  2. Heat the canola oil in a large skillet over medium heat. Then, add the ground beef as well as the taco seasoning, and cook the meat, breaking it up with a spoon or spatula, until the meat is browned. Add the corn to the meat and cook the mixture (stirring often) for a few more minutes, until the mixture is warm.
  3. Gently push a wonton wrapper into the bottom of 8 of the muffin tin cups, and spoon a tsp. of the queso into the bottom of the wonton wrapper, using the spoon to spread the queso evenly along the bottom. Add some of the meat mixture into each cup (evenly using 1/2 of the mixture for all 8 of the muffin cups), and then add some of the salsa into each cup (evenly using 1/2 of the salsa for all 8 of the muffin cups).
  4. Sprinkle some of the shredded cheese (evenly using 1/2 of the cheese for all 8 of the cups). Then, gently push another wonton wrapper on top of the cheese, and layer the “cupcakes” the same way you just did (queso, meat mixture, salsa, shredded cheese) using the rest of the layering ingredients.
  5. Bake the “cupcakes” for 18-20 minutes until the wontons are golden brown. The tips of the wonton wrappers will get seriously dark while in the oven if you want the rest of the wonton wrappers to get pretty crispy. Allow the “cupcakes” to cool for 5 minutes before taking them out of the muffin tin. Feel free to drizzle them with more warm queso after baking. Enjoy!


Filed Under: Beef, Mexican

Juicy Lucy

July 22, 2011 by Amy 2 Comments

Juicy Lucy

Burgers are such an easy meal to throw together in the summer. We used to make our burgers with 93% lean meat, but we’d hate how dry the burger came out. I thought it was the recipe, but no, it was the meat. You totally need some fat in that beef to make a burger taste absolutely amazing.

We usually buy 93% meat for most of our cooking, but now for burgers, we get 80% or 85%. Whatever is on sale.  I swear it makes all the difference in the world.

Now, I’m sure most of you are thinking, “Ok Amy, seriously? You didn’t know this?” Yeah, I really didn’t know that this made the difference. My husband knew, but stubborn me kept blaming it on the recipe.  

For the 24×24 party we threw, we googled the heck out of Minneapolis food and found that the Juicy Lucy was pretty darn popular out there. Such a simple concept…a cheese stuffed burger. The cheese fiend in me wants to know why aren’t those served out here??

We need Juicy Lucy burgers in our lives…seriously.

And if you haven’t had a Juicy Lucy burger yet, I highly recommend you try making these. Absolutely delish!

Juicy Lucy
Source: adapted from Cooks Country

Ingredients:

  • 2 slices of white sandwich bread, torn into rough pieces
  • 1/4 cup milk
  • 1 tsp. garlic powder
  • 1 tsp. onion powder
  • 3/4 tsp. salt
  • 1/2 tsp. pepper
  • 1 1/2 lb 85-percent-lean ground beef
  • 1/2-inch thick slice deli American cheese, cut into quarters

Directions:

  1. Using a potato masher or your hands, mash the bread, milk, garlic powder, onion powder, salt and pepper in large bowl until smooth. Add beef and gently knead until well combined.
  2. Divide the meat mixture into 4 equal portions; divide each ball in half so that you have 8 balls of equal size. Using small ball of meat, encase each piece of cheese in meat to form a mini burger patty. Mold remaining half-portion of meat around the mini patty and seal the edges to form a ball. Flatten the ball with the palm of your hand, forming a 3/4-inch-thick patty. (Note:  To avoid the cheese from oozing out and the burger from separating, it’s essential to completely seal in the cheese. )
  3. Grill burgers over medium fire until well browned and cooked through, 6 to 8 minutes per side. Transfer to plate, tent with foil, and let rest 5 minutes. (Since the cheese is very hot, don’t omit the resting part.). Makes 4 burgers.

Filed Under: Beef, Sandwiches

Foodbuzz 24×24: A Culinary Journey Down the Muddy Mississippi

June 26, 2011 by Amy 5 Comments

When I was a little kid, I had such trouble spelling “Mississippi”. Was it too many “s”s or the double “p” that threw me for a loop? I just couldn’t get it. My house was less than a tenth of a mile away from the river, and I just couldn’t spell it. That bothered me. My parents taught us a little fun way to spell it eventually, and now I can’t ever spell Mississippi wrong. When in doubt, I tell myself “M-i-s-s… I-s-s…i.P.P.i”. There was an emphasis on the cap letters, so it became a bit of a rhythm to say it in my head that way before spelling it out.

Since I grew up living so close to the Mississippi, I’ve seen the river have its ups and downs. Literally. When the river gets high in the Spring, boats appear like they are floating on the levee. And of course, when it gets low, you’ll barely see the tops of the boats. It’s crazy how much it varies, and this year was no exception. For the first time in almost 40 years, the river was so high that the Corps of Engineers had to open a spillway north of Baton Rouge in order to save New Orleans and Baton Rouge from catastrophic flooding. Sadly, this spillway isn’t just land. People actually built their homes and farms in the spillway, so they had to evacuate. While I’m glad that nothing catastrophic happened to our big cities, it still hurts to know that some people suffered from this.

While I was watching a news segment about the river one night, I couldn’t help but think about the massive journey that the water takes. All the way north from Minnesota to the Gulf of Mexico. There are so many different cities that the river just flows by, and my husband had the greatest idea. A culinary journey down the river–from Minneapolis all the way to New Orleans. Our party idea featured foods that are notorious in the major cities along the river: Minneapolis, St. Louis, Memphis and New Orleans. I was so stoked when Foodbuzz let me know that our party proposal had been accepted for this month’s 24×24, so I called up our families and had them over for this awesome party!

For Minneapolis, we grilled up the famous Juicy Lucy burger! You can’t go wrong with a cheese stuffed burger, and this burger was one of the favorites of the meal!

Jucy Lucy

For St. Louis, we baked a gooey butter cake. We served it with ice cream and various summer fruit sorbets. The cake is a yeast based batter on the bottom and of course, a gooey butter base layer on top. Many of us (myself included) have never had a gooey butter cake, but it was a great hit! I think next time, this would go perfectly with some fresh fruit.

Gooey Butter Cake

For Memphis, we made some fabulous BBQ Baby Back ribs. This was my first time ever working with ribs, and it really wasn’t that bad. These were very flavorful ribs and super tender, since they were in an oven for a good part of the morning before finishing off on the grill!

BBQ Baby Back Ribs

And of course, for New Orleans, we made some grilled corn grits. Grits are a favorite around here, and in one of our favorite restaurants, this is how they make the grits. It’s fabulously rich and flavorful! You probably don’t want to know how much heavy cream and butter are in these grits, but I’ll tell you anyway later when I post the recipe! 🙂

Corn Grits

Oh, and since we’re all from Louisiana, we had to add in a little lagniappe for NOLA: Hurricanes. I mean, how could you NOT? For a hot, summer day, these are always a hit!

Hurricane

*all recipes will be shared on the blog at a later date*

It was so wonderful to spend time with our families, and I’m so glad everyone enjoyed the food. You know it was a good party when people ask for the leftovers and recipes as they’re leaving! 🙂

Dessert Time

Family

Thanks so much to Foodbuzz for making this party happen! We really enjoyed the different foods from cities along the river, and also had a blast spending time together!


Filed Under: Beef, Beverages, Cakes/Cupcakes, Entertaining/Parties, Louisiana Cuisine, Pork/Ham/Bacon, Side Dishes

I can’t ever settle on one recipe!

September 2, 2010 by Amy 5 Comments

Meatloaf/Potatoes

I love meatloaf. My Mom used to make meatloaf for us all the time as kids, and almost everytime I have meatloaf, it reminds me of my Mom. 🙂 We joke about the way my Mom makes hers, though. She forms it in a donut shape and nukes it in the microwave. Yep, she nukes it. AND it comes out perfect! Crazy, right?

I’m sure weirder things happen in the world of cooking, but I always found it funny that her meatloaf comes out of a microwave. 🙂

The hubs and I, about a year ago, found our go-to recipe for meatloaf. We still love it..it’s fabulous, I promise. However, I’m always wondering if something better is out there, and I stumbled across this recipe from Alton Brown. The hubs was a  bit skeptical when I mentioned I was trying  a new recipe. He wanted his favorite, and I don’t blame him.

However, this meatloaf came out yummy! You don’t taste the vegetables, but you get an explosion of flavor and it has a good kick to it too. I think our go-to is slightly better, but this one is less steps and dishes. Torn….

I will say that this meatloaf recipe just really changes the way I think of meatloaf, because of the kick from the chili powder and cayenne. I’m thinking of somehow merging the two types of flavor profiles to get a (hopefully) awesome recipe someday, if I’m brave enough.

Good Eats Meatloaf
Source: adapted from Alton Brown

Ingredients:

  • 3 ounces garlic-flavored croutons
  • 1/4 teaspoon ground black pepper
  • 1/4 teaspoon cayenne pepper
  • 1/2 teaspoon chili powder
  • 1/2 teaspoon dried thyme
  • 1/2 onion, roughly chopped
  • 1 small carrot, peeled and broken
  • 3 whole cloves garlic
  • 1/4 red bell pepper
  • 1 lb. lean ground beef
  • 1 teaspoon kosher salt
  • 1 egg white
  • 1/4 cup catsup
  • 1/2 teaspoon ground cumin
  • Dash Worcestershire sauce
  • Dash hot pepper sauce
  • 1/2 tablespoon honey

Directions:

  1. Heat oven to 325 degrees F.
  2. In a food processor bowl, combine croutons, black pepper, cayenne pepper, chili powder, and thyme. Pulse until the mixture is of a fine texture. Place this mixture into a large bowl. Combine the onion, carrot, garlic, and red pepper in the food processor bowl. Pulse until the mixture is finely chopped, but not pureed. Combine the vegetable mixture and ground beef with the bread crumb mixture. Season the meat mixture with the kosher salt. Add the egg and combine thoroughly, but avoid squeezing the meat.
  3. Onto a parchment paper-lined baking sheet, mold your meatloaf.  Insert a temperature probe at a 45 degree angle into the top of the meatloaf. Avoid touching the bottom of the tray with the probe. Set the probe for 155 degrees. (Mine took 55 minutes to fully cook, if you’d rather not use a thermometer.)
  4. Combine the catsup, cumin, Worcestershire sauce, hot pepper sauce and honey. Brush the glaze onto the meatloaf after it has been cooking for about 10 minutes.

Filed Under: Beef

Sloppy Joes

August 4, 2010 by Amy 12 Comments

Sloppy Joes

My husband and I usually keep two types of meat on hand for cooking: chicken or ground beef. Sometimes we stray from the norm and do seafood or steaks, but to make our food budget happy, those are our staples. Chicken is so versatile and super easy to find meals for, but ground beef? I always feel a little limited there for some reason. I find it hard to find new ways to incorporate ground beef into our meals (feel free to comment if you have good ground beef recipes).

A while back, the hubs made some killer sloppy joes, and I thought I should challenge his with a good solid Cooks Illustrated recipe that I found. This recipe was pretty good, but a little bland compared to what the hubs came up with. Next time, I think I’ll have to spice things up a bit. 🙂

I paired this with some awesome oven baked fries and enjoyed the meal with a glass of lemonade. Classic summer meal, right? 🙂

Sloppy Joes
Source: mildly adapted from Cooks Illustrated

Ingredients:

  • 2 tablespoons vegetable oil
  • 1 medium onion , chopped fine
  • 1/2 teaspoon table salt
  • 2 cloves garlic , minced
  • 1/2 teaspoon chili powder
  • 1 pound lean ground beef
  • Ground black pepper
  • 1 teaspoon brown sugar
  • 1 cup tomato puree
  • 1/2 cup ketchup
  • 1/4 cup water
  • 1/4 teaspoon tabasco sauce
  • 4 hamburger buns

Directions:

  1. Heat oil in large skillet over medium-high heat until shimmering. Add onion and salt and stir until coated with oil. Reduce heat to medium, cover, and cook, stirring occasionally, until onion is soft, about 10 minutes (if onion begins to burn after 5 minutes, reduce heat to low). Add garlic and chili powder and cook, uncovered, stirring constantly, until fragrant, about 30 seconds. Add beef and cook, breaking up meat with wooden spoon, until just pink, about 3 minutes.
  2. Add 1/4 teaspoon pepper, brown sugar, tomato puree, ketchup, water, and tabasco. Simmer until Sloppy Joe sauce is slightly thicker than ketchup, 8 to 10 minutes. Adjust seasonings. Spoon meat mixture onto hamburger buns and serve.

Filed Under: Beef, Sandwiches

  • Go to page 1
  • Go to page 2
  • Go to page 3
  • Go to Next Page »

Primary Sidebar

Hey Y’all!

Image Credit: Leslie Pendleton Photography


Hey y’all!

Thanks so much for reading! I’m Amy, and I live in south Louisiana with my husband and our rescue dog. I enjoy sharing my love for cooking, baking, crafts & more! Follow my daily adventures on social media!

Follow my Daily Adventures

  • Email
  • Facebook
  • Instagram
  • Pinterest
  • Twitter

Footer

  • Email
  • Facebook
  • Instagram
  • Pinterest
  • Twitter

Archives

Copyright © 2023 · Foodie Pro Theme by Shay Bocks · Built on the Genesis Framework · Powered by WordPress